-
Read the WELCOME ALL BMWFANATICS post.
You are using an out of date browser. It may not display this or other websites correctly.
You should upgrade or use an alternative browser.
You should upgrade or use an alternative browser.
Corsa C Ute - Another Toy Story
- Thread starter gavsadler
- Start date
gavsadler
///Member
13-15 April:
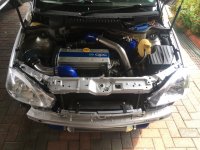
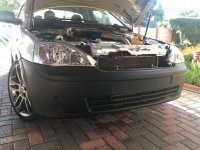
Things had been progressing nicely so far. With everything cleaned up, it was time to begin closing up the front end. I reinstalled the intercooler, and the boost pipes. For the cooler, I had to straighten out the top bracket which got bent in the accident, and also gave them a fresh coat of black paint. The lower brackets were also straightened up a bit, so that the cooler can sit straight. I redrilled top mounting holes in the bumper stiffener for the cooler brackets as well.
I also fitted bulbs to the headlights. Irritatingly, the same RHS headlight which gave me issues before, has a bit of a dodgy moulding where the indicator bulb fits into. I battled for a long time trying to get it to work. Eventually I worked out that I needed to trim the moulding in 2 places with a blade, so that he bulb holder could screw in properly. I also refitted the 2 hooters in front of the RHS wheel arch.
Some pics of the bits installed:
View attachment 3
View attachment 4
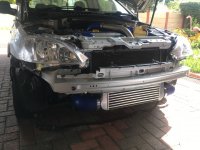
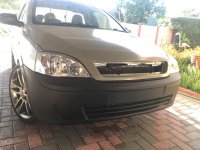
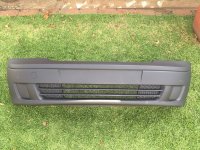
I then decided to slip on the old bumper, just to give some visual confirmation that all looks decent and aligned, and that there are no significant issues:
View attachment 8
Moving onto the next job, the foam bumper stiffener was cracked, so I glued this as well using wood glue - it works well with polystyrene. I taped it to hold it in shape while the glue cured.
View attachment 6
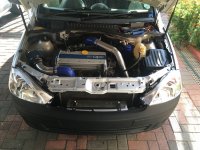
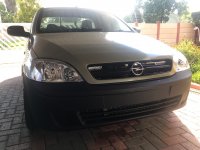
Lastly, I did some testing of the headlights, everything working good as it should. New headlights were on my agenda at some point with the Ute, and it's definitely looking much nicer up front now, with the clear lenses instead of the old faded ones (despite multiple rejuvenation attempts).
View attachment 7
I'm still in 2 minds about the xenon bulbs in the new lights. I suspect I may end up buying regular halogen bulbs to take it back to "stock". The xenon bulbs are pretty damn bright and can be blinding to other road users. For now though I'll leave it as-is, until things return to normal and I can shop around etc. I also need to check on headlight alignment as well....
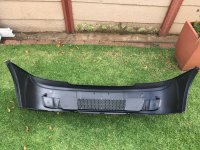
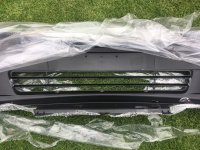
Moving onto the next piece of the puzzle, modification of the front bumper. In 2012 when I did the conversion, my intention was to keep it looking stealthy, without giving away what lies beneath the bonnet. I also wanted to change things up a bit, so that it does look a bit more sporty. The OPC Opels all have bespoke grills and bumpers, with a honeycomb mesh design, which I like the look of. My changes to the last bumper lasted well, so I was keen to do it again. Time to kit out the craft knife with a brand new blade....
So, to start off, I needed to remove some of the vertical slats in the centre section of the bumper cutout. I removed the centre piece, as well as a slat either side of centre. The outer slats are left in place, as the edges of the bumper will be blanked off, so that the boost pipes and silicone bends are hidden. I also had to glue on some hooks, to secure the honeycomb mesh.
After cutting and glueing on the hooks:
View attachment 9
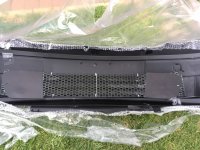
Next step was to install the mesh, and then glue on my custom blanking plates on either side (cut up ice-cream lids, lol).
And some pics of the finished product:
View attachment 2
View attachment 3
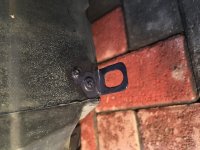
I also had to make a new bracket on the fender liner, which would secure it to the bottom of the bumper:
View attachment 1
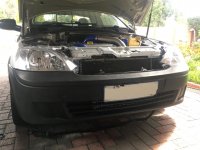
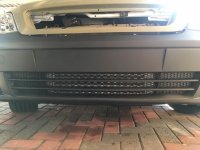
And some pics of the bumper installed. Stealth-mode activated")
View attachment 4
View attachment 5
View attachment 6
View attachment 7
Next job on the to do list, fixing up the grille....
Things had been progressing nicely so far. With everything cleaned up, it was time to begin closing up the front end. I reinstalled the intercooler, and the boost pipes. For the cooler, I had to straighten out the top bracket which got bent in the accident, and also gave them a fresh coat of black paint. The lower brackets were also straightened up a bit, so that the cooler can sit straight. I redrilled top mounting holes in the bumper stiffener for the cooler brackets as well.
I also fitted bulbs to the headlights. Irritatingly, the same RHS headlight which gave me issues before, has a bit of a dodgy moulding where the indicator bulb fits into. I battled for a long time trying to get it to work. Eventually I worked out that I needed to trim the moulding in 2 places with a blade, so that he bulb holder could screw in properly. I also refitted the 2 hooters in front of the RHS wheel arch.
Some pics of the bits installed:
View attachment 3
View attachment 4
I then decided to slip on the old bumper, just to give some visual confirmation that all looks decent and aligned, and that there are no significant issues:
View attachment 8
Moving onto the next job, the foam bumper stiffener was cracked, so I glued this as well using wood glue - it works well with polystyrene. I taped it to hold it in shape while the glue cured.
View attachment 6
Lastly, I did some testing of the headlights, everything working good as it should. New headlights were on my agenda at some point with the Ute, and it's definitely looking much nicer up front now, with the clear lenses instead of the old faded ones (despite multiple rejuvenation attempts).
View attachment 7
I'm still in 2 minds about the xenon bulbs in the new lights. I suspect I may end up buying regular halogen bulbs to take it back to "stock". The xenon bulbs are pretty damn bright and can be blinding to other road users. For now though I'll leave it as-is, until things return to normal and I can shop around etc. I also need to check on headlight alignment as well....
Moving onto the next piece of the puzzle, modification of the front bumper. In 2012 when I did the conversion, my intention was to keep it looking stealthy, without giving away what lies beneath the bonnet. I also wanted to change things up a bit, so that it does look a bit more sporty. The OPC Opels all have bespoke grills and bumpers, with a honeycomb mesh design, which I like the look of. My changes to the last bumper lasted well, so I was keen to do it again. Time to kit out the craft knife with a brand new blade....
So, to start off, I needed to remove some of the vertical slats in the centre section of the bumper cutout. I removed the centre piece, as well as a slat either side of centre. The outer slats are left in place, as the edges of the bumper will be blanked off, so that the boost pipes and silicone bends are hidden. I also had to glue on some hooks, to secure the honeycomb mesh.
After cutting and glueing on the hooks:
View attachment 9
Next step was to install the mesh, and then glue on my custom blanking plates on either side (cut up ice-cream lids, lol).
And some pics of the finished product:
View attachment 2
View attachment 3
I also had to make a new bracket on the fender liner, which would secure it to the bottom of the bumper:
View attachment 1
And some pics of the bumper installed. Stealth-mode activated
View attachment 4
View attachment 5
View attachment 6
View attachment 7
Next job on the to do list, fixing up the grille....
Attachments
-
 IMG_1029 (Large).JPG384.5 KB · Views: 412
 -
 IMG_1031 (Large).JPG373.8 KB · Views: 407
 -
 IMG_1038 (Large).JPG872.5 KB · Views: 404
 -
 IMG_1041 (Large).JPG217.6 KB · Views: 402
 -
 IMG_1035 (Large).JPG391.7 KB · Views: 402
 -
 IMG_1118 (Large).JPG294 KB · Views: 383
 -
 IMG_1116 (Large).JPG335.7 KB · Views: 387
 -
 IMG_1113 (Large).JPG406.9 KB · Views: 389
 -
 IMG_1112 (Large).JPG418.1 KB · Views: 392
 -
 IMG_1108 (Large).JPG672.2 KB · Views: 392
 -
 IMG_1107 (Large).JPG694.2 KB · Views: 395
 -
 IMG_1079 (Large).JPG333.6 KB · Views: 391
 -
 IMG_1065 (Large).JPG352.8 KB · Views: 390
 -
 IMG_1052 (Large).JPG474.6 KB · Views: 396
BeemerFanatic
Events Organiser
This isn’t DIY anymore. Looks more like a panel shop.
gavsadler
///Member
17-20 April:
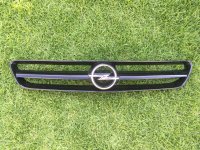
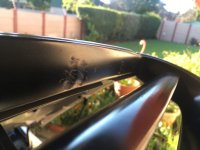
Next up on the jobs list was to tackle the grille. My original grille was cracked on either side of the emblem, from the twisting motion of the bonnet from the accident (you'll notice it in the earlier pics). When I was purchasing all the replacement parts, I did purchase a grille as well, but didn't inspect it at that time.
Fast forward 4 weeks from then, and when I opened the grille, it wasn't damaged or anything, but it did look incredibly cheaply made. I can only describe it as wonky at best, and even test fitting it into the bonnet, it did not fit properly at all. So.... plan B, stick to original.
The cracks on my original grille were fairly thin, and with the grille not twisted and in it's normal alignment, the cracks were hardly noticeable. I decided to fix these on the inside, and then would refurbish the grille on the outside to look good as new.
Also, dating back to 2012, I trimmed pieces of the grille to open it up a bit, and also with the intention of adding the same hexagon style mesh as used in the bumper (and for the OPC look). Back then, after trimming the vertical slats out, I don't recall using body filler to smooth out where the cuts were made. I painted over with the intention of coming back to it at a later stage. Well, 8 years later here we are.
Here's a pic of some of the old cut and filing marks:
View attachment 9
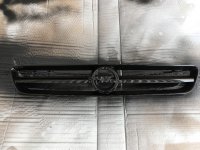
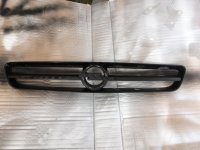
Also, from the years of vibration and harshness, 2 of the mounting lugs on the grille itself were broken off (grille secures to the bonnet with 6 screws), so it did rattle around a bit. This needed fixing before I could proceed with prep for paint and stuff. So I scratched around in my tins of Opel bits and pieces, and found 2 plastic fittings, which I ended up glueing to the grille in the required places. This worked out quite nicely, and there would be no more rattly grille going forward. I then spent some time sanding off all the old paint on the grille, pretty much down to the raw plastic.
Next up, I mixed some filler and repaired all my old cut and file marks from where the vertical slats used to be. I did a much better job this time round, and after sanding these spots smooth again, it was looking much better. And lastly, I glued the 2 cracks on either side of the emblem. At this point, all the repairs to the grille were done and it was time for paint.
For this, I used some Rustoleum rattle can products which I had. I started off with some primer, followed by 2 coats of black, and then 2 coats of clear over the top of that.
View attachment 1
Again, I left this to cook in the sun for a couple of days, before refitting the emblem and sealing the paint with some Menzerna Powerlock.
View attachment 2
To end off, I did a test install in the bonnet. Fit is good and all the lugs now secure the grille properly. (I'll do the mesh at a later stage after painting the bonnet).
View attachment 3
[font=Tahoma, Verdana, Arial, sans-serif]21-27 April:[/font]
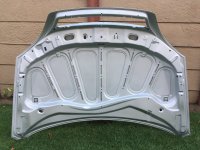
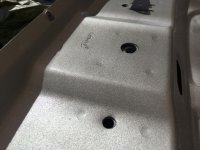
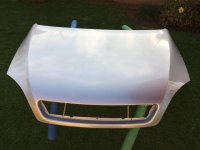
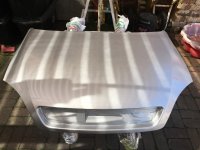
[font=Tahoma, Verdana, Arial, sans-serif]Time for the last piece of the puzzle, painting the bonnet. After my first attempts on the bumper stiffener and valance, I watched some more Youtube and hopefully got a bit more educated. I also decided I would paint the underside first, again because finish does not need to be perfect, and it's another test run before tackling the top side.[/font]
[font=Tahoma, Verdana, Arial, sans-serif]I had already fitted the strut mounting lugs, and installed the catch, release handle etc. as part of the test fitting process, so I stripped most of that off again and then went about prepping the underside for paint. This involved giving it a good clean, and removing any stickers which were present. I also roughed up the primer again with an abrasive sponge. Soon I was ready to begin painting:[/font]
[font=Tahoma, Verdana, Arial, sans-serif]View attachment 4[/font]
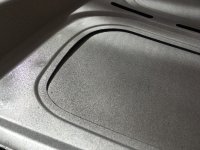
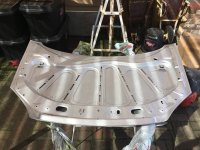
[font=Tahoma, Verdana, Arial, sans-serif]I did 2 coats of silver, and another 2 coats of clear over the top. After changing my technique a bit, my painting efforts improved, but were still not 100%. Also somewhere towards the end with the last coat of clear, I think I was rushing a bit, and the dreaded fuzzy texture was back in certain spots.[/font]
[font=Tahoma, Verdana, Arial, sans-serif]View attachment 5[/font]
[font=Tahoma, Verdana, Arial, sans-serif]View attachment 6[/font]
[font=Tahoma, Verdana, Arial, sans-serif]View attachment 7[/font]
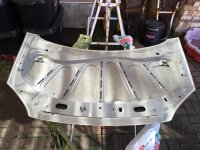
[font=Tahoma, Verdana, Arial, sans-serif]After leaving the paint to cook in the sun for a few days, I decided that I would have a go at flatting the rough spots down (also as a precurser to what I would need to do on the top side). Many hours later, over the course of 2 days, I finally completed the underside. It feels much better! [/font]
[font=Tahoma, Verdana, Arial, sans-serif]View attachment 8[/font]
[font=Tahoma, Verdana, Arial, sans-serif]View attachment 9[/font]
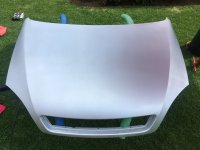
[font=Tahoma, Verdana, Arial, sans-serif]I was fairly happy with the outcome, and was now more in tune with how things work best when it comes to spraying, so I was more confident and comfortable to tackle the top side of the bonnet next...[/font]
Next up on the jobs list was to tackle the grille. My original grille was cracked on either side of the emblem, from the twisting motion of the bonnet from the accident (you'll notice it in the earlier pics). When I was purchasing all the replacement parts, I did purchase a grille as well, but didn't inspect it at that time.
Fast forward 4 weeks from then, and when I opened the grille, it wasn't damaged or anything, but it did look incredibly cheaply made. I can only describe it as wonky at best, and even test fitting it into the bonnet, it did not fit properly at all. So.... plan B, stick to original.
The cracks on my original grille were fairly thin, and with the grille not twisted and in it's normal alignment, the cracks were hardly noticeable. I decided to fix these on the inside, and then would refurbish the grille on the outside to look good as new.
Also, dating back to 2012, I trimmed pieces of the grille to open it up a bit, and also with the intention of adding the same hexagon style mesh as used in the bumper (and for the OPC look). Back then, after trimming the vertical slats out, I don't recall using body filler to smooth out where the cuts were made. I painted over with the intention of coming back to it at a later stage. Well, 8 years later here we are.
Here's a pic of some of the old cut and filing marks:
View attachment 9
Also, from the years of vibration and harshness, 2 of the mounting lugs on the grille itself were broken off (grille secures to the bonnet with 6 screws), so it did rattle around a bit. This needed fixing before I could proceed with prep for paint and stuff. So I scratched around in my tins of Opel bits and pieces, and found 2 plastic fittings, which I ended up glueing to the grille in the required places. This worked out quite nicely, and there would be no more rattly grille going forward. I then spent some time sanding off all the old paint on the grille, pretty much down to the raw plastic.
Next up, I mixed some filler and repaired all my old cut and file marks from where the vertical slats used to be. I did a much better job this time round, and after sanding these spots smooth again, it was looking much better. And lastly, I glued the 2 cracks on either side of the emblem. At this point, all the repairs to the grille were done and it was time for paint.
For this, I used some Rustoleum rattle can products which I had. I started off with some primer, followed by 2 coats of black, and then 2 coats of clear over the top of that.
View attachment 1
Again, I left this to cook in the sun for a couple of days, before refitting the emblem and sealing the paint with some Menzerna Powerlock.
View attachment 2
To end off, I did a test install in the bonnet. Fit is good and all the lugs now secure the grille properly. (I'll do the mesh at a later stage after painting the bonnet).
View attachment 3
[font=Tahoma, Verdana, Arial, sans-serif]21-27 April:[/font]
[font=Tahoma, Verdana, Arial, sans-serif]Time for the last piece of the puzzle, painting the bonnet. After my first attempts on the bumper stiffener and valance, I watched some more Youtube and hopefully got a bit more educated. I also decided I would paint the underside first, again because finish does not need to be perfect, and it's another test run before tackling the top side.[/font]
[font=Tahoma, Verdana, Arial, sans-serif]I had already fitted the strut mounting lugs, and installed the catch, release handle etc. as part of the test fitting process, so I stripped most of that off again and then went about prepping the underside for paint. This involved giving it a good clean, and removing any stickers which were present. I also roughed up the primer again with an abrasive sponge. Soon I was ready to begin painting:[/font]
[font=Tahoma, Verdana, Arial, sans-serif]View attachment 4[/font]
[font=Tahoma, Verdana, Arial, sans-serif]I did 2 coats of silver, and another 2 coats of clear over the top. After changing my technique a bit, my painting efforts improved, but were still not 100%. Also somewhere towards the end with the last coat of clear, I think I was rushing a bit, and the dreaded fuzzy texture was back in certain spots.[/font]
[font=Tahoma, Verdana, Arial, sans-serif]View attachment 5[/font]
[font=Tahoma, Verdana, Arial, sans-serif]View attachment 6[/font]
[font=Tahoma, Verdana, Arial, sans-serif]View attachment 7[/font]
[font=Tahoma, Verdana, Arial, sans-serif]After leaving the paint to cook in the sun for a few days, I decided that I would have a go at flatting the rough spots down (also as a precurser to what I would need to do on the top side). Many hours later, over the course of 2 days, I finally completed the underside. It feels much better! [/font]
[font=Tahoma, Verdana, Arial, sans-serif]View attachment 8[/font]
[font=Tahoma, Verdana, Arial, sans-serif]View attachment 9[/font]
[font=Tahoma, Verdana, Arial, sans-serif]I was fairly happy with the outcome, and was now more in tune with how things work best when it comes to spraying, so I was more confident and comfortable to tackle the top side of the bonnet next...[/font]
Attachments
-
 IMG_1214 (Large).JPG322 KB · Views: 320
 -
 IMG_1213 (Large).JPG782.8 KB · Views: 323
 -
 IMG_1177 (Large).JPG448.2 KB · Views: 324
 -
 IMG_1176 (Large).JPG341.7 KB · Views: 325
 -
 IMG_1159 (Large).JPG219 KB · Views: 325
 -
 IMG_1283 (Large).JPG276.4 KB · Views: 316
 -
 IMG_1282 (Large).JPG410.3 KB · Views: 317
 -
 IMG_1244 (Large).JPG542.5 KB · Views: 319
 -
 IMG_1243 (Large).JPG451.7 KB · Views: 321
 -
 IMG_1241 (Large).JPG362.4 KB · Views: 321
 -
 IMG_1233 (Large).JPG360.2 KB · Views: 319
gavsadler
///Member
24-27 April:
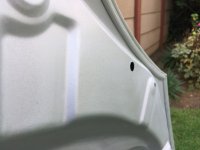
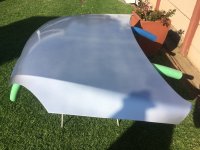
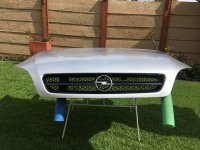
Now that the underside of the bonnet was completed, it was time to tackle the top. As usual, it started with prepping everywhere, with a scouring pad and cleaning any marks and imperfections (there was one that I noticed).
Prepped and ready for paint:
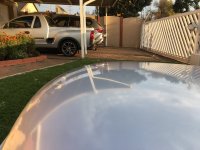
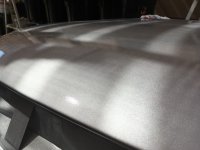
I did 3 coats of silver, and just about 3 coats of clear on top. I had set the gun to spray a lot of paint, and the compressor was pumping. Overall, this effort came out a lot better than the previous one, once I was done painting there was a consistent wet paint shine across the bonnet. That being said, there were a couple of spots where I seem to have some tiger stripes, but would see once all the paint had dried properly.
Some pics after painting:
View attachment 1
View attachment 2
View attachment 3
View attachment 4
Again, I left the bonnet to cook in the sun for 2 days to make sure the paint was hard, as the next steps would involve wet sanding and polishing....
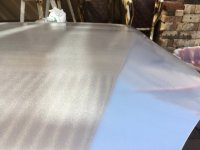
Fast forward 2 days and I was ready to complete the finishing of the bonnet. Here's a pic prior to wet sanding:
View attachment 5
Then, after a couple of hours working very carefully with 1200grit (this is all I had), I got the following finish:
View attachment 6
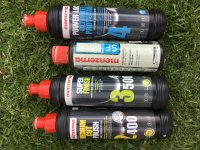
I started to get a bit nervous at this point, as I didn't want to cut through too much of the paint at this point, my intentions were to wait and get finer grades of water paper first before continuing. What I could do though is polish it up a bit in the meantime to protect the fresh paint, so I set about commencing with a 4 stage polishing and sealing process, using the following products:
View attachment 8
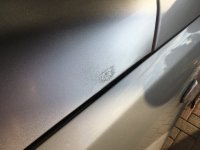
And then disaster struck. As much as could look to blame someone else for distracting me, ultimately it is my fault for rushing and not paying attention. During one of the last polishing stages, the polisher slipped off the side of the bonnet, and the polisher scratched the paint. %$&@! I managed to touch it up ok, and then thought I would use some spray can clear to blend over the top. Next disaster - the spray can paint started to dissolve the paint underneath. I was a bit glum at this point, with thoughts running through my head about redoing the entire bonnet. Well I couldn't do much about it anyway as I had run out of clear anyway, so I've left it for now.
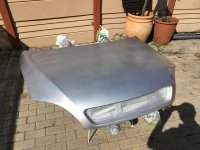
I lay the bonnet on the car to check for colour match and it doesn't look too bad. Here's a picture of the battle scar (maybe I'll leave it as a momento of my DIY efforts, and to rag my mate for years to come haha)
View attachment 7
I removed the bonnet again to complete some final polishing and sealing, and this was my end result:
View attachment 9
Lastly, after completing the polishing, I refitted the grille, and then also mounting the securing tags for the mesh behind the grille:
View attachment 1
View attachment 2
And then the bonnet was installed for the last time hopefully:
View attachment 3
View attachment 4
That pretty much wraps up the rebuild process. I'm still not completely satisfied with the wet sanding efforts on the bonnet, so I will attend to that again once I've got the correct grades of water paper and so on. I'll also look at aligning the fenders a bit better, and must also check headlight alignment at some point.
Now that the repairs are out the way, In the coming weeks I could look forward to doing a couple of other maintenance and enhancement jobs due on the Ute, including sorting out screeching front brakes, a sticky Armadillo cover and sorting out sagging seat belts. More updates to come...
Now that the underside of the bonnet was completed, it was time to tackle the top. As usual, it started with prepping everywhere, with a scouring pad and cleaning any marks and imperfections (there was one that I noticed).
Prepped and ready for paint:
I did 3 coats of silver, and just about 3 coats of clear on top. I had set the gun to spray a lot of paint, and the compressor was pumping. Overall, this effort came out a lot better than the previous one, once I was done painting there was a consistent wet paint shine across the bonnet. That being said, there were a couple of spots where I seem to have some tiger stripes, but would see once all the paint had dried properly.
Some pics after painting:
View attachment 1
View attachment 2
View attachment 3
View attachment 4
Again, I left the bonnet to cook in the sun for 2 days to make sure the paint was hard, as the next steps would involve wet sanding and polishing....
Fast forward 2 days and I was ready to complete the finishing of the bonnet. Here's a pic prior to wet sanding:
View attachment 5
Then, after a couple of hours working very carefully with 1200grit (this is all I had), I got the following finish:
View attachment 6
I started to get a bit nervous at this point, as I didn't want to cut through too much of the paint at this point, my intentions were to wait and get finer grades of water paper first before continuing. What I could do though is polish it up a bit in the meantime to protect the fresh paint, so I set about commencing with a 4 stage polishing and sealing process, using the following products:
View attachment 8
And then disaster struck. As much as could look to blame someone else for distracting me, ultimately it is my fault for rushing and not paying attention. During one of the last polishing stages, the polisher slipped off the side of the bonnet, and the polisher scratched the paint. %$&@! I managed to touch it up ok, and then thought I would use some spray can clear to blend over the top. Next disaster - the spray can paint started to dissolve the paint underneath. I was a bit glum at this point, with thoughts running through my head about redoing the entire bonnet. Well I couldn't do much about it anyway as I had run out of clear anyway, so I've left it for now.
I lay the bonnet on the car to check for colour match and it doesn't look too bad. Here's a picture of the battle scar (maybe I'll leave it as a momento of my DIY efforts, and to rag my mate for years to come haha)
View attachment 7
I removed the bonnet again to complete some final polishing and sealing, and this was my end result:
View attachment 9
Lastly, after completing the polishing, I refitted the grille, and then also mounting the securing tags for the mesh behind the grille:
View attachment 1
View attachment 2
And then the bonnet was installed for the last time hopefully:
View attachment 3
View attachment 4
That pretty much wraps up the rebuild process. I'm still not completely satisfied with the wet sanding efforts on the bonnet, so I will attend to that again once I've got the correct grades of water paper and so on. I'll also look at aligning the fenders a bit better, and must also check headlight alignment at some point.
Now that the repairs are out the way, In the coming weeks I could look forward to doing a couple of other maintenance and enhancement jobs due on the Ute, including sorting out screeching front brakes, a sticky Armadillo cover and sorting out sagging seat belts. More updates to come...
Attachments
-
 IMG_1421 (Large).JPG347.5 KB · Views: 279
 -
 IMG_1420 (Large).JPG269.5 KB · Views: 278
 -
 IMG_1417 (Large).JPG554.4 KB · Views: 282
 -
 IMG_1412 (Large).JPG472.4 KB · Views: 279
 -
 IMG_1401 (Large).JPG318.1 KB · Views: 279
 -
 IMG_1391 (Large).JPG462.2 KB · Views: 280
 -
 IMG_1360 (Large).JPG385.3 KB · Views: 279
 -
 IMG_1358 (Large).JPG291 KB · Views: 280
 -
 IMG_1357 (Large).JPG362.3 KB · Views: 279
 -
 IMG_1356 (Large).JPG300.9 KB · Views: 278
 -
 IMG_1347 (Large).JPG276.9 KB · Views: 277
 -
 IMG_1441 (Large).JPG402.1 KB · Views: 275
 -
 IMG_1440 (Large).JPG298.4 KB · Views: 275
 -
 IMG_1436 (Large).JPG555.2 KB · Views: 276
 -
 IMG_1435 (Large).JPG438 KB · Views: 275
gavsadler
///Member
Update May-2020:
A bit behind, but after completing the main repairs to the Ute, I continued doing some other jobs which were also on my to-do list forever.
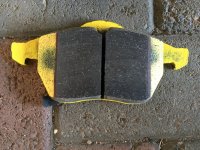
Starting off with squeaking brakes, when my brother-in-law changed the pads a few months ago, everything was fine, but as the pads bedded in, they started to squeal quite badly once warm. I've had this issue before, where it feathers on the inner and outer edges of the disc.
The easy fix is to pull the pads out again, and file down the edges slightly. So, out with the pads, and you'll see the edges which were causing the issues:
View attachment 3
View attachment 4
After some filing and a clean, they were ready to go back in:
View attachment 5
View attachment 6
And all closed up on the one side:
View attachment 7
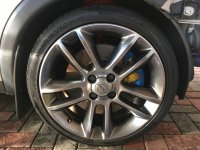
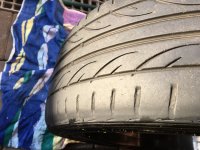
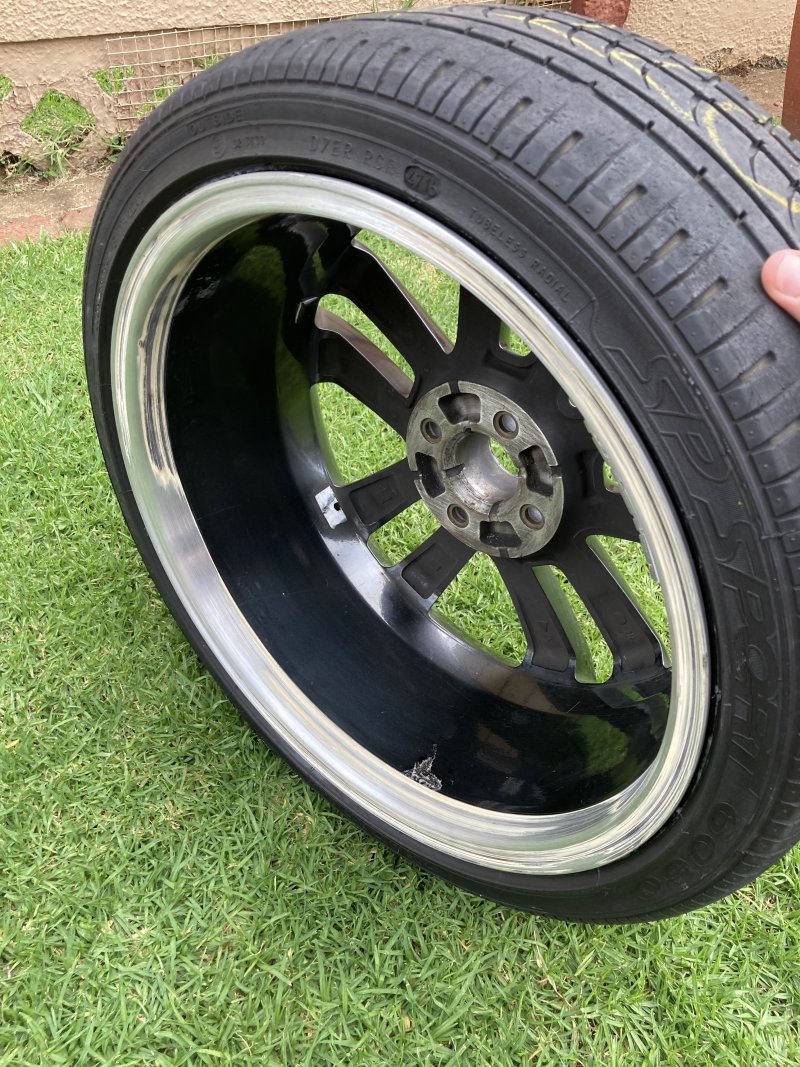
The LHS was the same process, and the same results. Also what I noted is that it seems my wheel bearings are starting to wear again, as there is some play on the wheel, and the tyres are wearing funny (almost like I've been tracking the Ute? lol)
View attachment 9
So it looks like there will be a massive running gear upgrade in the coming months, but that's all mileage dependent at this stage.
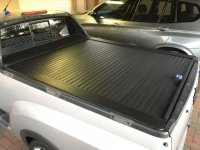
Moving on to the next job, my Armadillo required some attention. Since the last time I refurbished it, the drum spring tension was a bit on the high side, this required a proper pull on the door, before it could be locked/unlocked. The paint was also looking a bit tired, so I decided to refresh it.
It took about a day, but got everything sorted. First I removed it, then went about separating the slats from the drum, and lessening the tension, followed by attaching the slats again. Fit to the Ute and test tension. I think I did this process 3 times before I was happy. After that, I prepped the top for a fresh coat of paint and set about doing that.
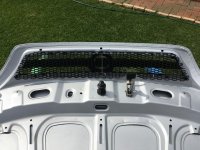
After the paint had dried, I reinstalled, and then gave it a coating of wax to protect the paint. Here's 2 quick pics of the end result. I didn't take any in process pics as I was pushing to get finished.
Looking a lot better than before:
View attachment 1
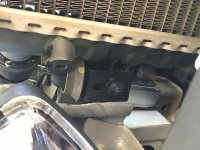
Oh before I forget, as part of the main repairs, I also had to fabricate a new radiator mounting bracket.
My previous effort was supposed to be temporary, and was made out of wood. But it worked so well it ended up being a permanent addition, and only failed now due to the accident.
Anyways, I decided to make a 'more permanent' version this time round, so I used up some bits and pieces of steel I had lying around, and cut up one bolt.
Some welding, drilling and painting later and it was ready for installation:
View attachment 2
View attachment 3
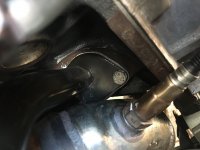
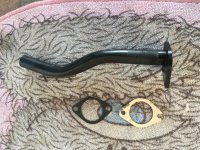
Next on the jobs list was to sort out the oil leak which had popped up again. As I mentioned earlier, it turned out to be the gasket for the crank case breather pipe.
View attachment 4
I had some gasket maker here, so cut out a new template, to replace the crushed steel gasket (which is pretty much useless in every iteration or function I've ever seen it used in).
View attachment 5
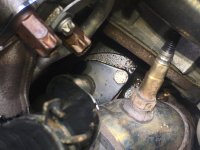
Then cleaned up the area and reinstalled, this job didn't take too long.
View attachment 6
View attachment 7
After driving it for a few weeks now, I'm pleased to report that there are no leaks. Woo-hoo!
A bit behind, but after completing the main repairs to the Ute, I continued doing some other jobs which were also on my to-do list forever.
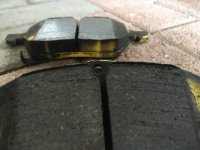
Starting off with squeaking brakes, when my brother-in-law changed the pads a few months ago, everything was fine, but as the pads bedded in, they started to squeal quite badly once warm. I've had this issue before, where it feathers on the inner and outer edges of the disc.
The easy fix is to pull the pads out again, and file down the edges slightly. So, out with the pads, and you'll see the edges which were causing the issues:
View attachment 3
View attachment 4
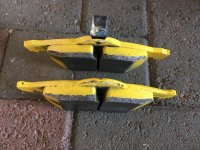
After some filing and a clean, they were ready to go back in:
View attachment 5
View attachment 6
And all closed up on the one side:
View attachment 7
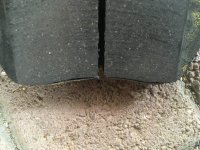
The LHS was the same process, and the same results. Also what I noted is that it seems my wheel bearings are starting to wear again, as there is some play on the wheel, and the tyres are wearing funny (almost like I've been tracking the Ute? lol)
View attachment 9
So it looks like there will be a massive running gear upgrade in the coming months, but that's all mileage dependent at this stage.
Moving on to the next job, my Armadillo required some attention. Since the last time I refurbished it, the drum spring tension was a bit on the high side, this required a proper pull on the door, before it could be locked/unlocked. The paint was also looking a bit tired, so I decided to refresh it.
It took about a day, but got everything sorted. First I removed it, then went about separating the slats from the drum, and lessening the tension, followed by attaching the slats again. Fit to the Ute and test tension. I think I did this process 3 times before I was happy. After that, I prepped the top for a fresh coat of paint and set about doing that.
After the paint had dried, I reinstalled, and then gave it a coating of wax to protect the paint. Here's 2 quick pics of the end result. I didn't take any in process pics as I was pushing to get finished.
Looking a lot better than before:
View attachment 1
Oh before I forget, as part of the main repairs, I also had to fabricate a new radiator mounting bracket.
My previous effort was supposed to be temporary, and was made out of wood. But it worked so well it ended up being a permanent addition, and only failed now due to the accident.
Anyways, I decided to make a 'more permanent' version this time round, so I used up some bits and pieces of steel I had lying around, and cut up one bolt.
Some welding, drilling and painting later and it was ready for installation:
View attachment 2
View attachment 3
Next on the jobs list was to sort out the oil leak which had popped up again. As I mentioned earlier, it turned out to be the gasket for the crank case breather pipe.
View attachment 4
I had some gasket maker here, so cut out a new template, to replace the crushed steel gasket (which is pretty much useless in every iteration or function I've ever seen it used in).
View attachment 5
Then cleaned up the area and reinstalled, this job didn't take too long.
View attachment 6
View attachment 7
After driving it for a few weeks now, I'm pleased to report that there are no leaks. Woo-hoo!
Attachments
-
 IMG_1066 (Large).JPG231.8 KB · Views: 232
 -
 IMG_1067 (Large).JPG366.2 KB · Views: 234
 -
 IMG_1070 (Large).JPG479.2 KB · Views: 233
 -
 IMG_1072 (Large).JPG555.1 KB · Views: 233
 -
 IMG_1074 (Large).JPG353.3 KB · Views: 234
 -
 IMG_1077 (Large).JPG399.8 KB · Views: 234
 -
 IMG_1773 (Large).JPG307.8 KB · Views: 224
 -
 IMG_1772 (Large).JPG275 KB · Views: 223
 -
 IMG_1574 (Large).JPG454.4 KB · Views: 219
 -
 IMG_1577 (Large).JPG296.4 KB · Views: 220
 -
 IMG_1807 (Large).JPG246.5 KB · Views: 217
 -
 IMG_1806 (Large).JPG229.7 KB · Views: 215
 -
 IMG_1805 (Large).JPG658 KB · Views: 215
 -
 IMG_1802 (Large).JPG350.3 KB · Views: 216
gavsadler
///Member
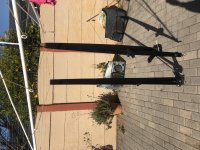
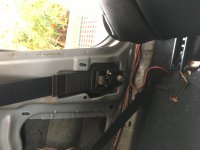
Next up, sagging seatbelts.
For a long time now, the performance of the seatbelts has not been great, whereby after extending them, they do not retract easily, and end up hanging all over the place, sometimes in the case of transporting a careless passenger, the seatbelts end up outside the door before it gets shut. Not great at all.
Doing some research, they say a good clean will sort out the problem, and while that may be true in some instances, it wasn't in this case. My cars are generally clean and looked after, not having a hard life of dirt and grime all over. So I decided to strip out the seatbelts and try to re-tension the spring mechanisms.
*Disclaimer: I'm posting my experience based on my seatbelts, don't hold me responsible if you try something similar and your springs explode all over the place...
Starting off, here's a picture of what typically happens:
View attachment 1
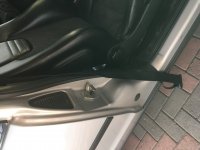
To remove the seatbelts, I had to loosen it at the bottom, middle and at the top:
View attachment 8
View attachment 9
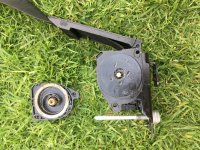
Then comes the analysis of the mechanism itself, the spring is housed on the one side, secured by a cover with retaining clips. After removing this, you have a view of the spring in it's most un-tensioned state:
View attachment 2
Now, to put it back, I secured it onto the mechanisms axle shaft, and then began twisting the housing to tension the spring, being careful not to slip. This took a bit of time to do properly. Once it was fully-tensioned and would not turn more, I backed it off 1 turn. Thereafter I closed up the mechanism and secured it to make sure it does not open again.
After doing both belts, they got a good clean again, and I also cleaned the quarter panels:
View attachment 3
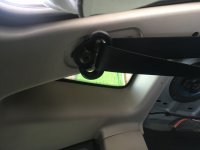
And the end-product, reinstalled:
View attachment 7
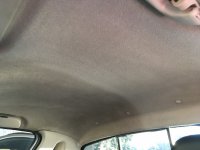
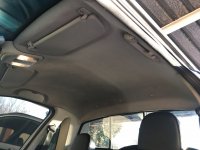
After completing the seat belts, I wanted to tackle the roof lining. This is probably also one of the areas that doesn't get as much attention as it should. On darker colours it's less noticeable, but light colours get dull over time. What I found interesting was how dirty it actually was.
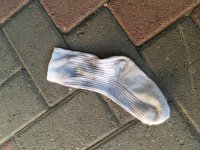
This is an easy DIY which anyone can do, all you need is some Benzine and a colour-neutral cloth. Simply wet the cloth with Benzine and wipe the roof lining gently. The solution draws the dirt out of the roof lining and there is mininal risk when compared to other methods such as steam-cleaning etc.
Please don't judge me on the siffness, lol. This is due to driving with the windows open almost all the time. :smilebounce: :fencelook:
[font=Tahoma, Verdana, Arial, sans-serif]View attachment 8[/font]
View attachment 9
View attachment 1
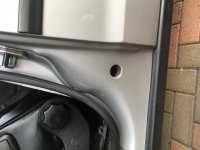
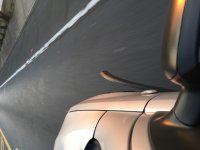
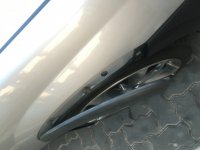
Fast forward a couple of weeks, and the other day, after pulling into a driveway, I heard the tyre catch the wheel arch liner. This was later confirmed after hitting the highway, I saw the liner flapping in the wind:
View attachment 2
View attachment 3
I've subsequently purchased a new one, and fitted to the Ute, so it's looking much better now.
Unfortunately, some more bad news is that the RHS headlight seems to be faulty. The indicator seems to work as and when it pleases, which resulted in 2 near-accidents last week when people didn't see that I was turning. I've purchased another headlight, so will probably replace that in the next few days.
Also, last weekend I got round to giving my bonnet another wet sand. It's looking much better now, and more consistent across the whole surface area. I've just got some fine scratches left in the paint, which didn't come out with the 1-step polish I used as a temporary sealant. So I will whip out my polisher again and give it the 3-step Menzerna treatment - same as previously. I think that should sort out the scratches.
And that's about all updates I have for now on the Ute. I really need to try be more disciplined with regular updates, then it won't be such a big mission each time.
That's all for now...
Well almost all,
Just a quick little vid of a short blast during lockdown.
Gotta get home before the goons come out after dark.... lol
[video=youtube]
For a long time now, the performance of the seatbelts has not been great, whereby after extending them, they do not retract easily, and end up hanging all over the place, sometimes in the case of transporting a careless passenger, the seatbelts end up outside the door before it gets shut. Not great at all.
Doing some research, they say a good clean will sort out the problem, and while that may be true in some instances, it wasn't in this case. My cars are generally clean and looked after, not having a hard life of dirt and grime all over. So I decided to strip out the seatbelts and try to re-tension the spring mechanisms.
*Disclaimer: I'm posting my experience based on my seatbelts, don't hold me responsible if you try something similar and your springs explode all over the place...
Starting off, here's a picture of what typically happens:
View attachment 1
To remove the seatbelts, I had to loosen it at the bottom, middle and at the top:
View attachment 8
View attachment 9
Then comes the analysis of the mechanism itself, the spring is housed on the one side, secured by a cover with retaining clips. After removing this, you have a view of the spring in it's most un-tensioned state:
View attachment 2
Now, to put it back, I secured it onto the mechanisms axle shaft, and then began twisting the housing to tension the spring, being careful not to slip. This took a bit of time to do properly. Once it was fully-tensioned and would not turn more, I backed it off 1 turn. Thereafter I closed up the mechanism and secured it to make sure it does not open again.
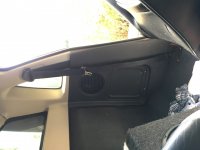
After doing both belts, they got a good clean again, and I also cleaned the quarter panels:
View attachment 3
And the end-product, reinstalled:
View attachment 7
After completing the seat belts, I wanted to tackle the roof lining. This is probably also one of the areas that doesn't get as much attention as it should. On darker colours it's less noticeable, but light colours get dull over time. What I found interesting was how dirty it actually was.
This is an easy DIY which anyone can do, all you need is some Benzine and a colour-neutral cloth. Simply wet the cloth with Benzine and wipe the roof lining gently. The solution draws the dirt out of the roof lining and there is mininal risk when compared to other methods such as steam-cleaning etc.
Please don't judge me on the siffness, lol. This is due to driving with the windows open almost all the time. :smilebounce: :fencelook:
[font=Tahoma, Verdana, Arial, sans-serif]View attachment 8[/font]
View attachment 9
View attachment 1
Fast forward a couple of weeks, and the other day, after pulling into a driveway, I heard the tyre catch the wheel arch liner. This was later confirmed after hitting the highway, I saw the liner flapping in the wind:
View attachment 2
View attachment 3
I've subsequently purchased a new one, and fitted to the Ute, so it's looking much better now.
Unfortunately, some more bad news is that the RHS headlight seems to be faulty. The indicator seems to work as and when it pleases, which resulted in 2 near-accidents last week when people didn't see that I was turning. I've purchased another headlight, so will probably replace that in the next few days.
Also, last weekend I got round to giving my bonnet another wet sand. It's looking much better now, and more consistent across the whole surface area. I've just got some fine scratches left in the paint, which didn't come out with the 1-step polish I used as a temporary sealant. So I will whip out my polisher again and give it the 3-step Menzerna treatment - same as previously. I think that should sort out the scratches.
And that's about all updates I have for now on the Ute. I really need to try be more disciplined with regular updates, then it won't be such a big mission each time.
That's all for now...
Well almost all,
Just a quick little vid of a short blast during lockdown.
Gotta get home before the goons come out after dark.... lol
[video=youtube]
Attachments
-
 IMG_2330 (Large).JPG539.4 KB · Views: 207
 -
 IMG_2318 (Large).JPG586.8 KB · Views: 210
 -
 IMG_2315 (Large).JPG249.1 KB · Views: 209
 -
 IMG_2314 (Large).JPG165 KB · Views: 209
 -
 IMG_2313 (Large).JPG258.6 KB · Views: 208
 -
 IMG_2312 (Large).JPG299.4 KB · Views: 208
 -
 IMG_2334 (Large).JPG217.8 KB · Views: 204
 -
 IMG_2359 (Large).JPG248 KB · Views: 199
 -
 IMG_2340 (Large).JPG252.4 KB · Views: 199
 -
 IMG_2339 (Large).JPG266.6 KB · Views: 199
 -
 IMG_2338 (Large).JPG683.4 KB · Views: 199
 -
 IMG_2365 (Large).JPG178.8 KB · Views: 192
 -
 IMG_2366 (Large).JPG188.3 KB · Views: 191
M135i
Well-known member
Thanks for the updates. Always fun to read through your progress. Also painful with certain updates...
With regards to the faulty indicator, could be relay that sits in the engine bay...same had happened to mine. Cheap enough at GW.
I think you'll get one relay for the left side and one relay for right. The GW one is a combined one which includes the left and right indicator.
With regards to the faulty indicator, could be relay that sits in the engine bay...same had happened to mine. Cheap enough at GW.
I think you'll get one relay for the left side and one relay for right. The GW one is a combined one which includes the left and right indicator.
gavsadler
///Member
Update Nov-2020:
Thankfully, not much to update here. The Ute has been serving me well the past few months, doing odd loads, the school trips, some general hooning etc.
Next month is also going to be maintenance month, with a service due, and I'm looking to refresh my suspension, wheel bearings and maybe some new front tyres.
There is one update relevant to all cars, but I'll compile that and then post it on all my threads. It makes for some interesting reading.
gavsadler
///Member
I clean forgot about this update. I’m going to combine this update for across the 4 cars in the fleet.
In July, following a refund from SARS, I decided to treat myself to a device to satisfy my nerdy tendencies. So after some chats with Firi, a day later my Dragy arrived.
First impressions: it’s really small, maybe the size of 2 BIC lighters held together. I gave it a charge, and after downloading the app to my phone, I was ready to test it out. I decided to keep things simple and stick it on top of the dash with 2 blobs of Prestik. This worked just fine, and for the first couple of days, I experimented with the settings and how it all works. It is very simple to use.
Thereafter, I decided on a private test track to use for some runs. It’s straight and long enough to get a 1/4mile in and have sufficient stopping distance too. Unfortunately it’s not 100% flat, but over the 400m, the gradient changes cancel each other out, which the app then regards as a valid run.
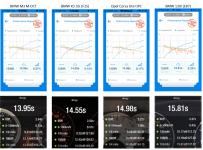
For the runs that you see below, I also didn’t apply too much rocket science. The intention was to mash the throttle / do a brisk pull off, as you would in a normal, day-to-day scenario. No activating of launch control, no warming up tyres, traction control activated (where applicable) etc. So yes, there is probably room for improvement on some of the cars (or they could fare worse) – who knows. This is purely for comparison, same road, similar conditions, same driving style.
I’ve added an image below, of the runs from each car, and the data generated. 1st place goes to the M3, 2nd the X3, 3rd for the Ute and 4th the 130i. Some data which peaked my nerdy interest:
View attachment 4
M3:
[video=youtube]
X3:
[video=youtube]
Corsa Ute:
[video=youtube]
As mentioned earlier, there are probably more ideal conditions, a better private test track, and better driver skills to be realised, which will result in lower times, but that was not the point of this exercise. It was to do some real-world “one take” runs of each vehicle.
All-in-all, a great little product, accuracy seems good and like I’ve said, I geek out on analysing the numbers and the graphs. I look forward to using it more in future and maybe trying for quicker runs in better conditions and on a better private test track.
Thanks for reading.
[video=youtube]
In July, following a refund from SARS, I decided to treat myself to a device to satisfy my nerdy tendencies. So after some chats with Firi, a day later my Dragy arrived.
First impressions: it’s really small, maybe the size of 2 BIC lighters held together. I gave it a charge, and after downloading the app to my phone, I was ready to test it out. I decided to keep things simple and stick it on top of the dash with 2 blobs of Prestik. This worked just fine, and for the first couple of days, I experimented with the settings and how it all works. It is very simple to use.
Thereafter, I decided on a private test track to use for some runs. It’s straight and long enough to get a 1/4mile in and have sufficient stopping distance too. Unfortunately it’s not 100% flat, but over the 400m, the gradient changes cancel each other out, which the app then regards as a valid run.
For the runs that you see below, I also didn’t apply too much rocket science. The intention was to mash the throttle / do a brisk pull off, as you would in a normal, day-to-day scenario. No activating of launch control, no warming up tyres, traction control activated (where applicable) etc. So yes, there is probably room for improvement on some of the cars (or they could fare worse) – who knows. This is purely for comparison, same road, similar conditions, same driving style.
I’ve added an image below, of the runs from each car, and the data generated. 1st place goes to the M3, 2nd the X3, 3rd for the Ute and 4th the 130i. Some data which peaked my nerdy interest:
View attachment 4
- Note the gear shift delays (orange line) on the 2 manual cars vs the 2 auto cars. Again I was shifting normally, no race-style shifting or flat shifting or looking for the elusive money shift. I have mechanical sympathy.
- Looking at the acceleration curve (blue line), the M3 and Ute have quite steep gradients most of the run, whereas the X3 has a strong showing initially, but then a much lazier curve (don’t get me wrong, the car is still rapid). The 130i is also not as strong as the turbo cars up at the reef.
- Interestingly, the 60ft time of the 130i is the best of the lot, I attribute this to less torque and less interference from the DSC. Next up is the X3 which also hopped off the line nicely – due to the x-drive. Thereafter is the M3, and lighting up the tyres at the back of the pack is the Ute.
- The terminal speed of the Ute over 400m is higher than the X3 – probably due to aerodynamics and also being able to put down more power once the front wheels have grip in the higher gears. Lighter weight may also help matters somewhat.
M3:
[video=youtube]
X3:
[video=youtube]
Corsa Ute:
[video=youtube]
As mentioned earlier, there are probably more ideal conditions, a better private test track, and better driver skills to be realised, which will result in lower times, but that was not the point of this exercise. It was to do some real-world “one take” runs of each vehicle.
All-in-all, a great little product, accuracy seems good and like I’ve said, I geek out on analysing the numbers and the graphs. I look forward to using it more in future and maybe trying for quicker runs in better conditions and on a better private test track.
Thanks for reading.
[video=youtube]
Attachments
gavsadler
///Member
Update: Jan-21:
As with the X3, December allowed for more time to attend to the cars, with service and maintenance on the agenda. The Ute was due for a service, and some other maintenance which will most likely take place early in the new year.
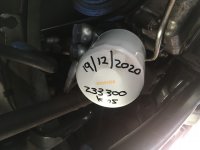
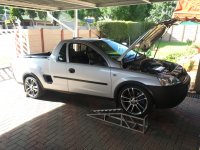
After completing the X3, it was time to give the Ute a quick service. So up onto the ramps it went:
View attachment 1
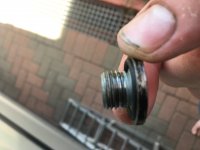
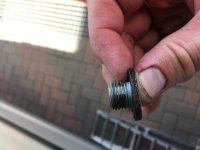
As part of the oil change, note how the o-ring on the sump plug gets squashed. This is why it's always recommended to replace o-rings with new ones.
View attachment 2
View attachment 3
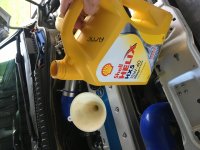
New oil filter and oil:
View attachment 4
View attachment 5
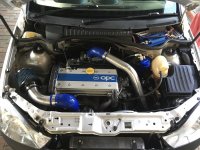
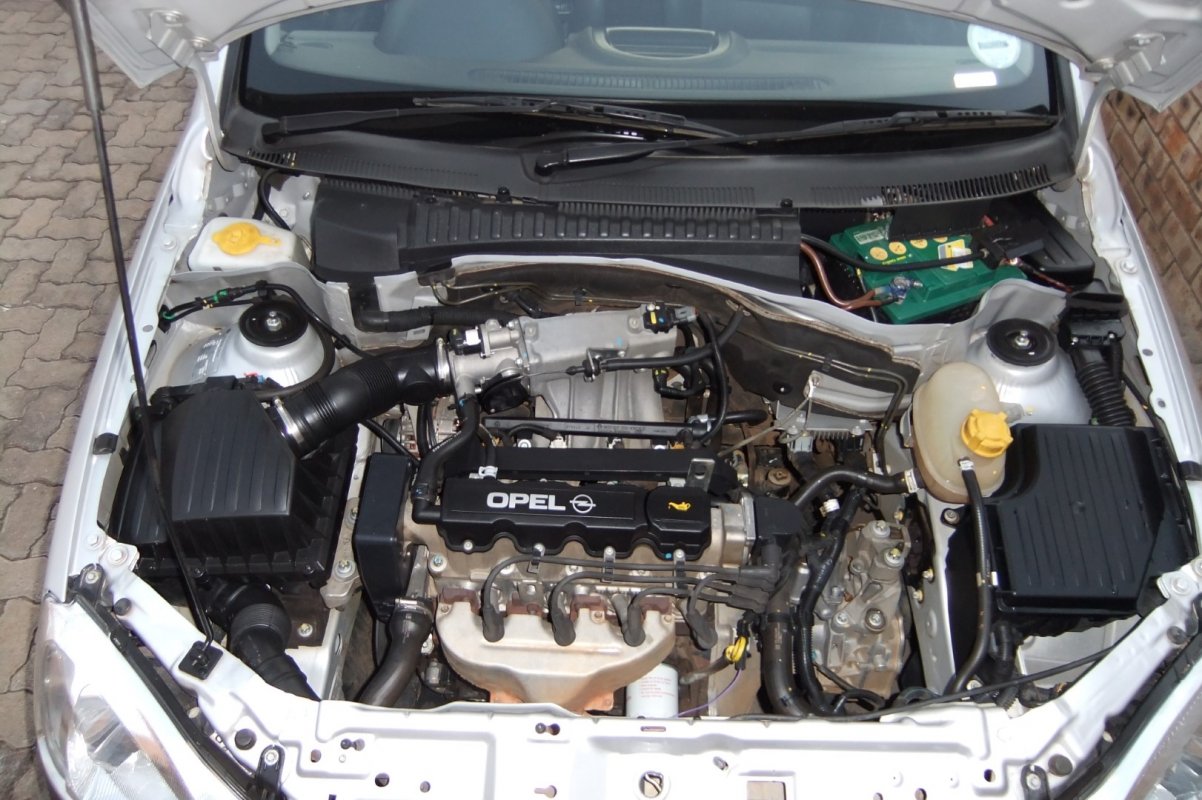
I also checked the plugs, but they are still good, so no need to replace them at the moment. I then also cleaned the air filter, and gave the engine bay a decent clean. It always brings a smile to my face to see how nice it looks:
View attachment 6
In the coming weeks, I want to strip out the suspension and inspect all of that, most likely having the shocks serviced / replaced. And while everything is off, I'll inspect the brakes and probably bleed the fluid as well.
More to come... stay tuned.
As with the X3, December allowed for more time to attend to the cars, with service and maintenance on the agenda. The Ute was due for a service, and some other maintenance which will most likely take place early in the new year.
After completing the X3, it was time to give the Ute a quick service. So up onto the ramps it went:
View attachment 1
As part of the oil change, note how the o-ring on the sump plug gets squashed. This is why it's always recommended to replace o-rings with new ones.
View attachment 2
View attachment 3
New oil filter and oil:
View attachment 4
View attachment 5
I also checked the plugs, but they are still good, so no need to replace them at the moment. I then also cleaned the air filter, and gave the engine bay a decent clean. It always brings a smile to my face to see how nice it looks:
View attachment 6
In the coming weeks, I want to strip out the suspension and inspect all of that, most likely having the shocks serviced / replaced. And while everything is off, I'll inspect the brakes and probably bleed the fluid as well.
More to come... stay tuned.
Attachments
gavsadler
///Member
Update March-21:
Following on from my last update, I wanted to look at the suspension on the Ute to make sure that all was in order. I parked it in the garage, and up on 4 trestles, I proceeded to remove the front and rear suspension. The back shocks felt ok, but what was a bit of a concern was the bump stops, they had seen better days and the one was completely perished through where the spring sits:

I needed a laugh, so popped in at Opel to see how much new ones cost. If I recall correctly, it was R2400ea? Can't remember, didn't make a point to pay attention.
After a good chuckle, I went to a local scrapyard, and found a pair of as-new ones, with the stock rear springs, for R1000. I don't need the rear springs, so those are sitting on the classifieds waiting for someone to take them off my hands.
I fitted the replacement bump stops into the H&R springs:


With the rear of the Ute sorted, attention turned to the front. I had taken my shocks to Koni for assessment, and possibly a service. Unfortunately, mine is the older design which is a sealed unit, so they could not service them. But overall the condition of the shocks was not bad. What was bad though, same as the back, was the bump stops. They had also gone all soft and were perishing at a rapid rate. I sourced a new pair, and when side by side, you can see how much taller the replacements are. This should help with the touching I was experiencing over the past few months (and I can confirm the ride is sorted now - no touching).

I am not sure why I'm missing pics of the front shocks, but there are pictures elsewhere in my thread if you need to have a look.
I also fitted new wheel bearings and hubs on the front, as the old bearings were worn (causing tyre wear issues, vibration etc.)

Following on from my last update, I wanted to look at the suspension on the Ute to make sure that all was in order. I parked it in the garage, and up on 4 trestles, I proceeded to remove the front and rear suspension. The back shocks felt ok, but what was a bit of a concern was the bump stops, they had seen better days and the one was completely perished through where the spring sits:
I needed a laugh, so popped in at Opel to see how much new ones cost. If I recall correctly, it was R2400ea? Can't remember, didn't make a point to pay attention.
After a good chuckle, I went to a local scrapyard, and found a pair of as-new ones, with the stock rear springs, for R1000. I don't need the rear springs, so those are sitting on the classifieds waiting for someone to take them off my hands.
I fitted the replacement bump stops into the H&R springs:
With the rear of the Ute sorted, attention turned to the front. I had taken my shocks to Koni for assessment, and possibly a service. Unfortunately, mine is the older design which is a sealed unit, so they could not service them. But overall the condition of the shocks was not bad. What was bad though, same as the back, was the bump stops. They had also gone all soft and were perishing at a rapid rate. I sourced a new pair, and when side by side, you can see how much taller the replacements are. This should help with the touching I was experiencing over the past few months (and I can confirm the ride is sorted now - no touching).
I am not sure why I'm missing pics of the front shocks, but there are pictures elsewhere in my thread if you need to have a look.
I also fitted new wheel bearings and hubs on the front, as the old bearings were worn (causing tyre wear issues, vibration etc.)
Attachments
gavsadler
///Member
With all the suspension refreshed and installed, a week later I had to go to the CBD for a client meeting. On my way back home, I did not see a massive pothole in the shadow of a bridge, and this cost me a tyre, (replaced with a spare from my brother-in-law) and a required wheel repair.
Hi Tech Mag Repairs (my preferred service provider) had to repair a buckle, along with some welding, but all is good now. They did not paint over the repair (as seen below), but I've subsequently giving it a lick of black paint so that it does not look too out of place when fitted on the Ute:

More recently, I decided to do a little bit of branding on the Ute, for some forthcoming events:

Last weekend, I attended my first car event since the COVID nonsense started last year. The Opel Owners Club held a breakfast run, starting in Woodmead, and around the highways of JHB, ending at Greenstone shopping centre. It was quite nice to get out again, and interact with some fellow petrolheads. There was actually a great turnout as well, about 50-60 cars, from different generations as well. One of my favourites for the day was a bone stock Astra TS, but there was plenty to look at. We also had some good chuckles with some new guys on the scene, who weren't exactly sure what was going on under the bonnet of the Ute. They just knew it passed them on the highway a lot faster than any Ute should do under normal circumstances (if at all), lol.
It was a good morning out. Some pics below:


Hi Tech Mag Repairs (my preferred service provider) had to repair a buckle, along with some welding, but all is good now. They did not paint over the repair (as seen below), but I've subsequently giving it a lick of black paint so that it does not look too out of place when fitted on the Ute:
More recently, I decided to do a little bit of branding on the Ute, for some forthcoming events:
Last weekend, I attended my first car event since the COVID nonsense started last year. The Opel Owners Club held a breakfast run, starting in Woodmead, and around the highways of JHB, ending at Greenstone shopping centre. It was quite nice to get out again, and interact with some fellow petrolheads. There was actually a great turnout as well, about 50-60 cars, from different generations as well. One of my favourites for the day was a bone stock Astra TS, but there was plenty to look at. We also had some good chuckles with some new guys on the scene, who weren't exactly sure what was going on under the bonnet of the Ute. They just knew it passed them on the highway a lot faster than any Ute should do under normal circumstances (if at all), lol.
It was a good morning out. Some pics below:
gavsadler
///Member
Update Aug-2021:
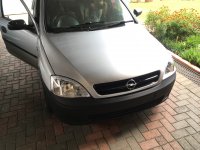
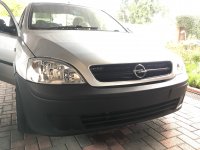
Time for a trip down memory lane... It was the first week of August 2011 when I purchased my Ute. Back then it was 4 years old, with 132600kms odd on the clock, stock standard, except for an aftermarket head unit fitted, front nudge bar, and the tonneau cover.
Some pics of it the day I collected, and after a clean:


.JPG")
.JPG")
Oh how things have changed. 10 years later and 105400kms travelled, I'm still smiling, no regrets.
Plans for the near future include a suspension refresh, and possibly looking at getting the head reconditioned, as it's starting to smoke a bit. Hopefully I don't go down the rabbit hole of a full rebuild, lol.
Stay tuned for further updates.
Thanks to all who have read and followed my thread over the years.
Time for a trip down memory lane... It was the first week of August 2011 when I purchased my Ute. Back then it was 4 years old, with 132600kms odd on the clock, stock standard, except for an aftermarket head unit fitted, front nudge bar, and the tonneau cover.
Some pics of it the day I collected, and after a clean:
Oh how things have changed. 10 years later and 105400kms travelled, I'm still smiling, no regrets.
Plans for the near future include a suspension refresh, and possibly looking at getting the head reconditioned, as it's starting to smoke a bit. Hopefully I don't go down the rabbit hole of a full rebuild, lol.
Stay tuned for further updates.
Thanks to all who have read and followed my thread over the years.
Attachments
Similar threads
- Replies
- 0
- Views
- 626