
-
Read the WELCOME ALL BMWFANATICS post.
You are using an out of date browser. It may not display this or other websites correctly.
You should upgrade or use an alternative browser.
You should upgrade or use an alternative browser.
Gavsadler’s 1st Classic, and a South African Special
- Thread starter gavsadler
- Start date


gavsadler
///Member
Thank you all for the well-wishes.
It has been a rather frantic and intensive 2 months since getting the car. I have lots of updates to share, but before we get to that, I would like to specifically mention some specific things which helped persuade me that this is a good idea, haha.
I may have eluded to it previously, but the car has a solid maintenance record with the previous owner, who in turn also commented that when he bought the car 2-3 years ago, that owner had also maintained it properly (e.g. GM stamped/branded Cambelt, amongst other things).
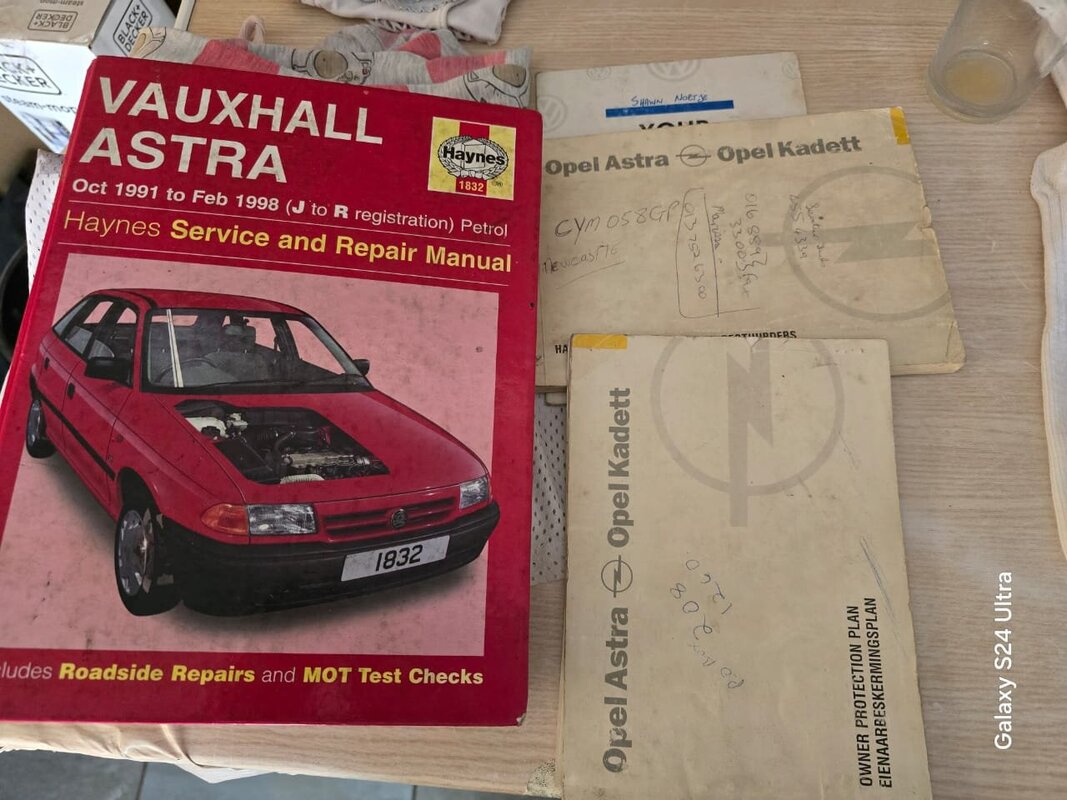
First of all, the car has its original owner’s manual, as well as a Haynes manual. It also came with the original key (it has a small LED light in it), and a spare key. It also has an aftermarket remote alarm + anti-hijack system fitted.
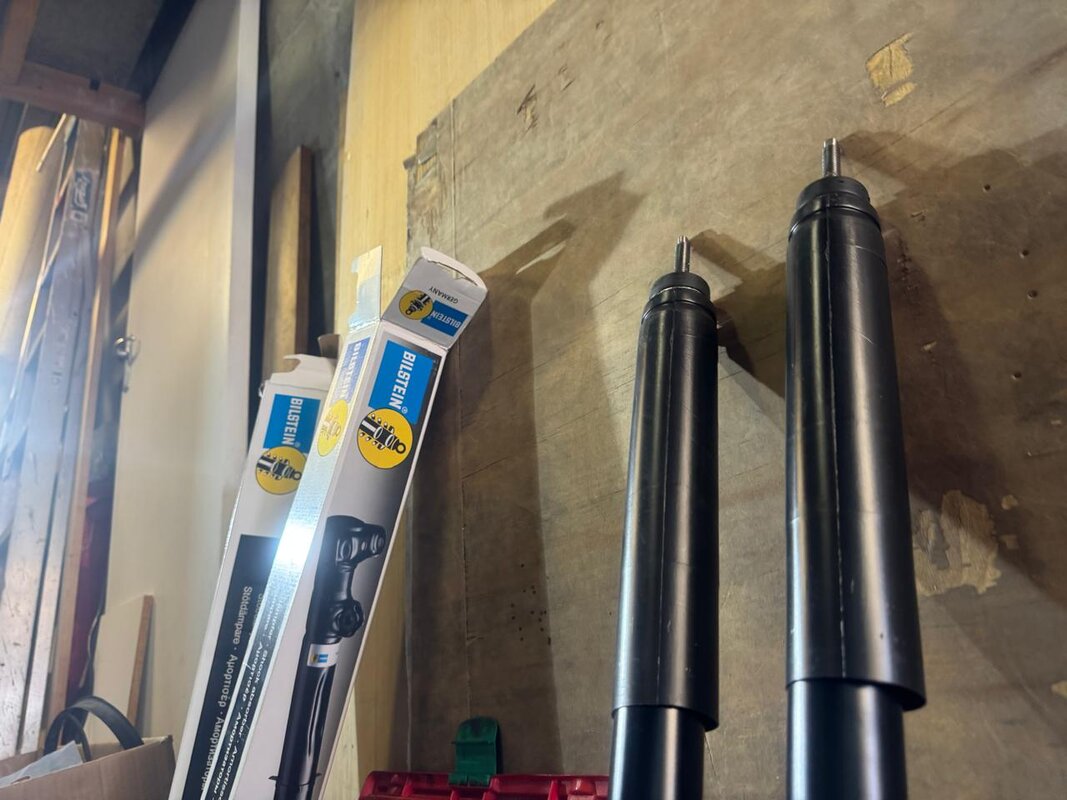
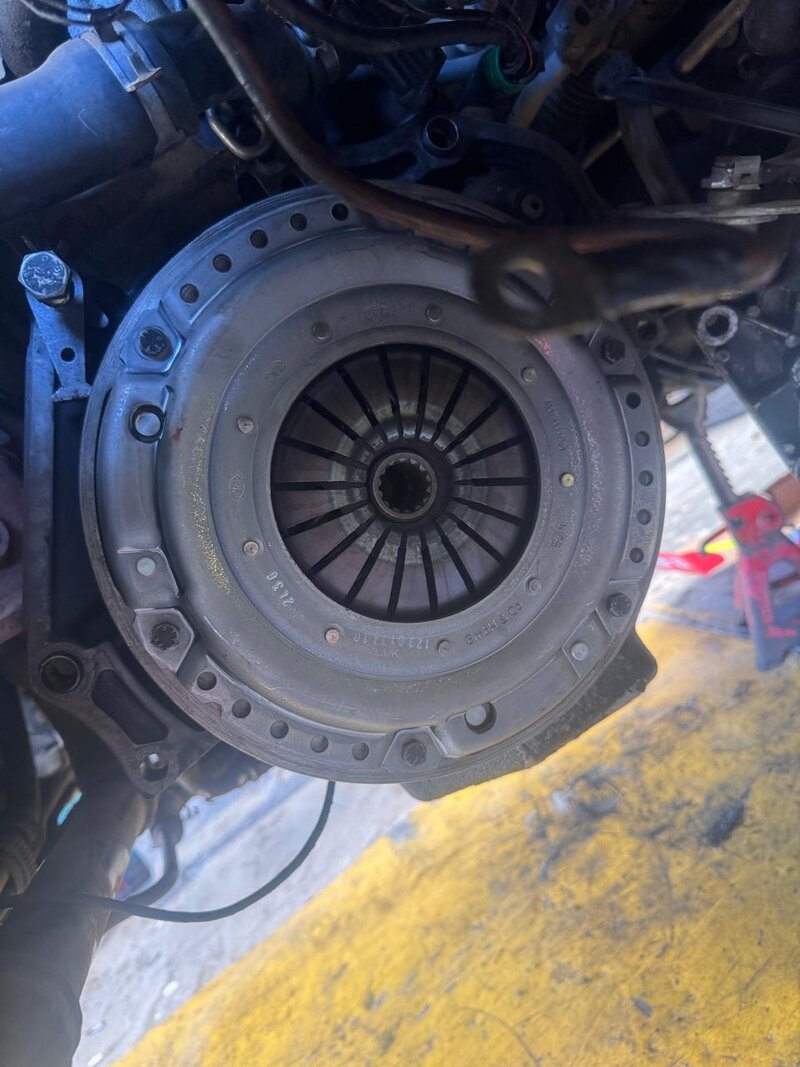
Mechanically, there has been a solid amount of work put into the car. New Bilstein rear shocks, front shocks are “new” 2nd hand items (I may change these in the near future). New control arms fitted, new rear brake pads. A new LUK clutch was fitted about 18months ago. New cambelt and pulleys done last year. Gearbox selector shaft seals were done, as well as fluid change.
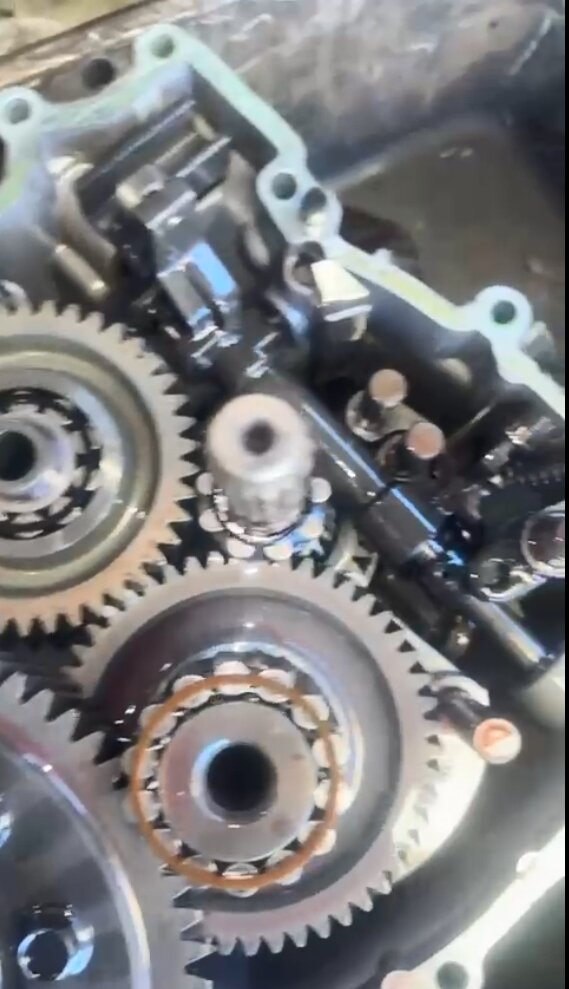
Here’s some pics of the inside of the box. Clean clean clean…
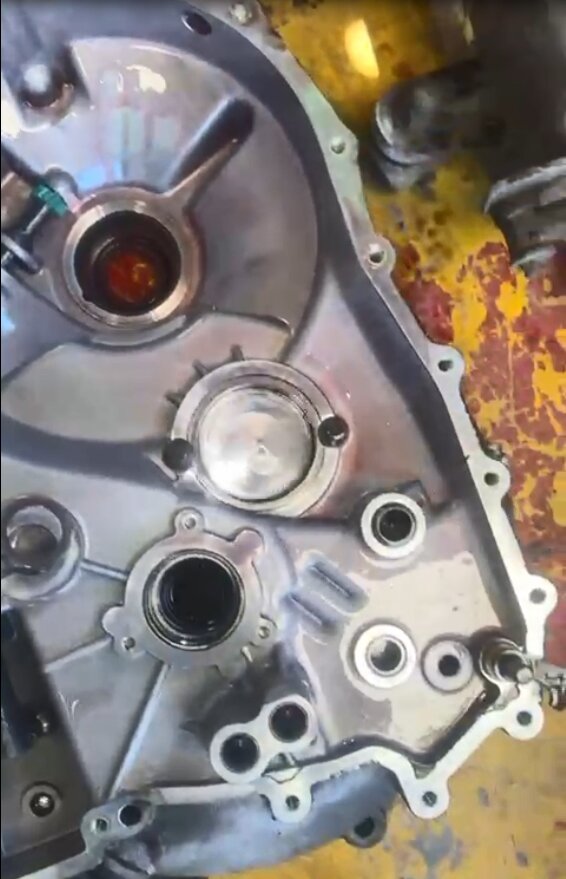
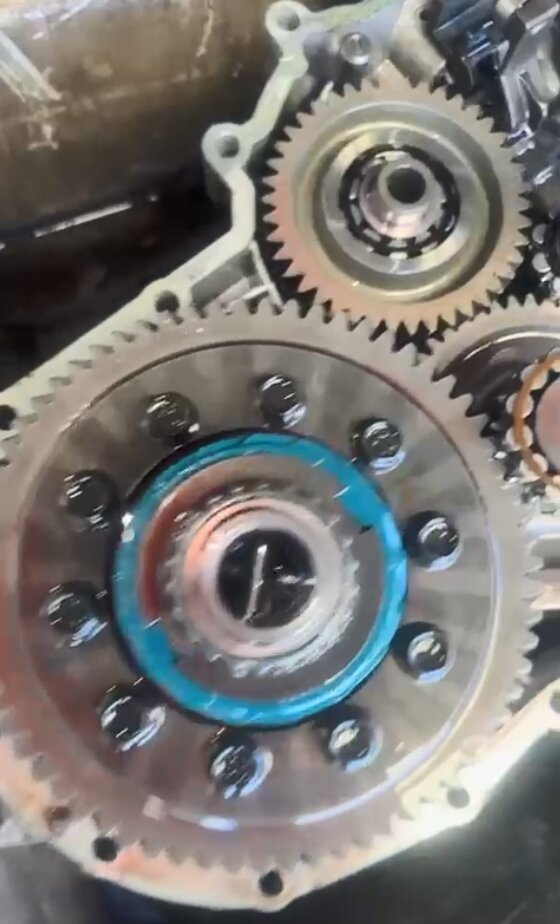
And the Unobtainium LSD showing "the cross":
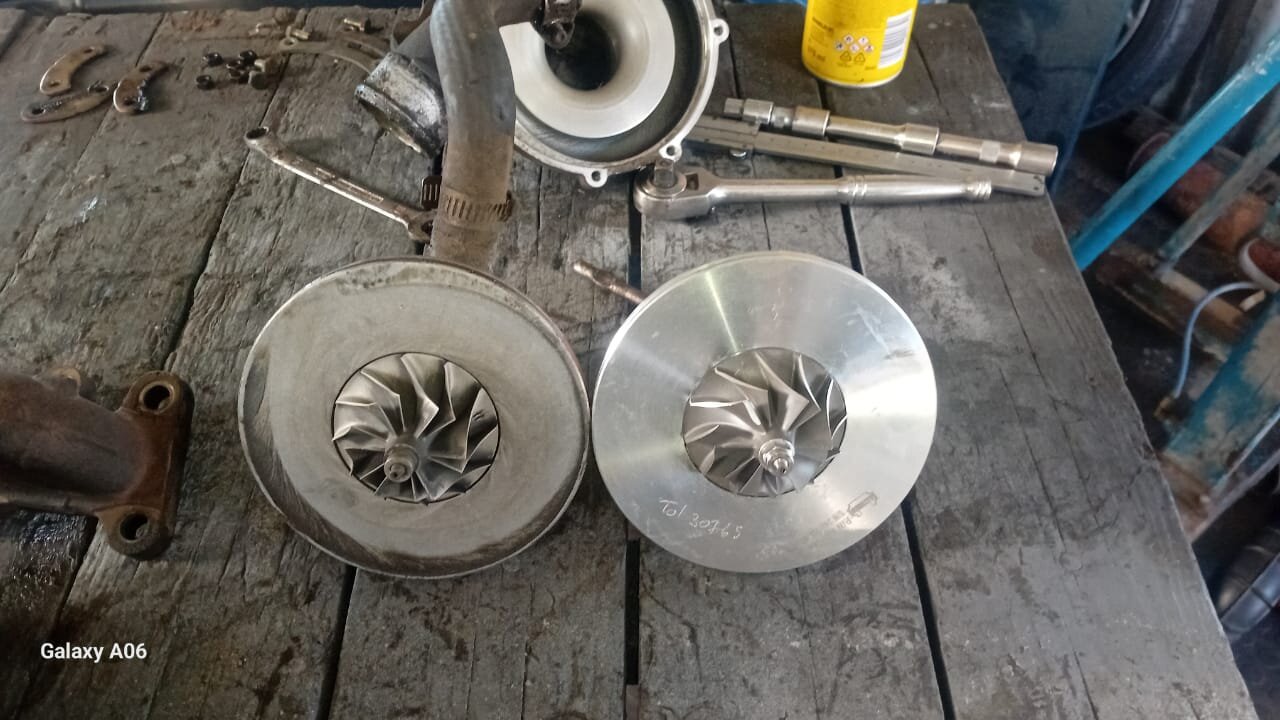
Two days after concluding a deal, the seller sent me some pics of the car in pieces, and the turbocharger on a workbench. He had a spare replacement core sitting on his shelf, and he did notice a bit of an oil sweat under the turbo, so he decided to replace the core, out of goodwill, no questions asked, no additional payment required. I was stunned, as good deeds like this are few and far between these days.
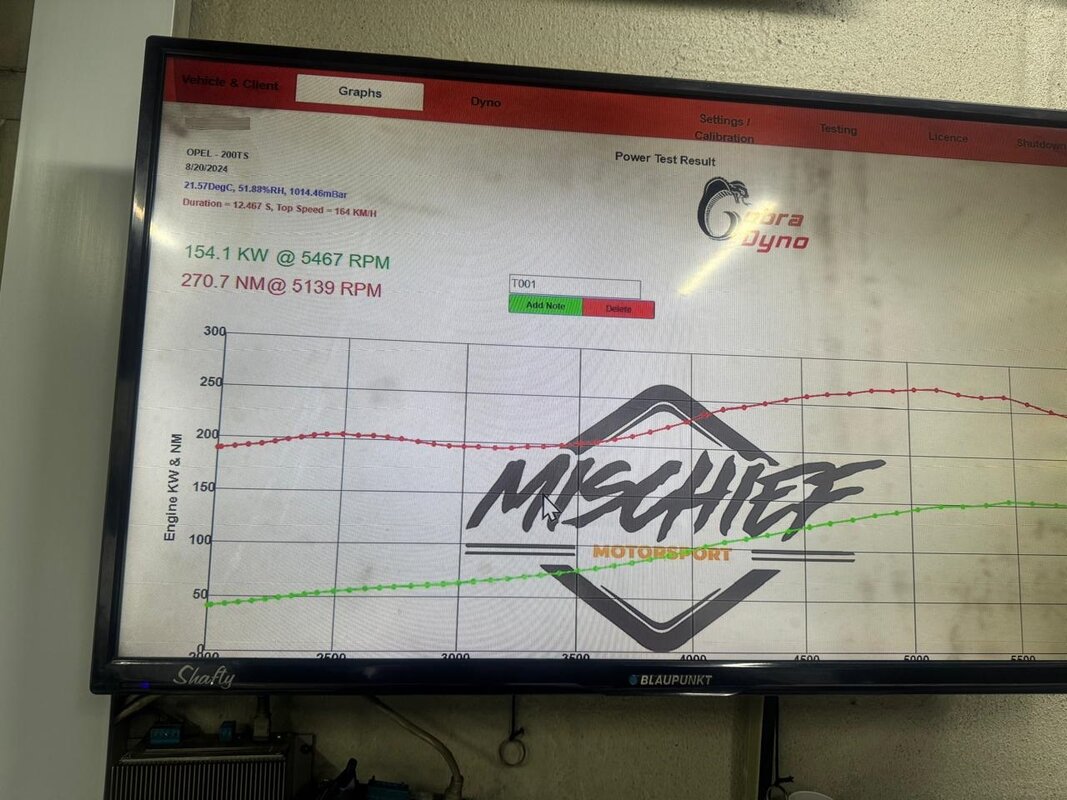
For the power junkies, here’s a dyno run from 2024, still plenty fresh for a 30year old car. Note how the power band builds, and from 4000-6000rpm it’s all-systems-go, old school is cool
The next update will be where we started tackling the car once it arrived in JHB…
It has been a rather frantic and intensive 2 months since getting the car. I have lots of updates to share, but before we get to that, I would like to specifically mention some specific things which helped persuade me that this is a good idea, haha.
I may have eluded to it previously, but the car has a solid maintenance record with the previous owner, who in turn also commented that when he bought the car 2-3 years ago, that owner had also maintained it properly (e.g. GM stamped/branded Cambelt, amongst other things).
First of all, the car has its original owner’s manual, as well as a Haynes manual. It also came with the original key (it has a small LED light in it), and a spare key. It also has an aftermarket remote alarm + anti-hijack system fitted.
Mechanically, there has been a solid amount of work put into the car. New Bilstein rear shocks, front shocks are “new” 2nd hand items (I may change these in the near future). New control arms fitted, new rear brake pads. A new LUK clutch was fitted about 18months ago. New cambelt and pulleys done last year. Gearbox selector shaft seals were done, as well as fluid change.
Here’s some pics of the inside of the box. Clean clean clean…
And the Unobtainium LSD showing "the cross":
Two days after concluding a deal, the seller sent me some pics of the car in pieces, and the turbocharger on a workbench. He had a spare replacement core sitting on his shelf, and he did notice a bit of an oil sweat under the turbo, so he decided to replace the core, out of goodwill, no questions asked, no additional payment required. I was stunned, as good deeds like this are few and far between these days.
For the power junkies, here’s a dyno run from 2024, still plenty fresh for a 30year old car. Note how the power band builds, and from 4000-6000rpm it’s all-systems-go, old school is cool
The next update will be where we started tackling the car once it arrived in JHB…
gavsadler
///Member
Update Apr-2026:
Aaaand, the car arrived safely in JHB around the 3rd week of April. I elected to use Exotic Carriers for the transport, as it is an enclosed truck. The deal also included a number of spare parts, which filled the boot and back seat to some degree, so I was more comfortable having everything out of sight, specifically if the truck stopped anywhere or overnight during the trip up. All was well though,
Work was extremely busy though, so as much as I wanted to get stuck in doing various things, I had to pace myself. I had a game plan in mind, the intention was to do do some small jobs incrementally, things which could be done in one session, so-to-speak,
First up, when we washed the car, we noted that the wheel brush picked up some grease from inside the wheel barrel. Upon pulling the wheel off, we found that the CV boot was not properly secured to the CV joint, and as such, must have spewed CV grease all over the wheel. Thankfully this was a quick repair, but the associated cleaning took about 2-3 times as long. But all spewed grease was cleaned up.
Before and After:
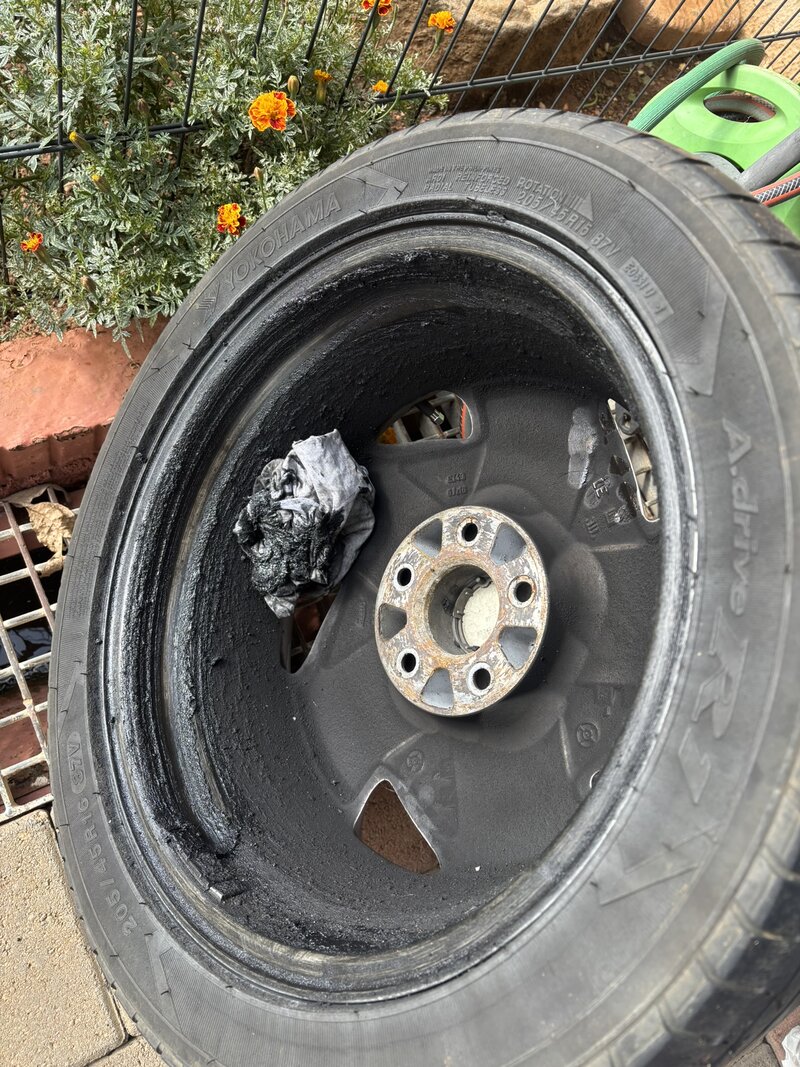
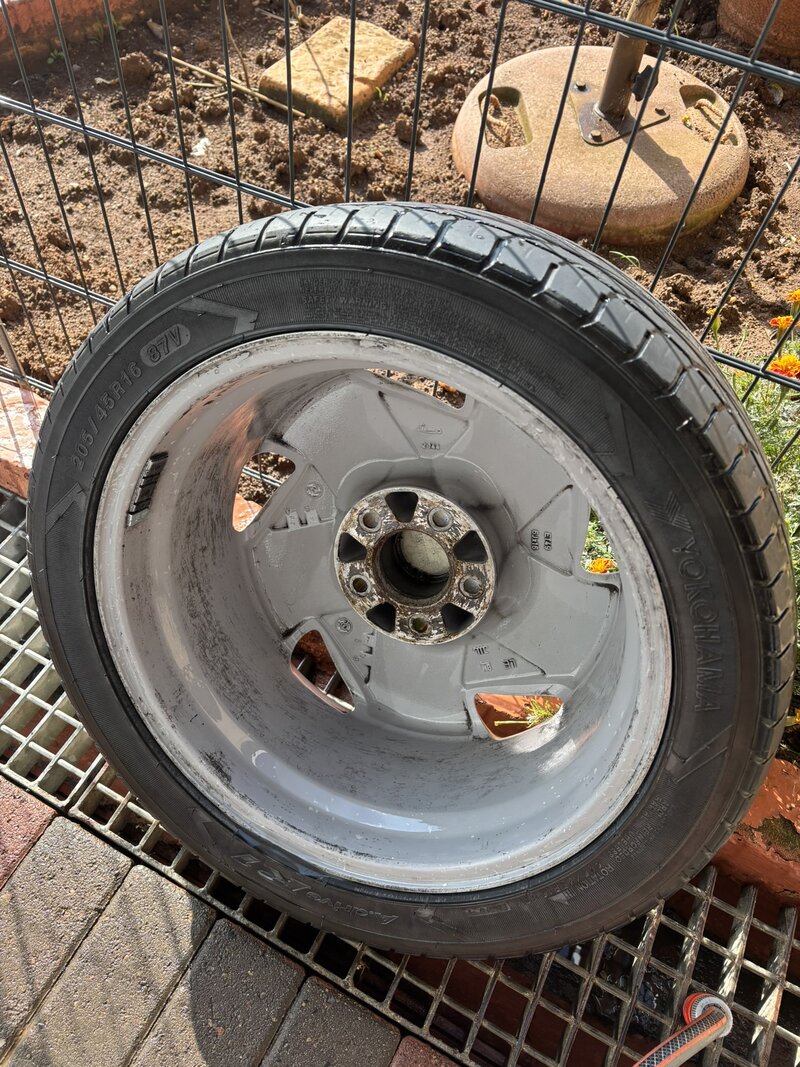
The rims will probably get refurbished later this year, and new tyres will be fitted, so for now, rigorous cleaning will have to do.
Dabbling in the engine bay, the heat shield for the turbo was also looking a bit caked up with corrosion. This was a quick 20min job. 3 bolts to remove, then 10mins in the bench vice, and I polished it up with a brass wire disc in my electric drill, before reinstalling, much better:
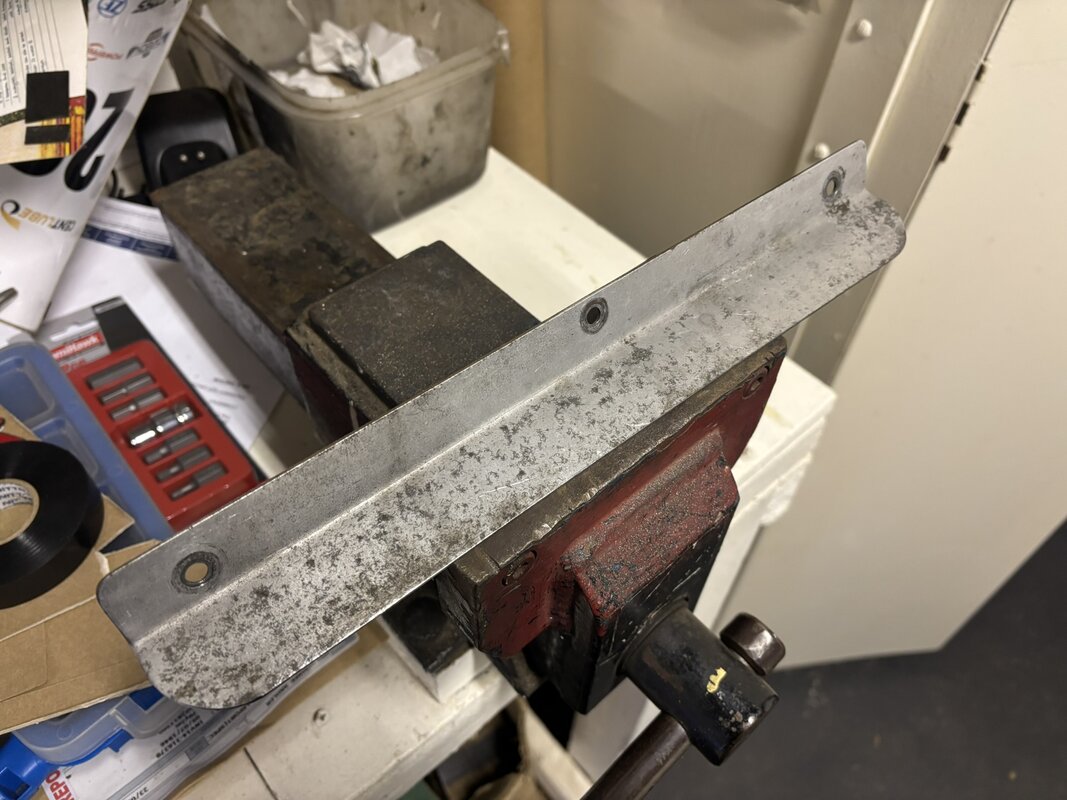
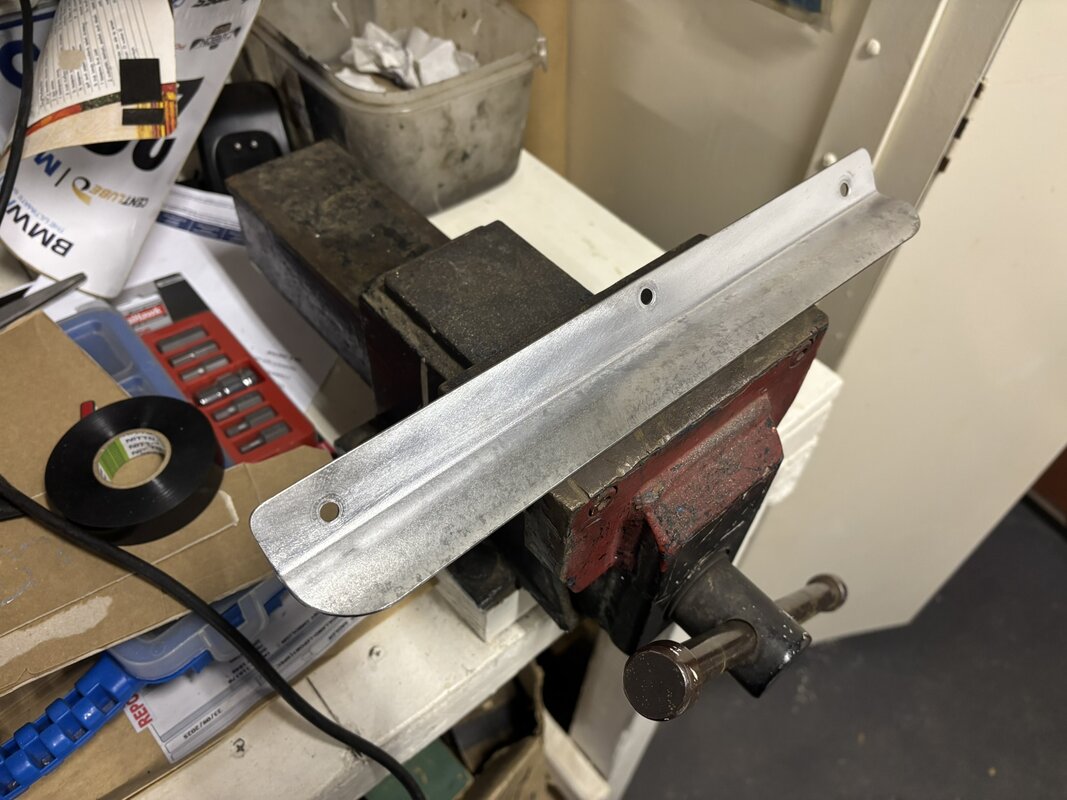
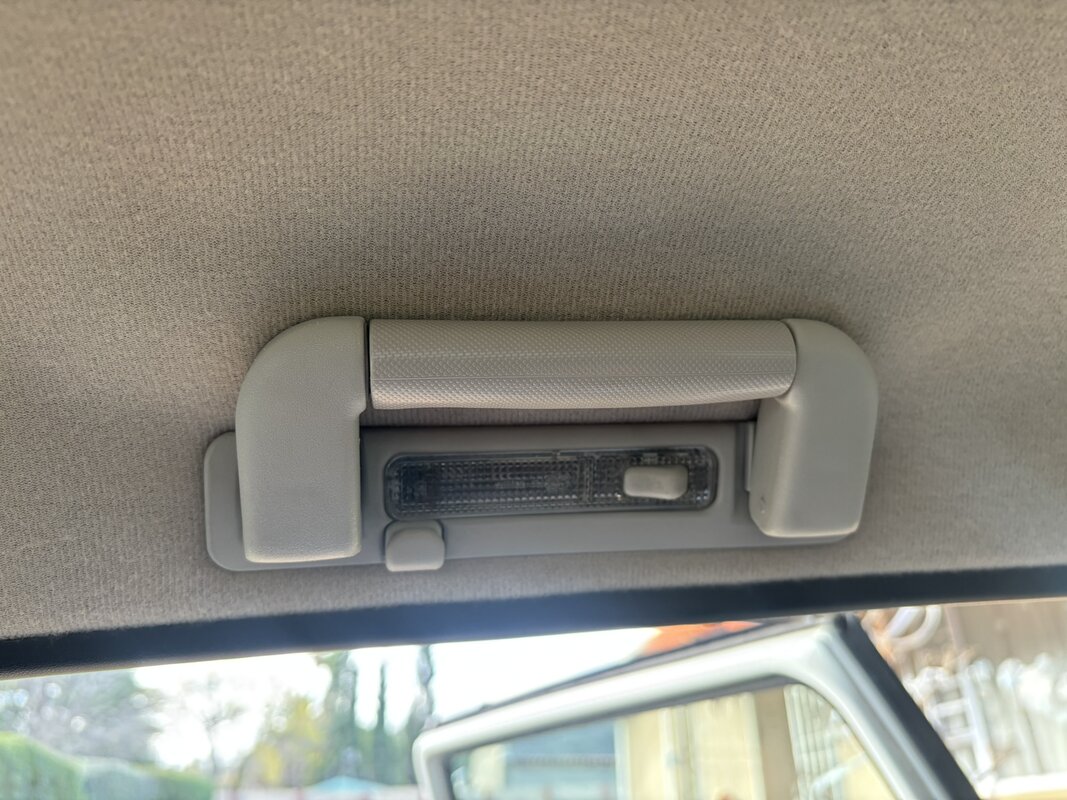
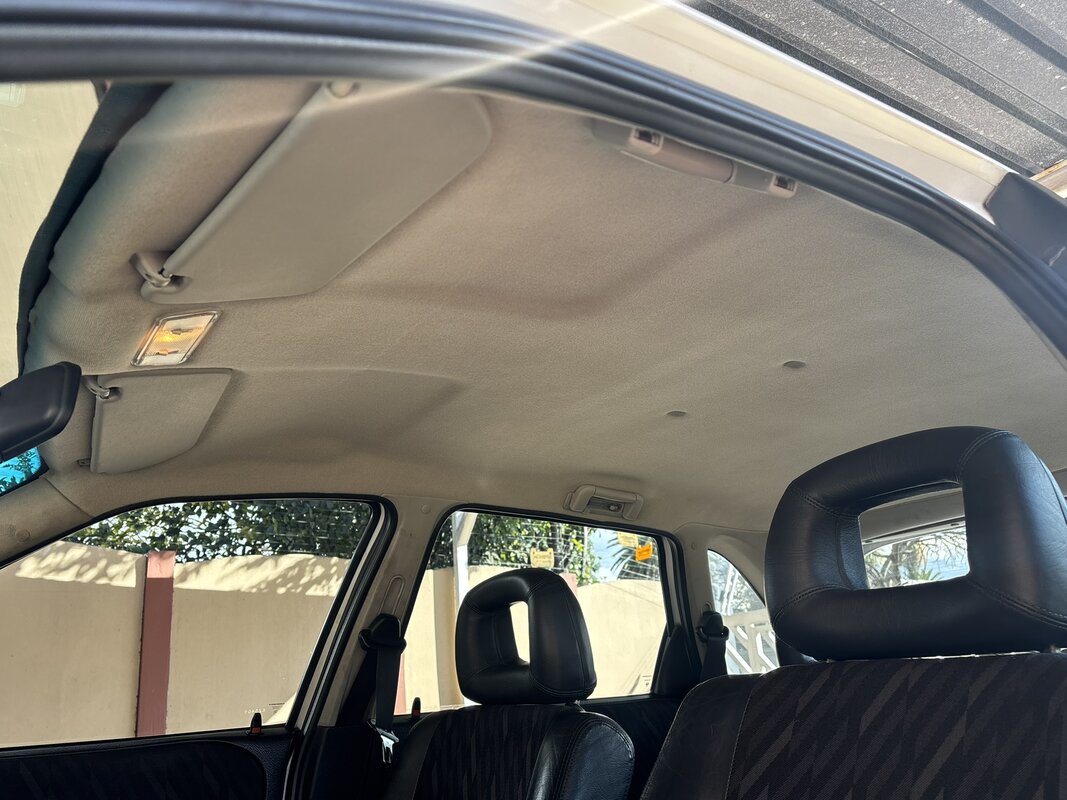
My trail of thought and attention then turned to the interior. I decided to tackle things top-to-bottom. The original headliner in the car is still in fantastic condition, no sagging material, broken clips or bent board. This cleaned up really nicely with my top-secret mix, which also does not attack the glue of the fabric. I also removed all the grab handles, sunvisors and interior lights, and cleaned them up before reinstalling. Whilst it didn't look too bad beforehand, the after pics really to highlight the changes quite significantly.
Before cleaning:
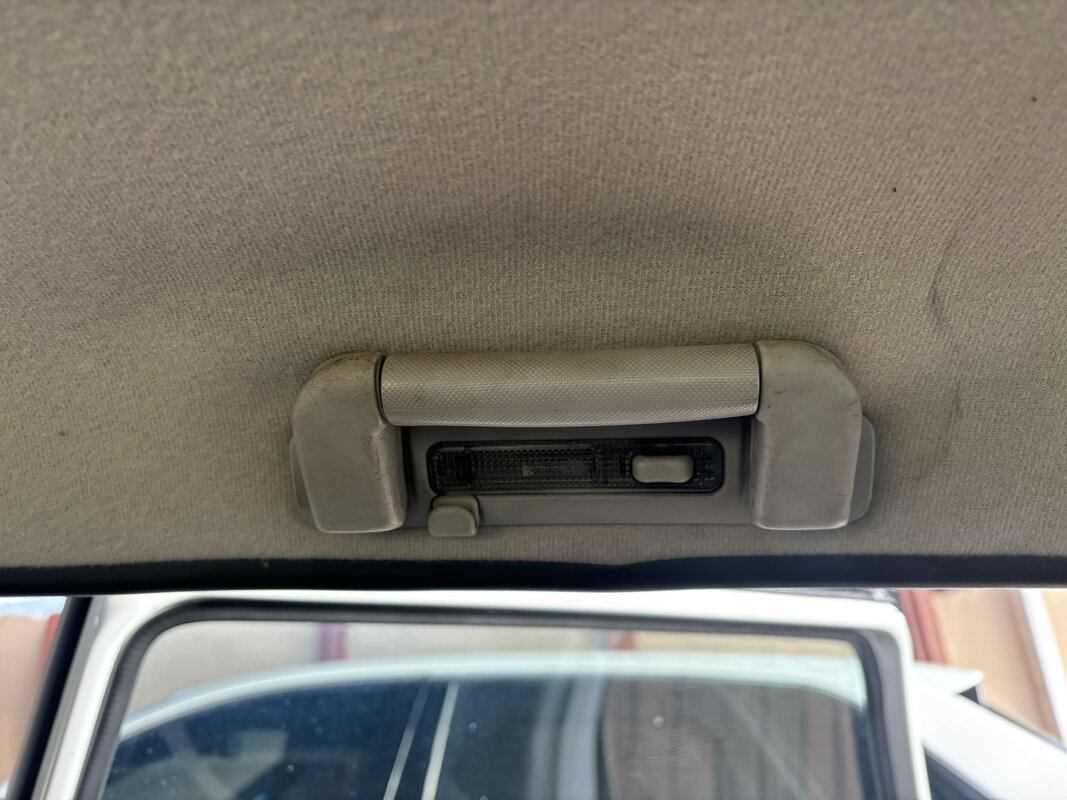
After cleaning:
Our first jobs on the body / paint were in the door jambs. There was a fair amount of Waxoil residue and runs all over the door jambs. These yellowy brown streaks and runs looked rather awful on the white paint. They have probably been there for 30-odd years since the car left the production line, but to me it was a real eyesore. So we first spent a solid 8hrs with various cleaning solvents to remove the old goop. Once everything was cleaned up, we clayed the paint, and polished and sealed the door jambs. This was probably another 8hrs of work. As you can see, my "quick jobs" line of thought escalated quite quickly. 2 days just to clean door jambs, lol. This set the scene for things to come...
Unfortunately, I don't have any pics of the before and after here, but it is looking great now.
That pretty much wrapped up the last 10 days of April. Moving into May, less work stress and more free time meant that things could properly ramp up on the car. I think it's also a bit of a drug / disease, once you start, you can't stop. Having seen the results achieved with our efforts so far, I was really keen to push on and dial in the rest of the interior, as well as moving on to the exterior and mechanical bits.
Aaaand, the car arrived safely in JHB around the 3rd week of April. I elected to use Exotic Carriers for the transport, as it is an enclosed truck. The deal also included a number of spare parts, which filled the boot and back seat to some degree, so I was more comfortable having everything out of sight, specifically if the truck stopped anywhere or overnight during the trip up. All was well though,
Work was extremely busy though, so as much as I wanted to get stuck in doing various things, I had to pace myself. I had a game plan in mind, the intention was to do do some small jobs incrementally, things which could be done in one session, so-to-speak,
First up, when we washed the car, we noted that the wheel brush picked up some grease from inside the wheel barrel. Upon pulling the wheel off, we found that the CV boot was not properly secured to the CV joint, and as such, must have spewed CV grease all over the wheel. Thankfully this was a quick repair, but the associated cleaning took about 2-3 times as long. But all spewed grease was cleaned up.
Before and After:
The rims will probably get refurbished later this year, and new tyres will be fitted, so for now, rigorous cleaning will have to do.
Dabbling in the engine bay, the heat shield for the turbo was also looking a bit caked up with corrosion. This was a quick 20min job. 3 bolts to remove, then 10mins in the bench vice, and I polished it up with a brass wire disc in my electric drill, before reinstalling, much better:
My trail of thought and attention then turned to the interior. I decided to tackle things top-to-bottom. The original headliner in the car is still in fantastic condition, no sagging material, broken clips or bent board. This cleaned up really nicely with my top-secret mix, which also does not attack the glue of the fabric. I also removed all the grab handles, sunvisors and interior lights, and cleaned them up before reinstalling. Whilst it didn't look too bad beforehand, the after pics really to highlight the changes quite significantly.
Before cleaning:
After cleaning:
Our first jobs on the body / paint were in the door jambs. There was a fair amount of Waxoil residue and runs all over the door jambs. These yellowy brown streaks and runs looked rather awful on the white paint. They have probably been there for 30-odd years since the car left the production line, but to me it was a real eyesore. So we first spent a solid 8hrs with various cleaning solvents to remove the old goop. Once everything was cleaned up, we clayed the paint, and polished and sealed the door jambs. This was probably another 8hrs of work. As you can see, my "quick jobs" line of thought escalated quite quickly. 2 days just to clean door jambs, lol. This set the scene for things to come...
Unfortunately, I don't have any pics of the before and after here, but it is looking great now.
That pretty much wrapped up the last 10 days of April. Moving into May, less work stress and more free time meant that things could properly ramp up on the car. I think it's also a bit of a drug / disease, once you start, you can't stop. Having seen the results achieved with our efforts so far, I was really keen to push on and dial in the rest of the interior, as well as moving on to the exterior and mechanical bits.


Salt
///Member
Well done Gav. That roof liniing looks flippen brand new - those two comparison photos are day and night.Update Apr-2026:
Aaaand, the car arrived safely in JHB around the 3rd week of April. I elected to use Exotic Carriers for the transport, as it is an enclosed truck. The deal also included a number of spare parts, which filled the boot and back seat to some degree, so I was more comfortable having everything out of sight, specifically if the truck stopped anywhere or overnight during the trip up. All was well though,
Work was extremely busy though, so as much as I wanted to get stuck in doing various things, I had to pace myself. I had a game plan in mind, the intention was to do do some small jobs incrementally, things which could be done in one session, so-to-speak,
First up, when we washed the car, we noted that the wheel brush picked up some grease from inside the wheel barrel. Upon pulling the wheel off, we found that the CV boot was not properly secured to the CV joint, and as such, must have spewed CV grease all over the wheel. Thankfully this was a quick repair, but the associated cleaning took about 2-3 times as long. But all spewed grease was cleaned up.
Before and After:
View attachment 34907
View attachment 34908
The rims will probably get refurbished later this year, and new tyres will be fitted, so for now, rigorous cleaning will have to do.
Dabbling in the engine bay, the heat shield for the turbo was also looking a bit caked up with corrosion. This was a quick 20min job. 3 bolts to remove, then 10mins in the bench vice, and I polished it up with a brass wire disc in my electric drill, before reinstalling, much better:
View attachment 34910
View attachment 34911
My trail of thought and attention then turned to the interior. I decided to tackle things top-to-bottom. The original headliner in the car is still in fantastic condition, no sagging material, broken clips or bent board. This cleaned up really nicely with my top-secret mix, which also does not attack the glue of the fabric. I also removed all the grab handles, sunvisors and interior lights, and cleaned them up before reinstalling. Whilst it didn't look too bad beforehand, the after pics really to highlight the changes quite significantly.
Before cleaning:
View attachment 34905
After cleaning:
View attachment 34906
View attachment 34909
Our first jobs on the body / paint were in the door jambs. There was a fair amount of Waxoil residue and runs all over the door jambs. These yellowy brown streaks and runs looked rather awful on the white paint. They have probably been there for 30-odd years since the car left the production line, but to me it was a real eyesore. So we first spent a solid 8hrs with various cleaning solvents to remove the old goop. Once everything was cleaned up, we clayed the paint, and polished and sealed the door jambs. This was probably another 8hrs of work. As you can see, my "quick jobs" line of thought escalated quite quickly. 2 days just to clean door jambs, lol. This set the scene for things to come...
Unfortunately, I don't have any pics of the before and after here, but it is looking great now.
That pretty much wrapped up the last 10 days of April. Moving into May, less work stress and more free time meant that things could properly ramp up on the car. I think it's also a bit of a drug / disease, once you start, you can't stop. Having seen the results achieved with our efforts so far, I was really keen to push on and dial in the rest of the interior, as well as moving on to the exterior and mechanical bits.

WIDEOPN-X5
Well-known member
Congrats on your unicorn Gavsaddler. Have to say I'm jealous. That was / is and awesome car.
A mate of mine from the early 90's (was actually ex brother in law's bestie but we became mates too) had the Astra tS and a Superboss. He built an extension to his house with a double volume roof and installed 2 hoists so he could store 6 cars in there as an additional to the triple garage on the other end of the house. He daily'd the tS but was also a big Alfa nut and had 4 of them when I last saw him.
A mate of mine from the early 90's (was actually ex brother in law's bestie but we became mates too
) had the Astra tS and a Superboss. He built an extension to his house with a double volume roof and installed 2 hoists so he could store 6 cars in there as an additional to the triple garage on the other end of the house. He daily'd the tS but was also a big Alfa nut and had 4 of them when I last saw him.
gavsadler
///Member
Update May-2026:
Even though I had a game plan in mind, nothing like some good ol’ scatterbrain to upset the applecart. I had started on the interior, but at the same time, I wanted to attend to some of the bug bear items.
Headlights and indicators: A contact managed to source some brand new, aftermarket replacements. These were ordered and paid for at the end of April. More about this later on.
Badges: The front bumper had a “GSI 16vT” badge, obviously not to my taste, so this was carefully removed a few days after getting the car. You will notice it’s omission in subsequent pics. While on the topic of badges, the rear emblems had been repainted in a previous life, with the “tS” part being in bright red. Again, not to my liking, so I had good intentions to remove this badge and respray it. After carefully removing it, I proceeded to apply some paint stripper to the badge, to remove the paint thoroughly in preparation for fresh silver. 30mins later, when I checked on progress, there was considerable progress for sure! The paint stripper had eaten through the paint, but had also started to attack the plastic and dissolve the badge. %#$#&! I’m too annoyed and embarrassed to share pics of this abomination.
It was so frail, the badge actually broke in half. Even after cleaning all the paint stripper off, I gave it a coat of paint, but it just looked terrible. Now where on earth would a person find new badges? Maybe in the same isle as hen’s teeth at the local GTFO retail store.
Thankfully, the ex-owner has a contact who has taken moulds of many of the older Opel badges, and can reproduce them on a 3D printer. Winner! So new badges were ordered, to come at a later stage.
So, with these 2 bug bear jobs (lights and badges) awaiting replacement parts, I decided to move onto the next bugbear, that being the...
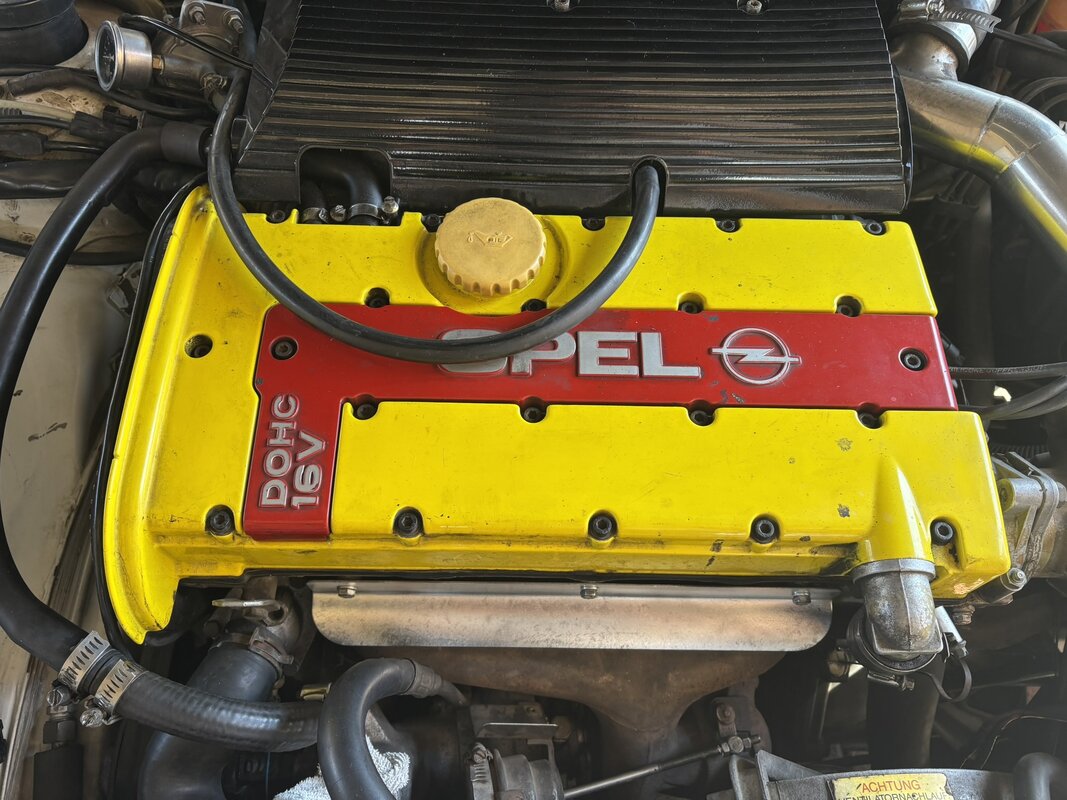
Yellow tappet cover and cambelt cover: I planned to do this over a weekend, which would give enough time to clean, prep and paint everything without leaving the motor open and exposed to the elements for too long.
Some pics beforehand:
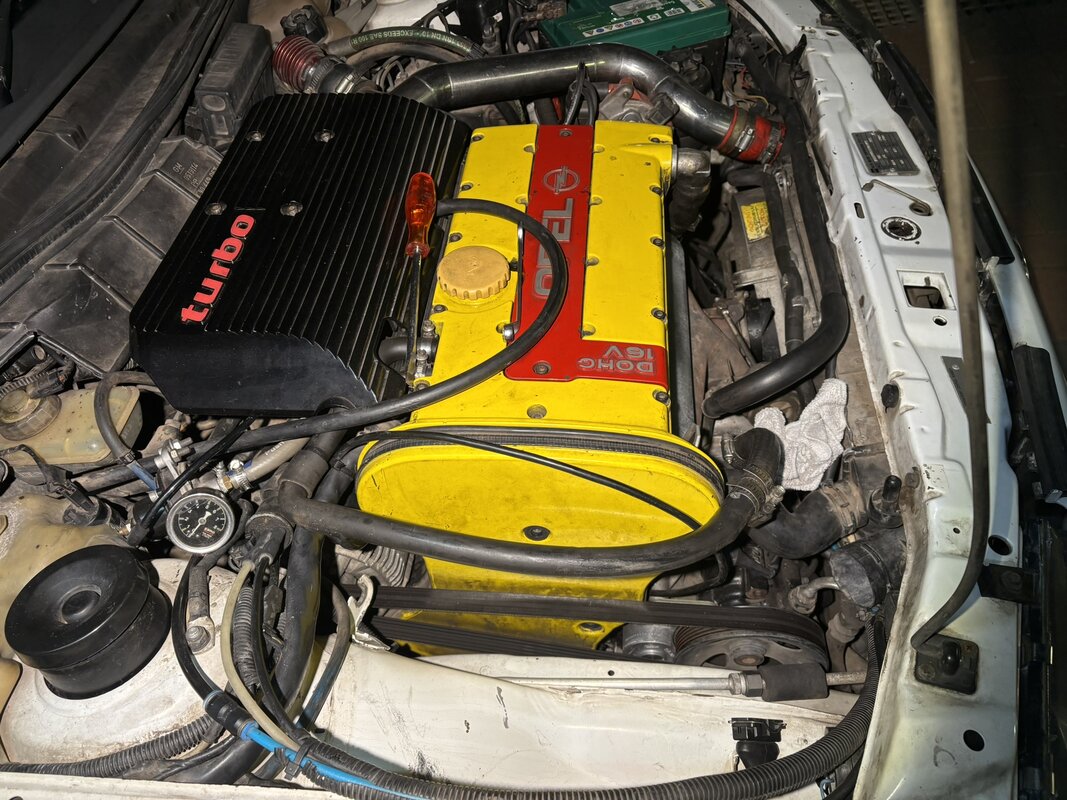
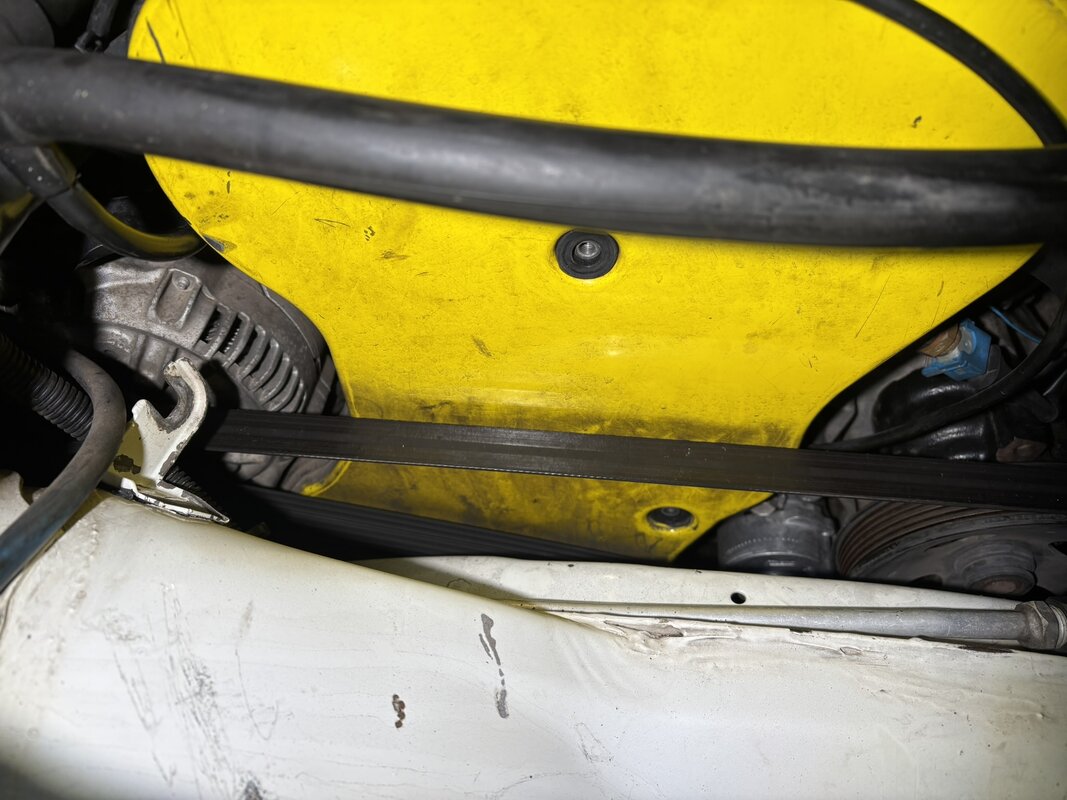
After cleaning the cover, prior to starting with the paint stripper:
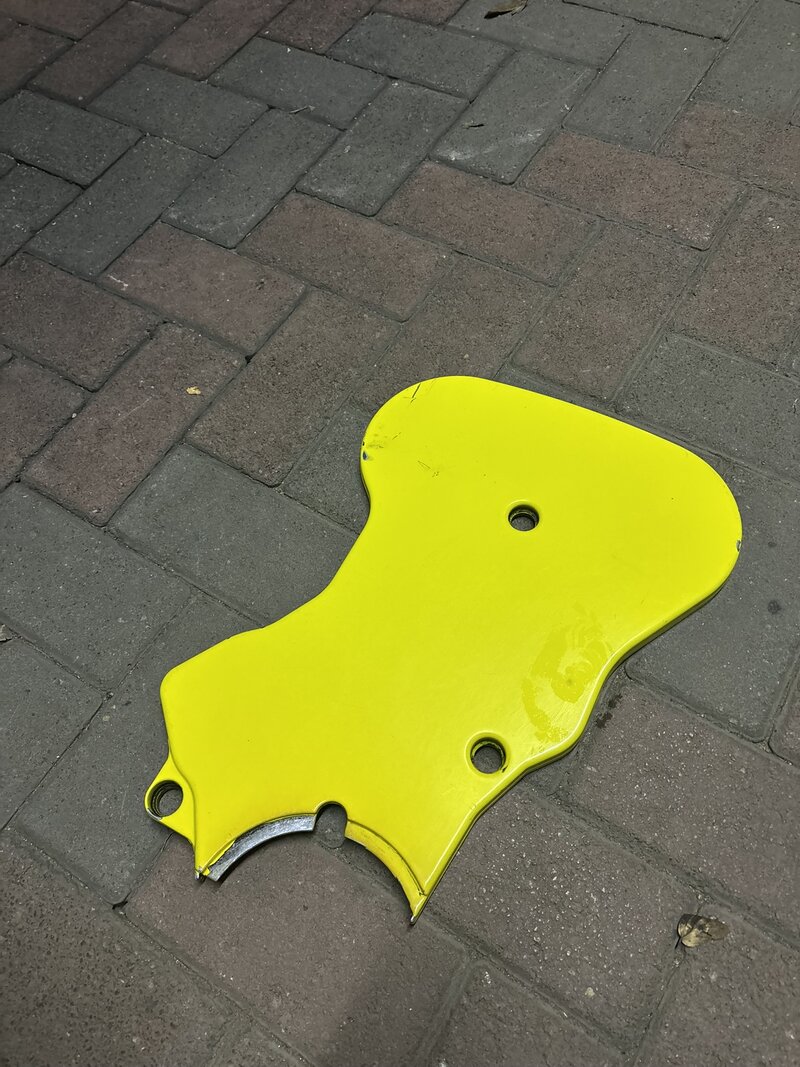
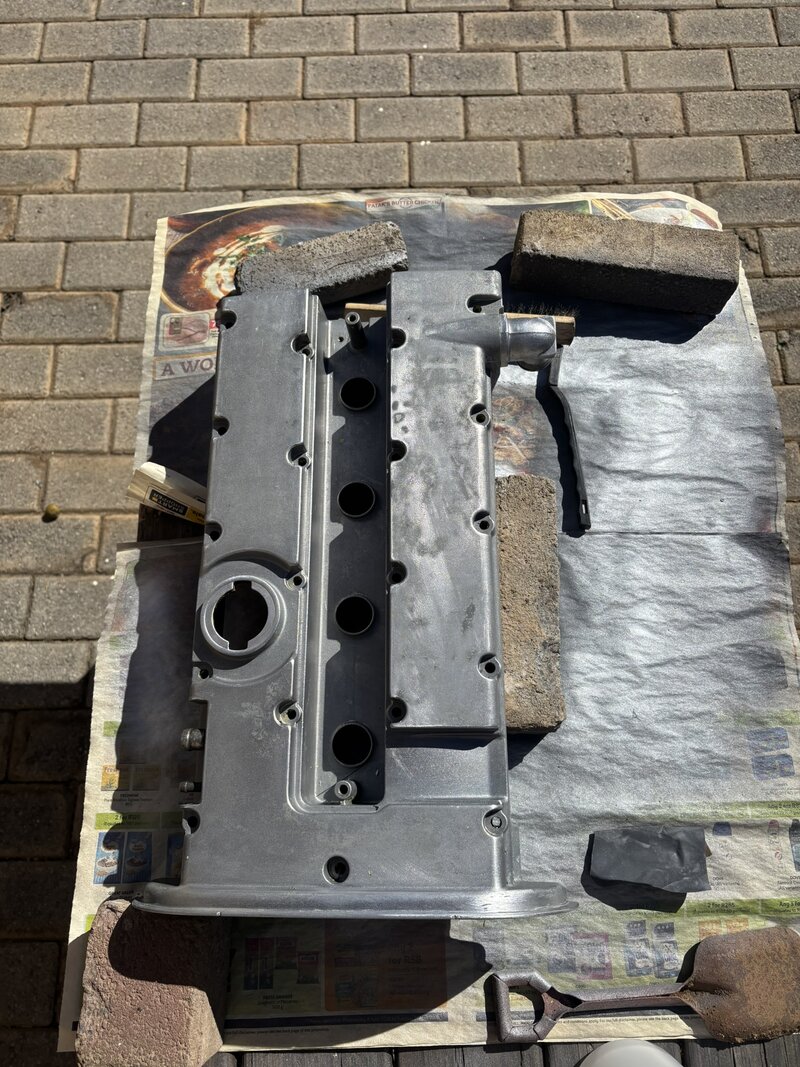
Then, using the %$#@& paint stripper, I tackled both covers. It did take some time, and multiple reapplications, together with use of some brushes, but all the old paint was removed, leaving bare surfaces for primer and paint.
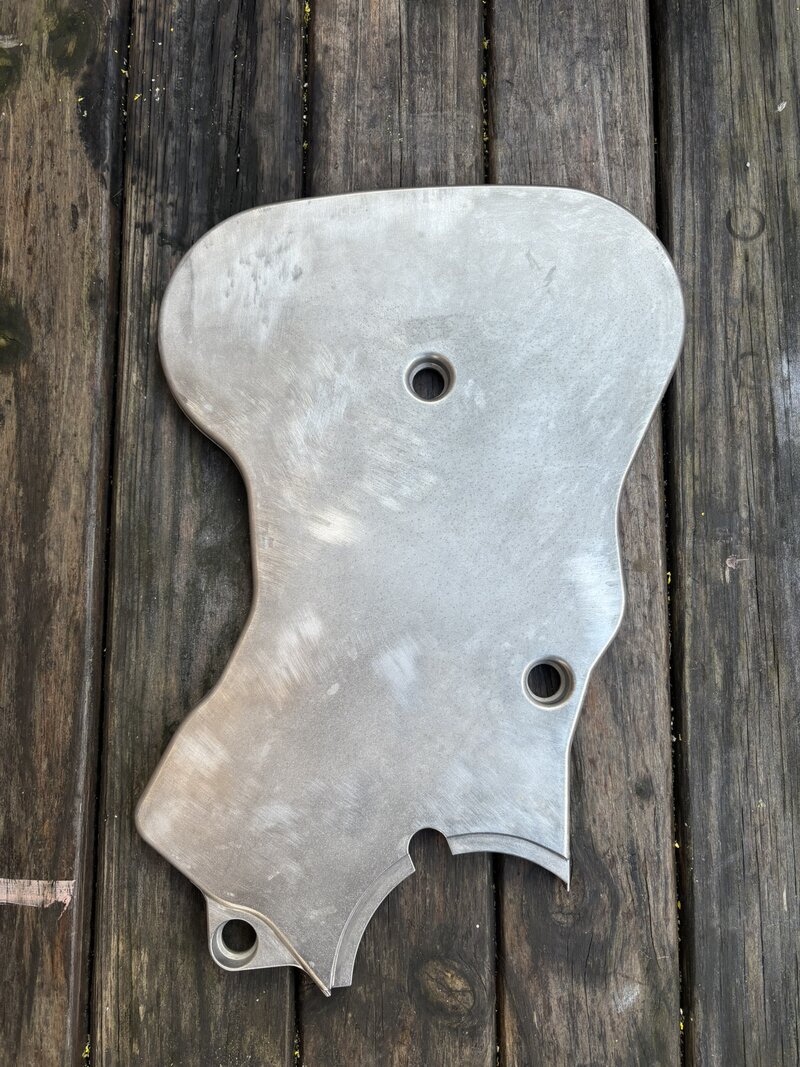
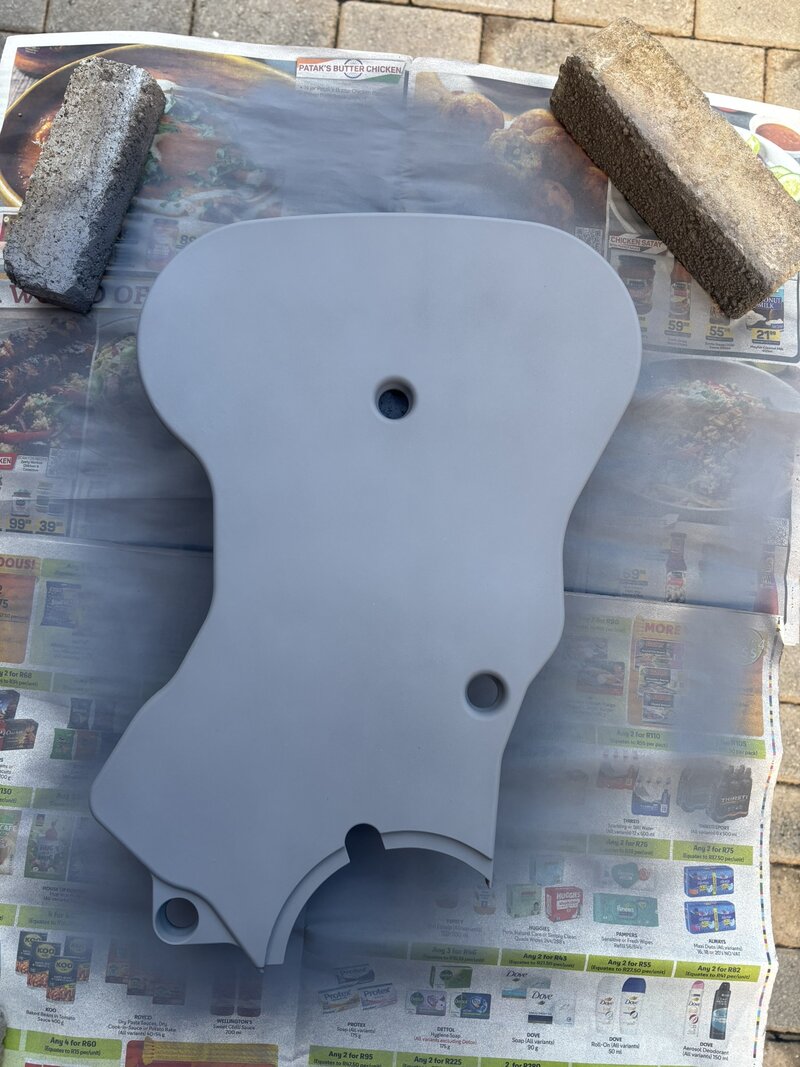
Primer applied:
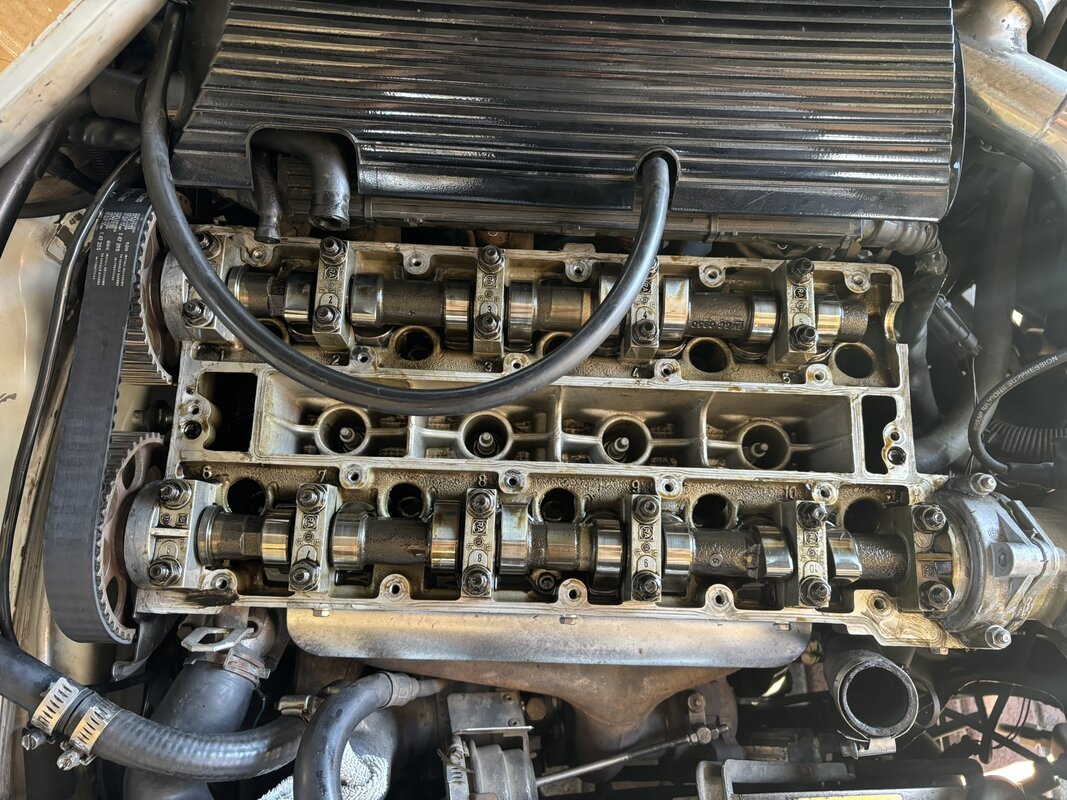
The cams and everything else in the valvetrain was looking pretty good too:
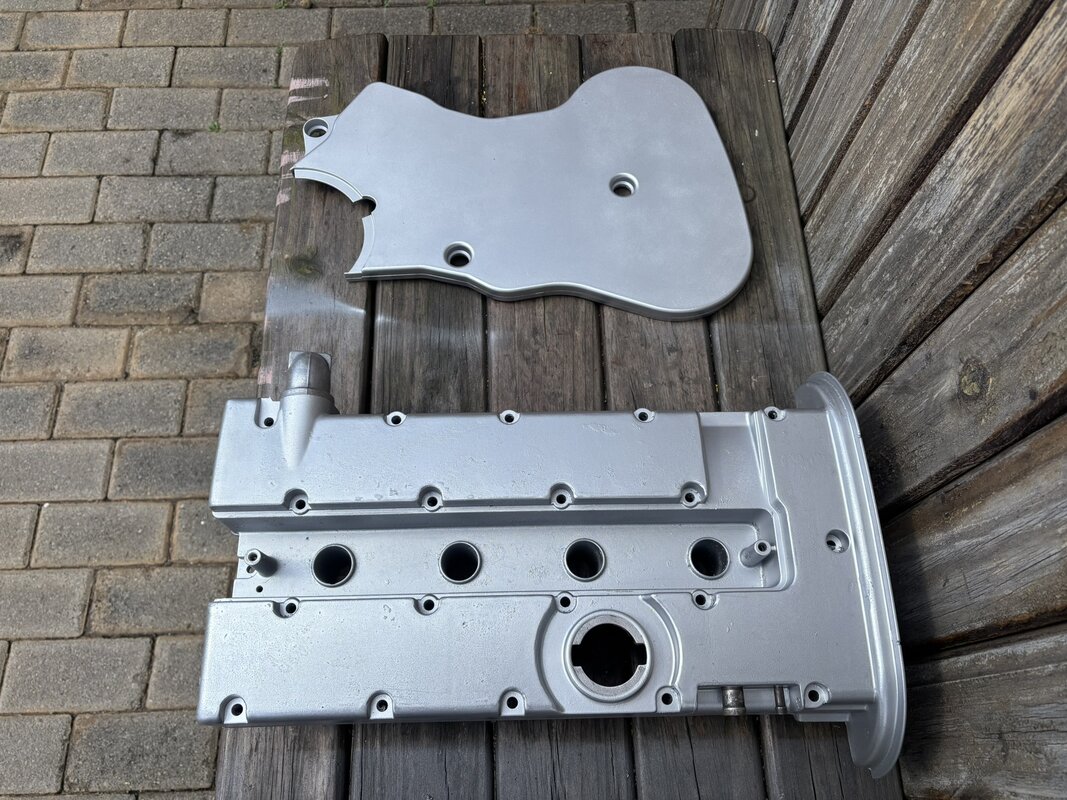
After painting:
Reinstalled and job done. Overall, I would rate the end result a 7/10. The finish isn't perfect, but it almost fits in perfectly with the age and patina of other parts. It doesn't look too new. I am however pleased with the outcome. Much much better for my eyes.
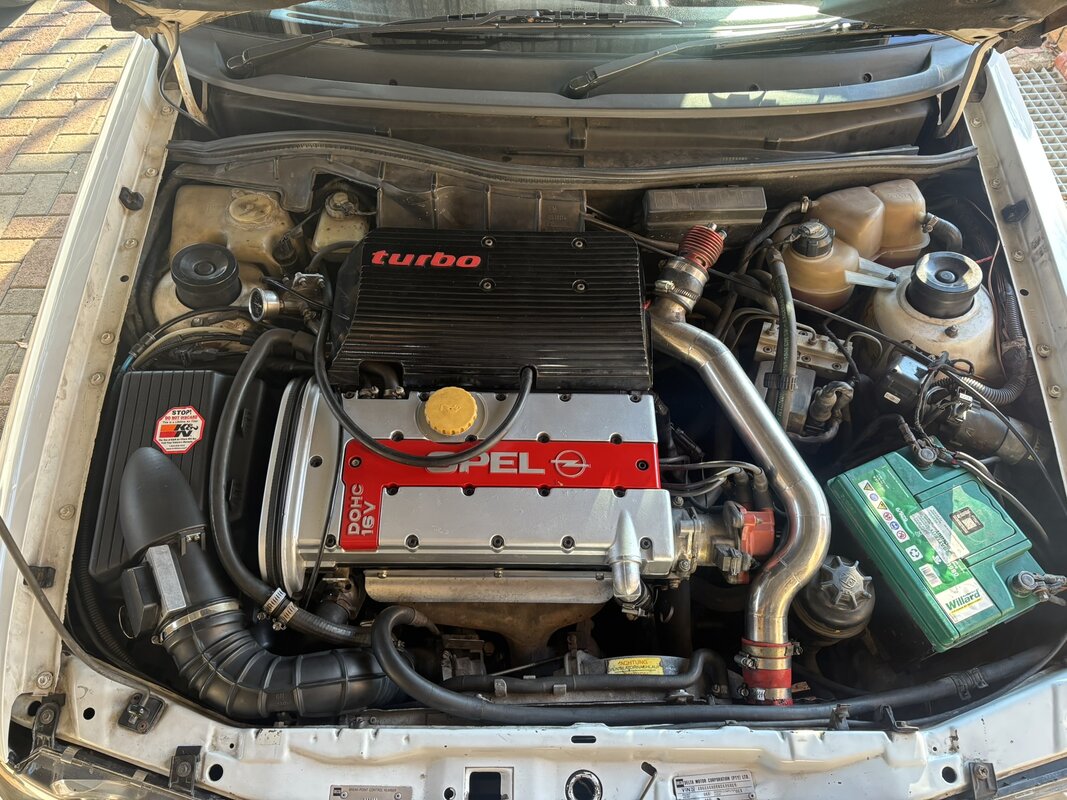
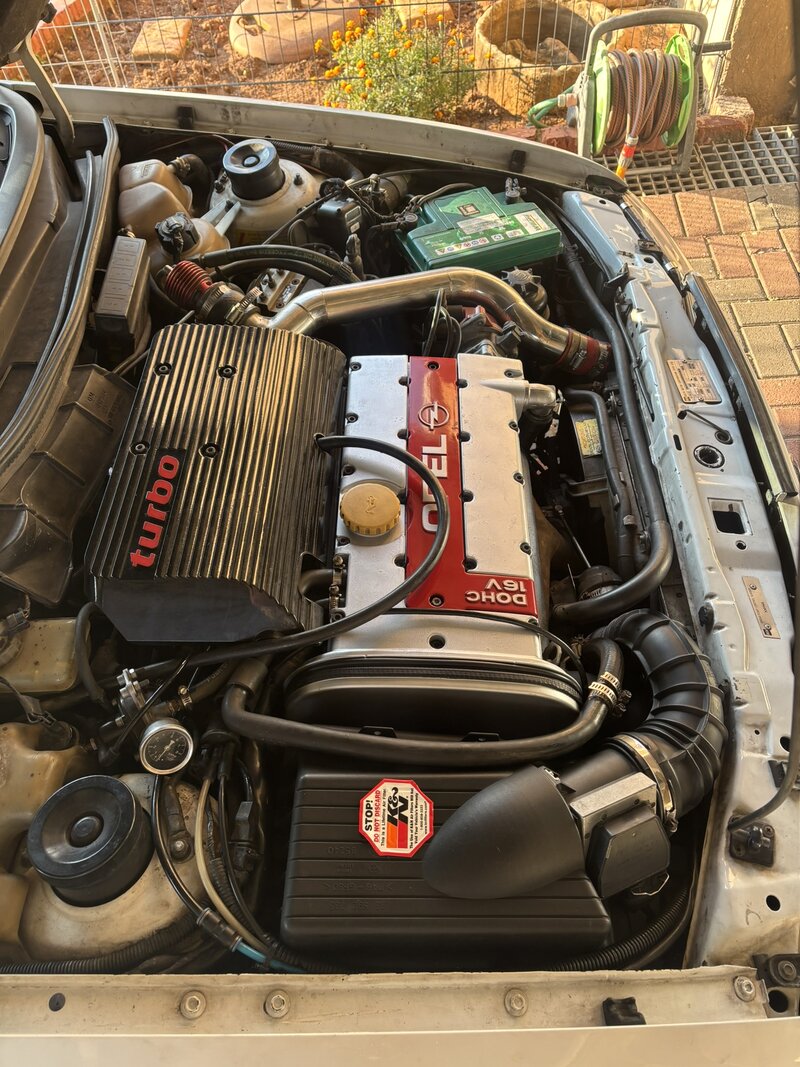
Time to move back to the interior. On the to-do list for the future, is to sort out the gear knob:
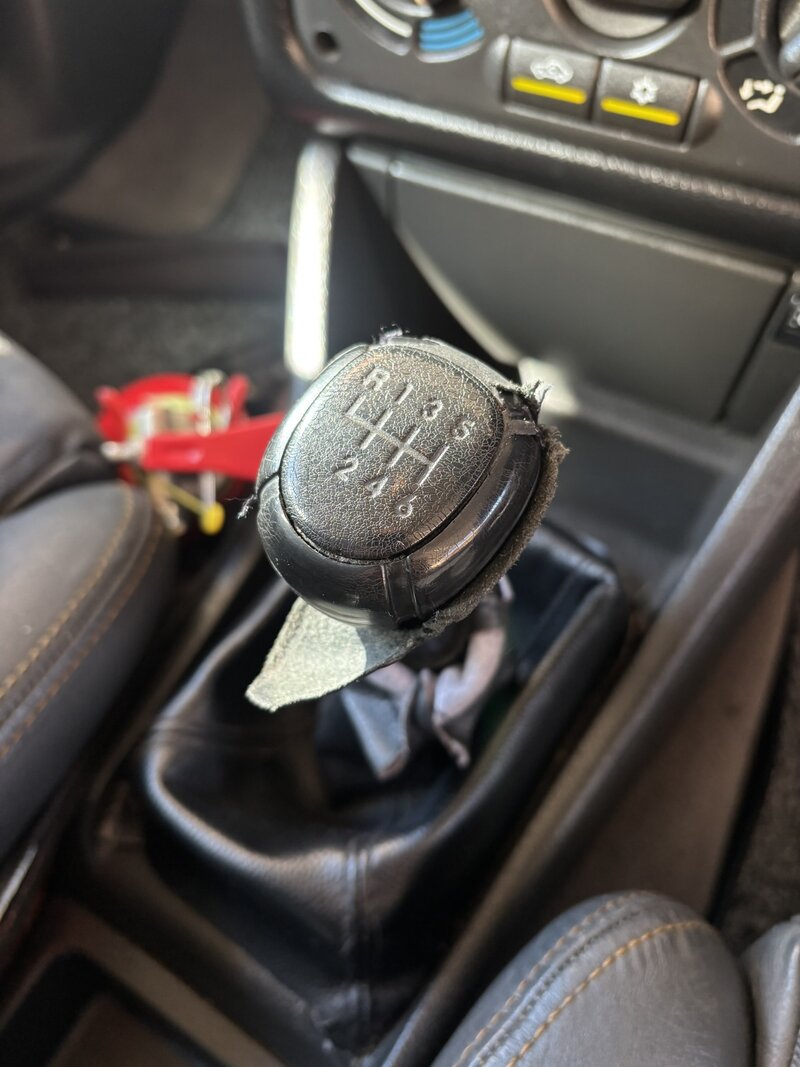
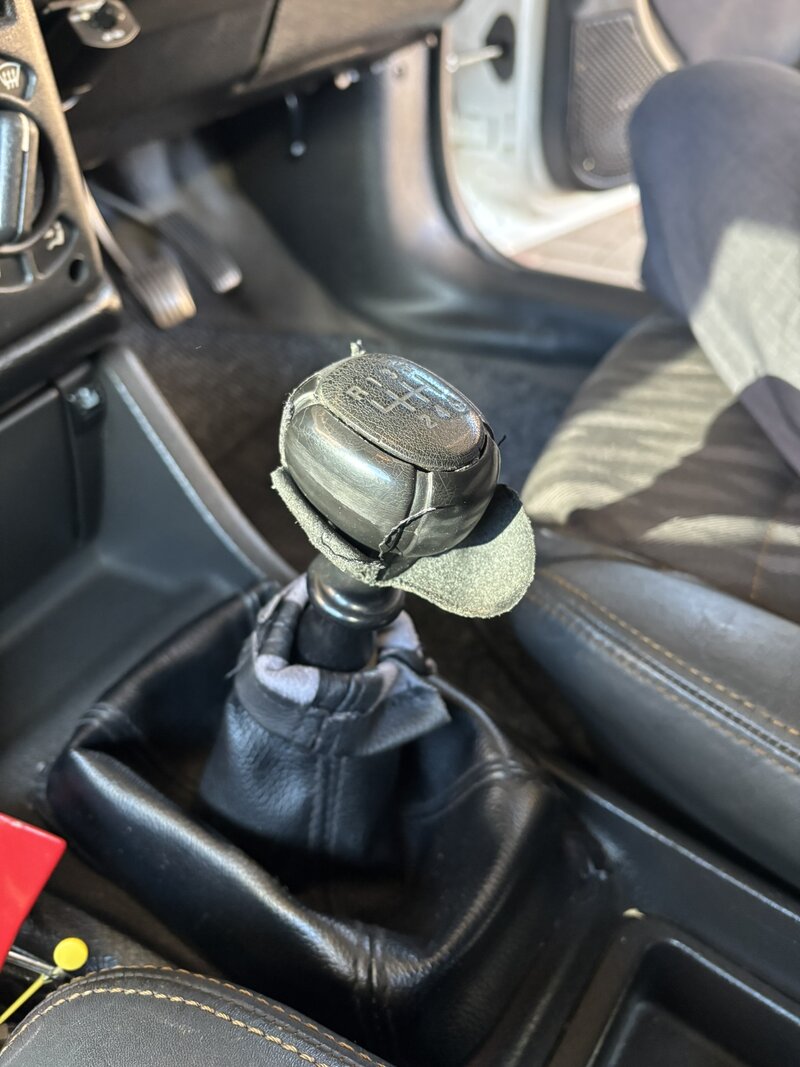
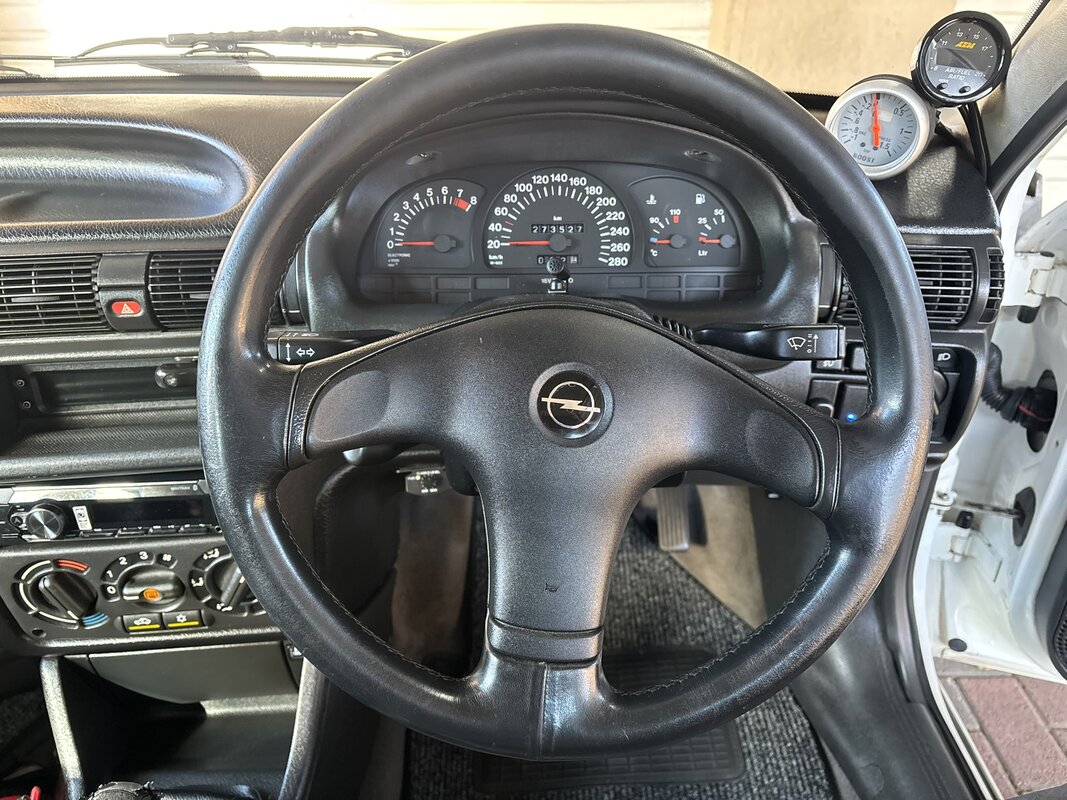
And the steering wheel. While it doesn't look too bad, some accumulated muck is discuising some wear on the leather. The dashtop gauges in the corner also need to be dealt with. Lastly, you can also get a glimpse of a clean door jamb:
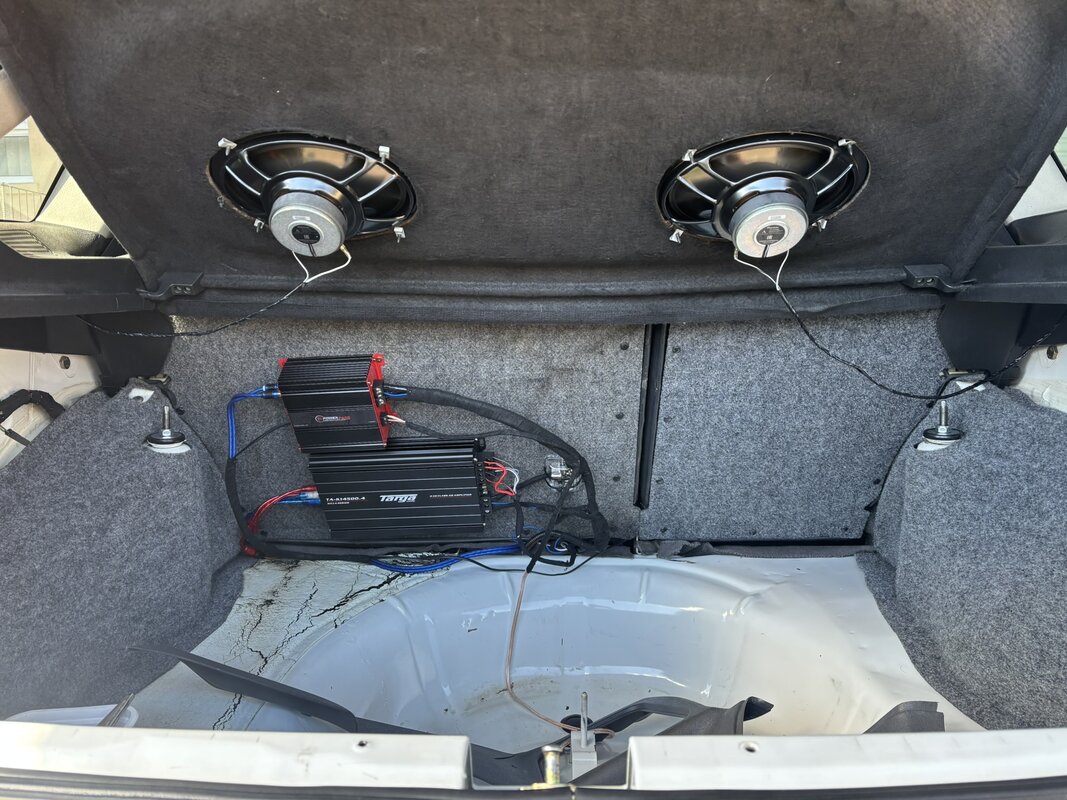
Having finished with the roof lining and door jambs, our focus turned to the boot area. Here things were quite tatty, and in need of some thorough cleaning. All the panels and carpeting were removed, and cleaning started. Painted areas received the same treatment as the door jambs (clean, clay, polish, seal). The carpeting was cleaned (extraction vacuum as well as spot treatment where needed), and then everything was reinstalled again.
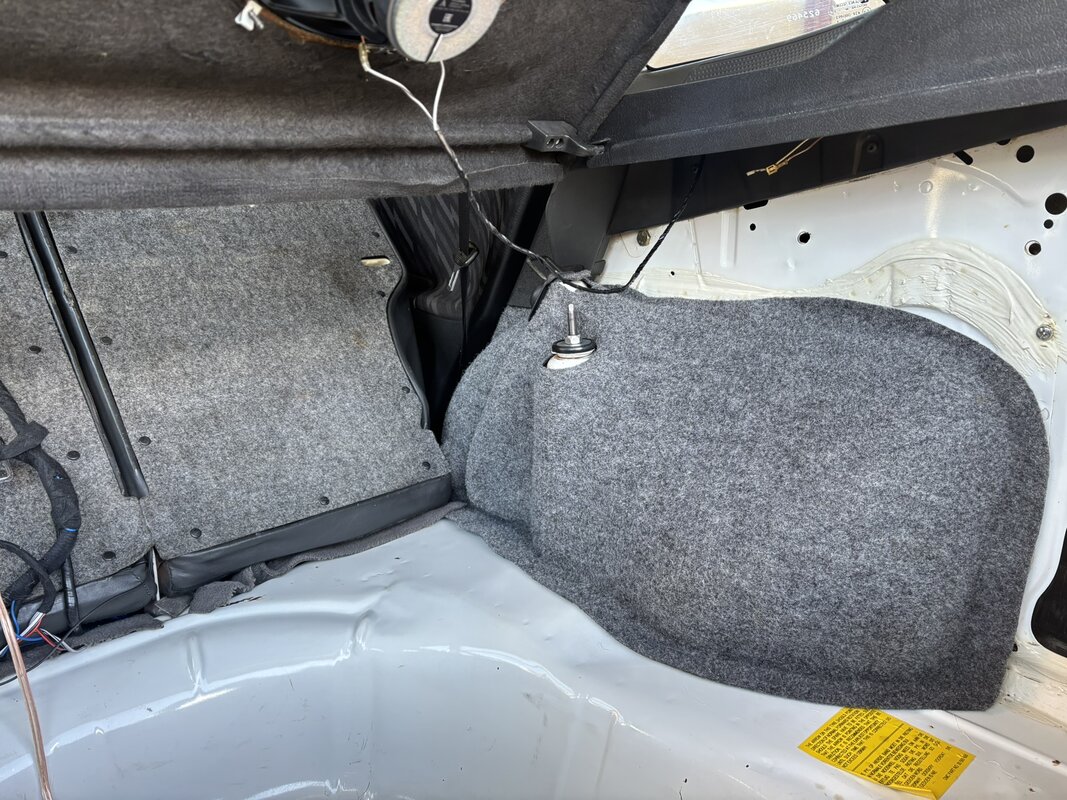
Here the wheel arch cover was cleaned, but the seatbacks had not been cleaned yet. Noticeable difference:
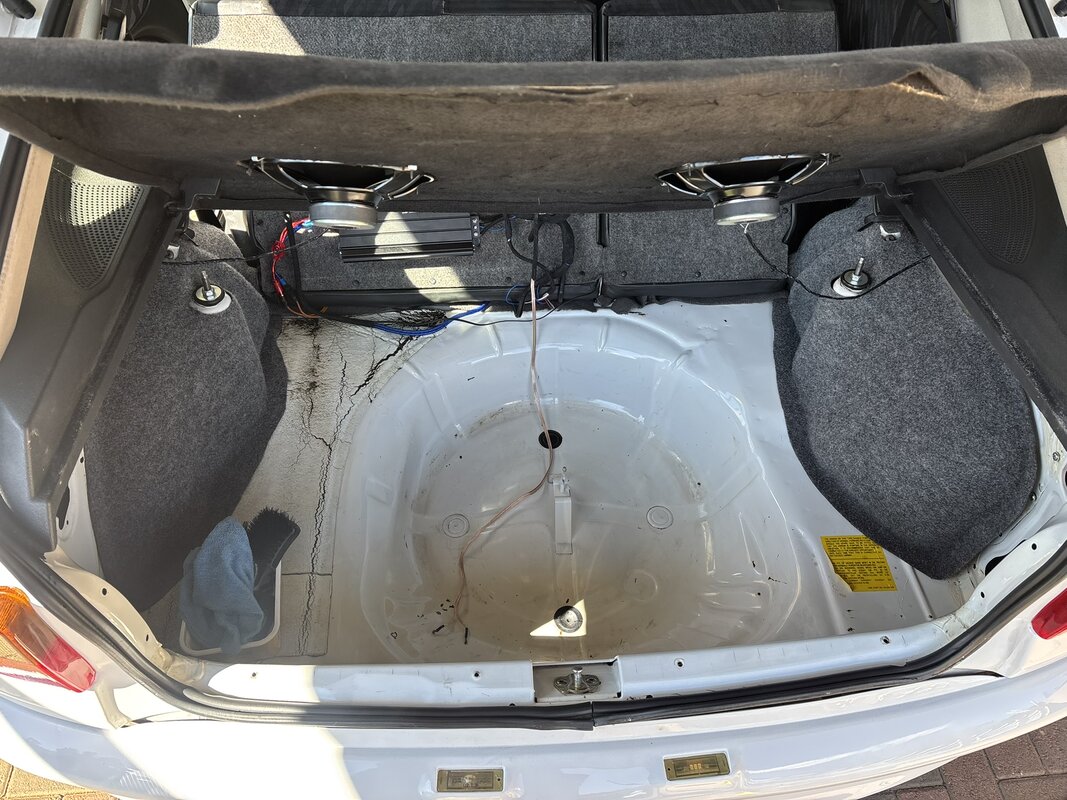
A cleaned and sorted spare wheel well:
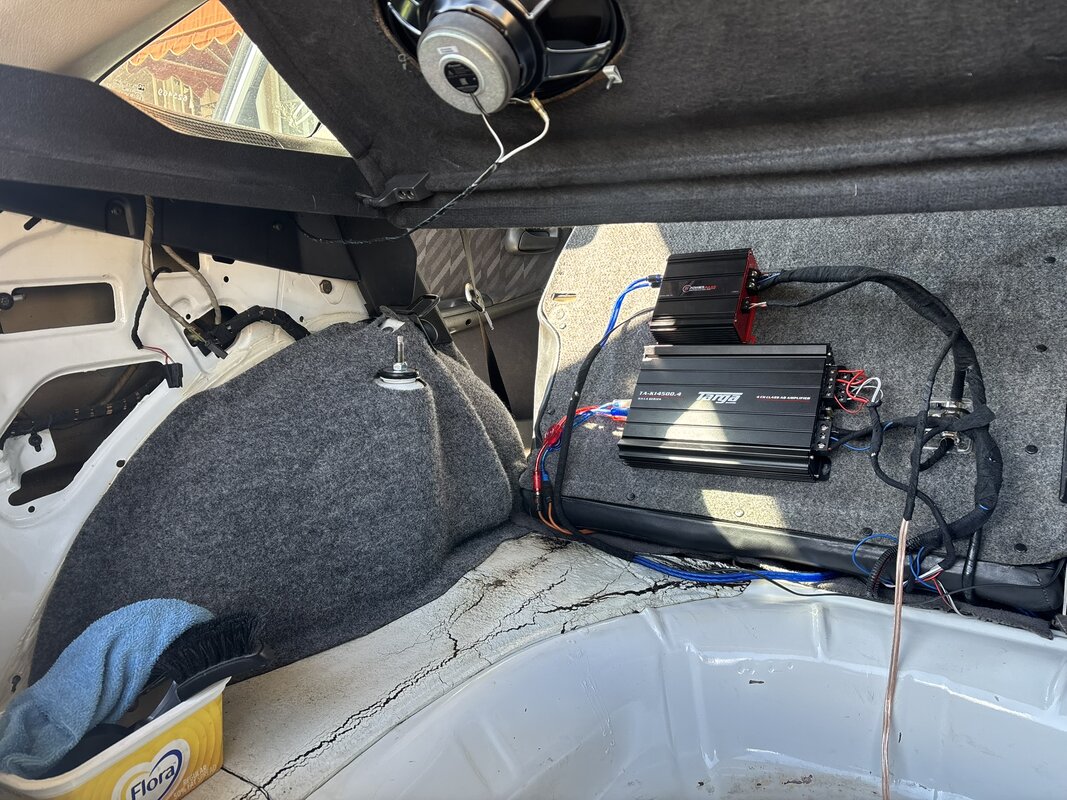
The LHS wheel arch liner cleaned, seatback behind amps not yet cleaned:
RHS seatback cleaned, LHS still to be cleaned:
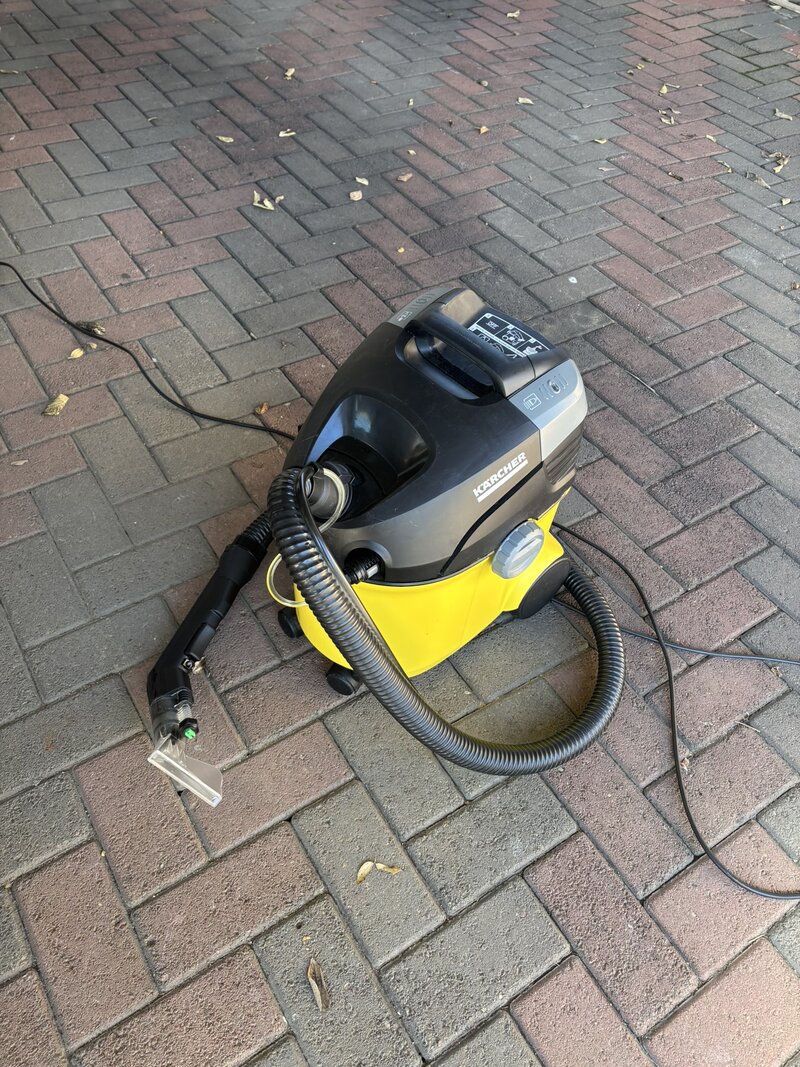
Our trusty Karcher working hard, with the worst still to come...
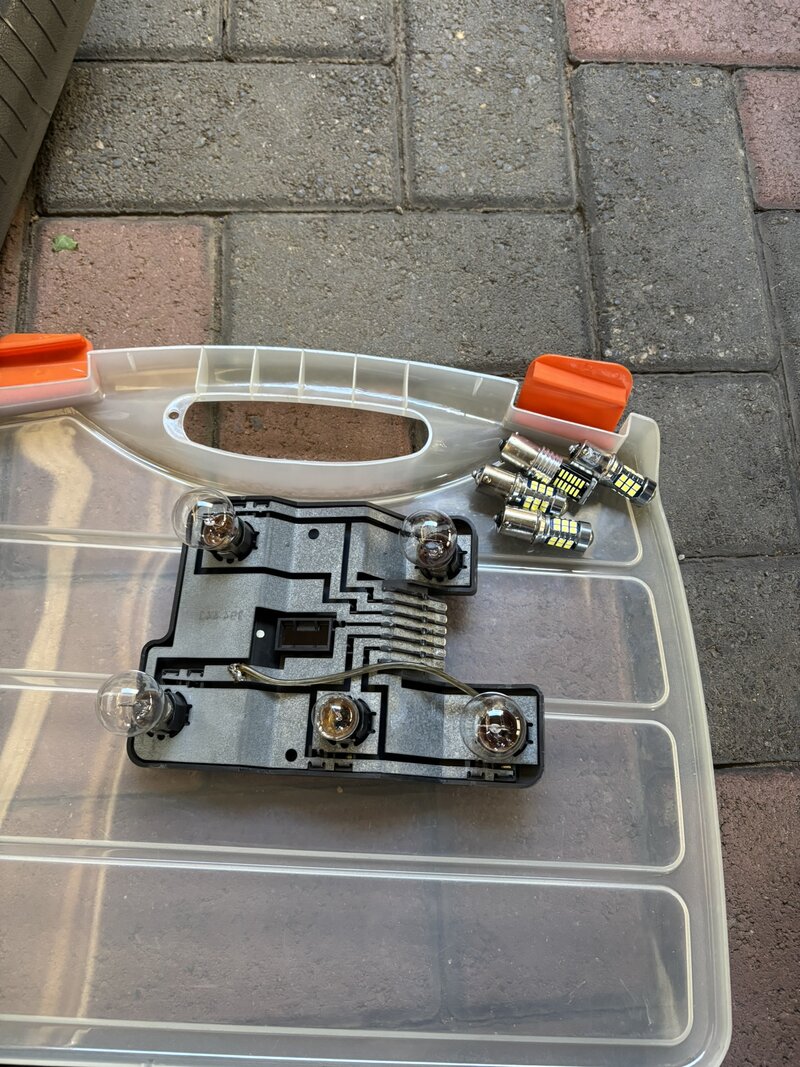
The previous owner had installed LED bulbs in the taillights, and while these did work, they were throwing warnings on the MFD in the dash. So I replaced the LED bulbs with “period correct” regular bulbs.
The next update will be wrapping up the boot and then tackling the seats and carpet...
Even though I had a game plan in mind, nothing like some good ol’ scatterbrain to upset the applecart. I had started on the interior, but at the same time, I wanted to attend to some of the bug bear items.
Headlights and indicators: A contact managed to source some brand new, aftermarket replacements. These were ordered and paid for at the end of April. More about this later on.
Badges: The front bumper had a “GSI 16vT” badge, obviously not to my taste, so this was carefully removed a few days after getting the car. You will notice it’s omission in subsequent pics. While on the topic of badges, the rear emblems had been repainted in a previous life, with the “tS” part being in bright red. Again, not to my liking, so I had good intentions to remove this badge and respray it. After carefully removing it, I proceeded to apply some paint stripper to the badge, to remove the paint thoroughly in preparation for fresh silver. 30mins later, when I checked on progress, there was considerable progress for sure! The paint stripper had eaten through the paint, but had also started to attack the plastic and dissolve the badge. %#$#&! I’m too annoyed and embarrassed to share pics of this abomination.
It was so frail, the badge actually broke in half. Even after cleaning all the paint stripper off, I gave it a coat of paint, but it just looked terrible. Now where on earth would a person find new badges? Maybe in the same isle as hen’s teeth at the local GTFO retail store.
Thankfully, the ex-owner has a contact who has taken moulds of many of the older Opel badges, and can reproduce them on a 3D printer. Winner! So new badges were ordered, to come at a later stage.
So, with these 2 bug bear jobs (lights and badges) awaiting replacement parts, I decided to move onto the next bugbear, that being the...
Yellow tappet cover and cambelt cover: I planned to do this over a weekend, which would give enough time to clean, prep and paint everything without leaving the motor open and exposed to the elements for too long.
Some pics beforehand:
After cleaning the cover, prior to starting with the paint stripper:
Then, using the %$#@& paint stripper, I tackled both covers. It did take some time, and multiple reapplications, together with use of some brushes, but all the old paint was removed, leaving bare surfaces for primer and paint.
Primer applied:
The cams and everything else in the valvetrain was looking pretty good too:
After painting:
Reinstalled and job done. Overall, I would rate the end result a 7/10. The finish isn't perfect, but it almost fits in perfectly with the age and patina of other parts. It doesn't look too new. I am however pleased with the outcome. Much much better for my eyes.
Time to move back to the interior. On the to-do list for the future, is to sort out the gear knob:
And the steering wheel. While it doesn't look too bad, some accumulated muck is discuising some wear on the leather. The dashtop gauges in the corner also need to be dealt with. Lastly, you can also get a glimpse of a clean door jamb:
Having finished with the roof lining and door jambs, our focus turned to the boot area. Here things were quite tatty, and in need of some thorough cleaning. All the panels and carpeting were removed, and cleaning started. Painted areas received the same treatment as the door jambs (clean, clay, polish, seal). The carpeting was cleaned (extraction vacuum as well as spot treatment where needed), and then everything was reinstalled again.
Here the wheel arch cover was cleaned, but the seatbacks had not been cleaned yet. Noticeable difference:
A cleaned and sorted spare wheel well:
The LHS wheel arch liner cleaned, seatback behind amps not yet cleaned:
RHS seatback cleaned, LHS still to be cleaned:
Our trusty Karcher working hard, with the worst still to come...
The previous owner had installed LED bulbs in the taillights, and while these did work, they were throwing warnings on the MFD in the dash. So I replaced the LED bulbs with “period correct” regular bulbs.
The next update will be wrapping up the boot and then tackling the seats and carpet...
gavsadler
///Member
Im just waiting for you to say if you ever figure out how to stop those grill clips, below the headlights, from constantly popping out.
From day 1 my dad owned his, brand new, that was an issue which even the dealer could not resolve.
I am with you on this, even on my 160iS this was an issue, and IIRC, at the time, I made a plan with some zip ties. For this car though, I have tried (successfully) a bit of a macguyver solution for the time-being.
The spaghetti wiring in the boot is the least of my worries for now. At least it's fairly neatly done, and taped up with cloth tape. It also helps that the subwoofer hides it from sight.That yellow valve cover actually kept me up at night, on your behalf, looks so much better!
What are you planning on doing with the wiring spaghetti for the amps?
It's the tagliatelle under the rear seat which needs attention. Basically all the sound wiring, plus Walbro fuel pump wiring, nothing taped up or neatly installed.
gavsadler
///Member
Let's continue with the updates.
With the boot in a mostly reasonable state, it was time to move to the interior. I decided to remove all the seats, because commitment was in full supply, and it needed it.
Before cleaning:
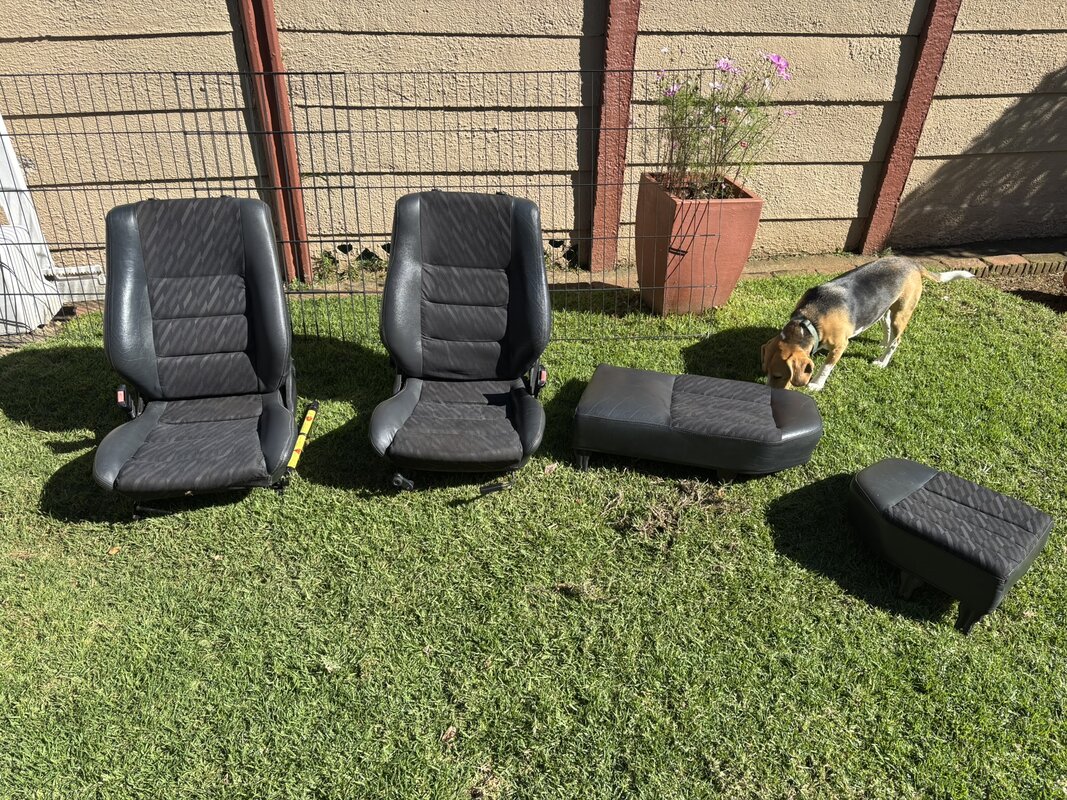
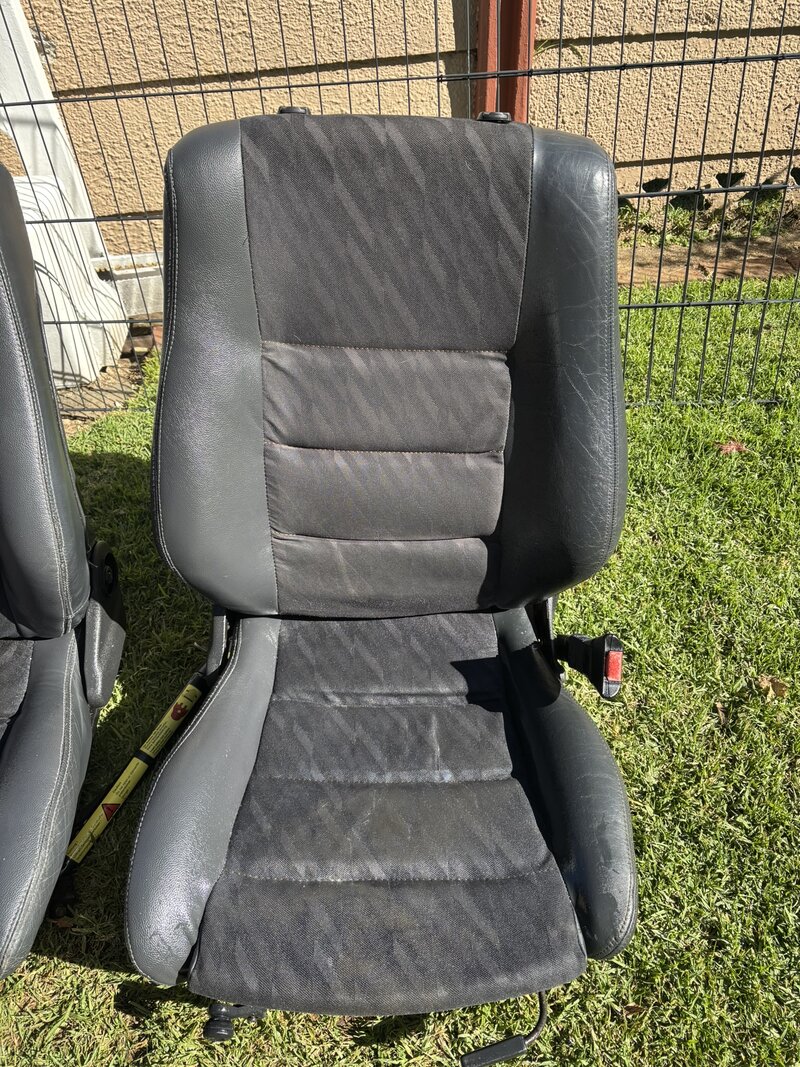
After starting with cleaning, I had done the top 2 panels of the backrest here:
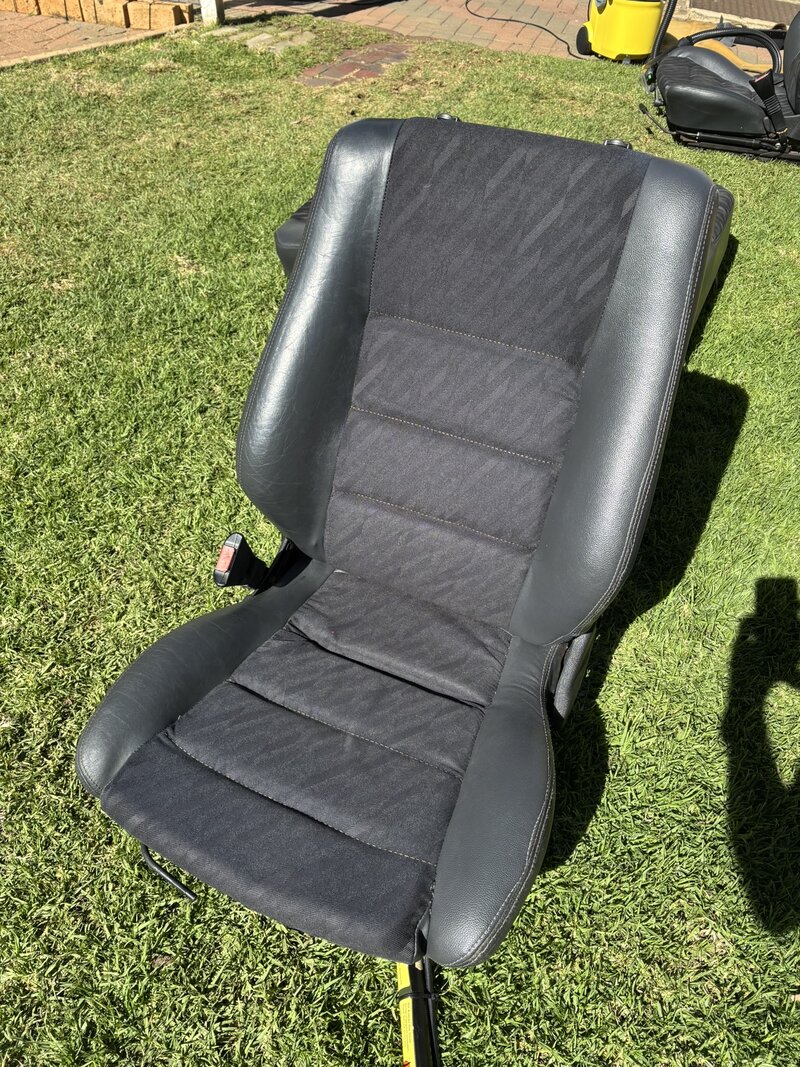
The carpet was okayish in the easy-to-reach areas for cleaning with the seats installed (i.e. under the floor mats), but everywhere else, there was years of accumulated dust and dirt. We spent a good deal of time scrubbing, extracting and repeating the process.
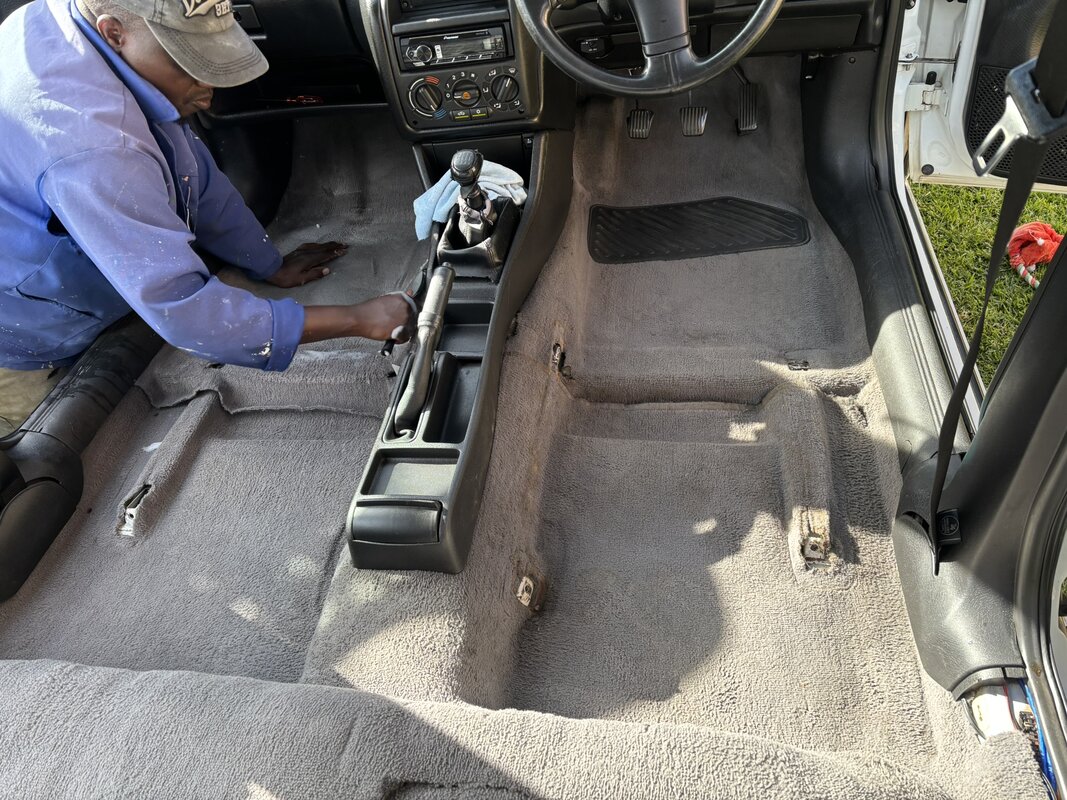
Passenger side mostly cleaned, notice how it looks grey again, compared to the beige (uncleaned) driver's side:
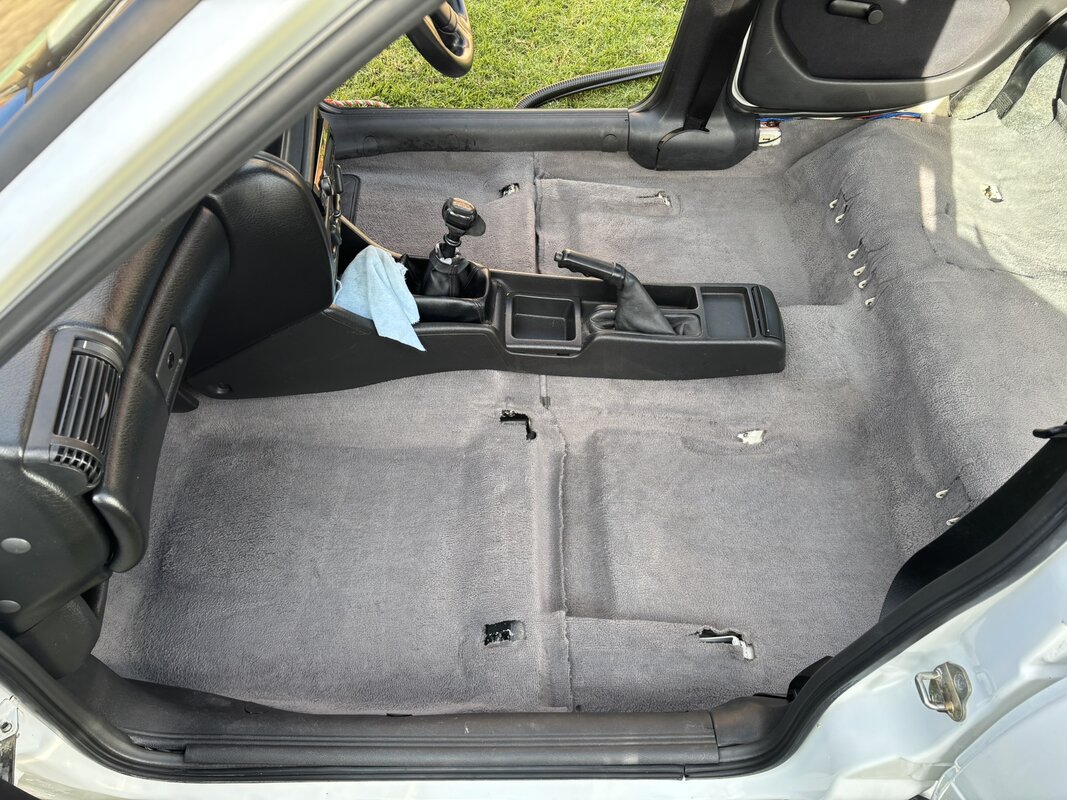
Both sides clean:
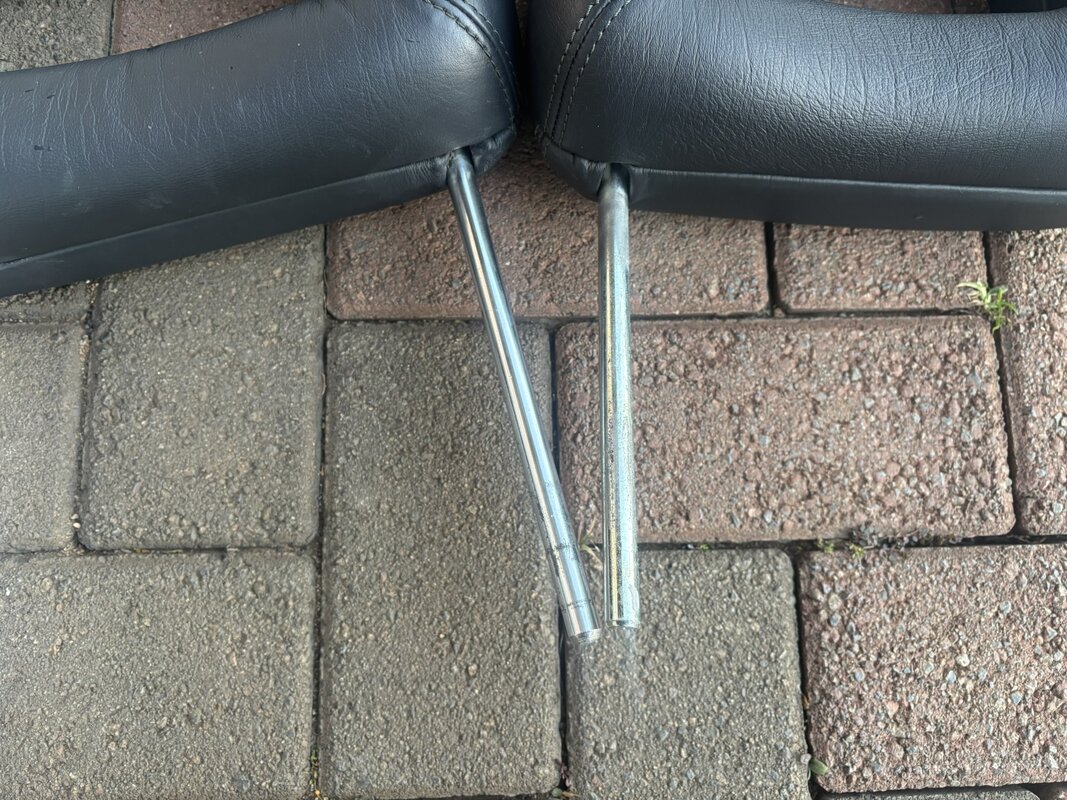
The seat frames and rails were also cleaned prior to reinstalling, and leather treated with P&S Leather Conditioner. To finish off the seats, I gave the headrests some attention which will hardly be noticed or seen: I polished the chrome, to remove years of oxidation and buildup.
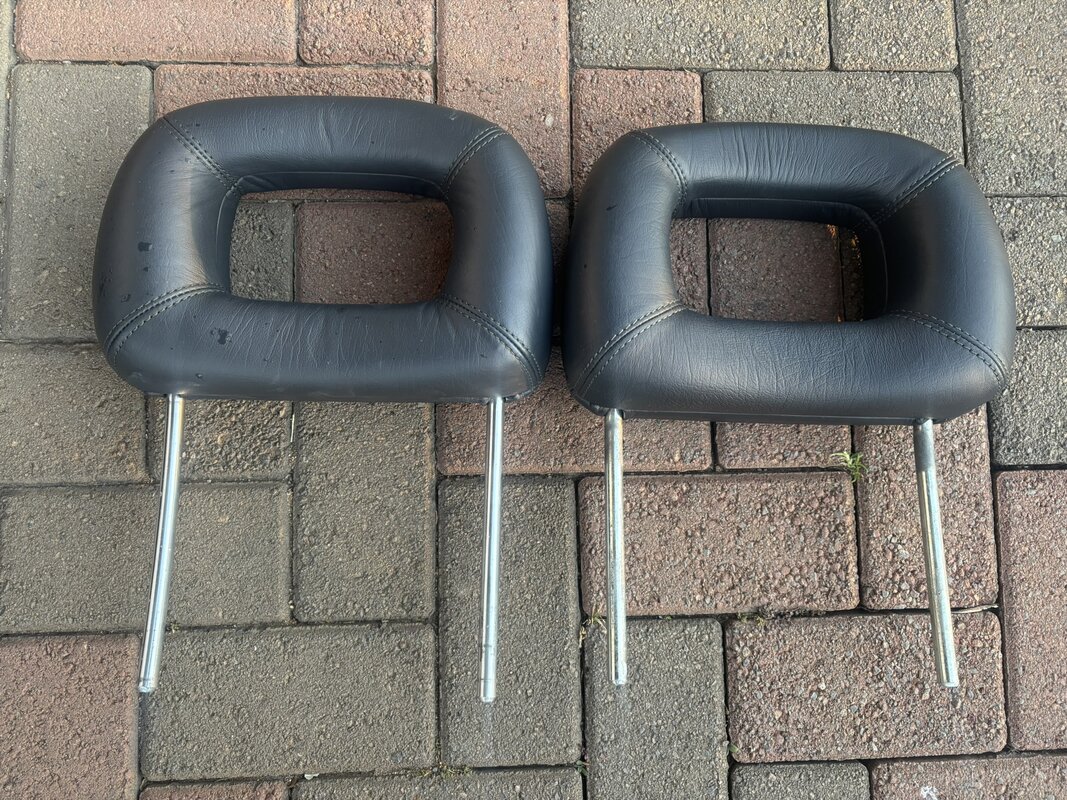
Polished on the left, RHS was before polishing:
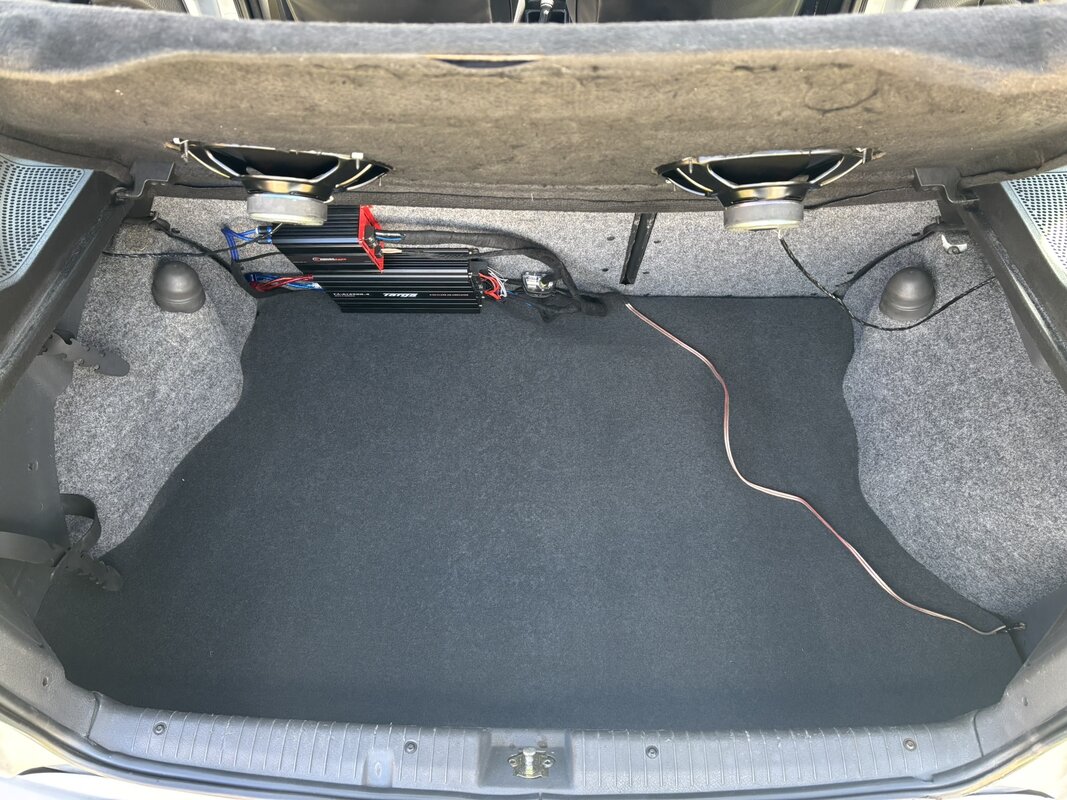
A week later, it was time to move back to the boot area and wrap things up. As mentioned previously, the OEM carpet is missing, but was replaced with 2pcs of hardboard, cut to the shape of the boot. It fits pretty well, and ensures a more flat floor, compared to standard where the 16in TS spare wheel causes a bit of a hump. I had also purchased a piece of replacement carpet to lie over the board, just to make it look a bit neater. Unfortunately I couldn't get the exact colour (yet), but I am working on that.
New replacement carpet:
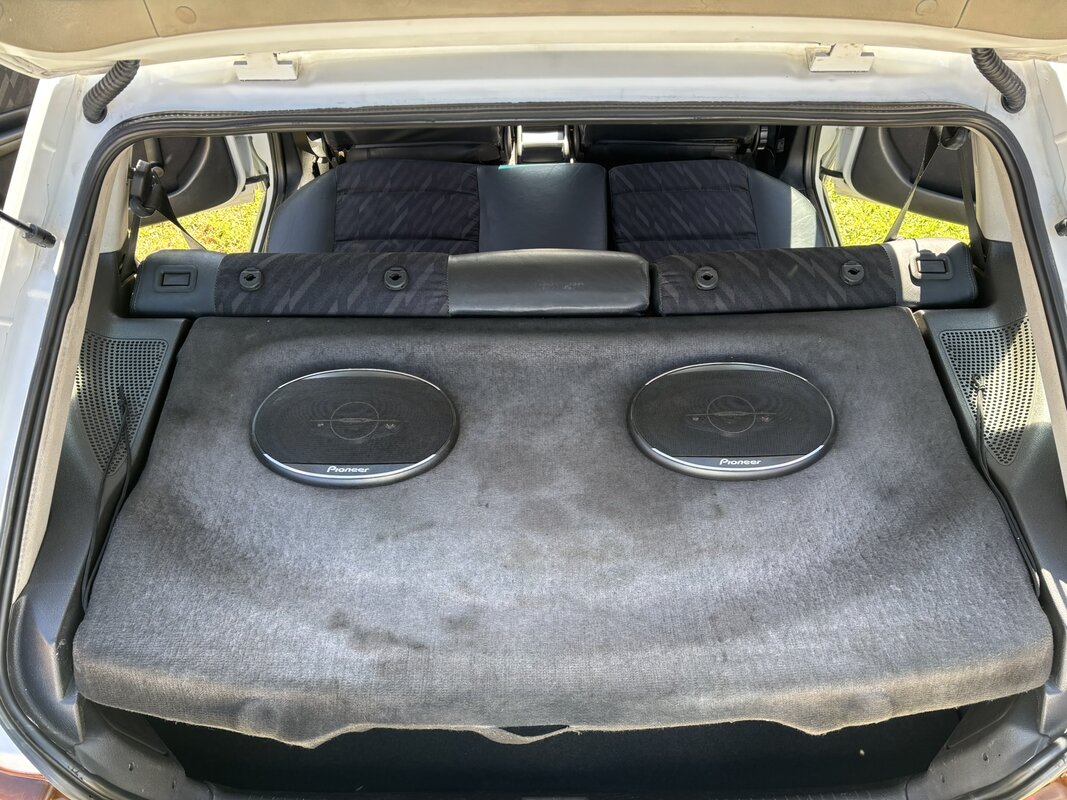
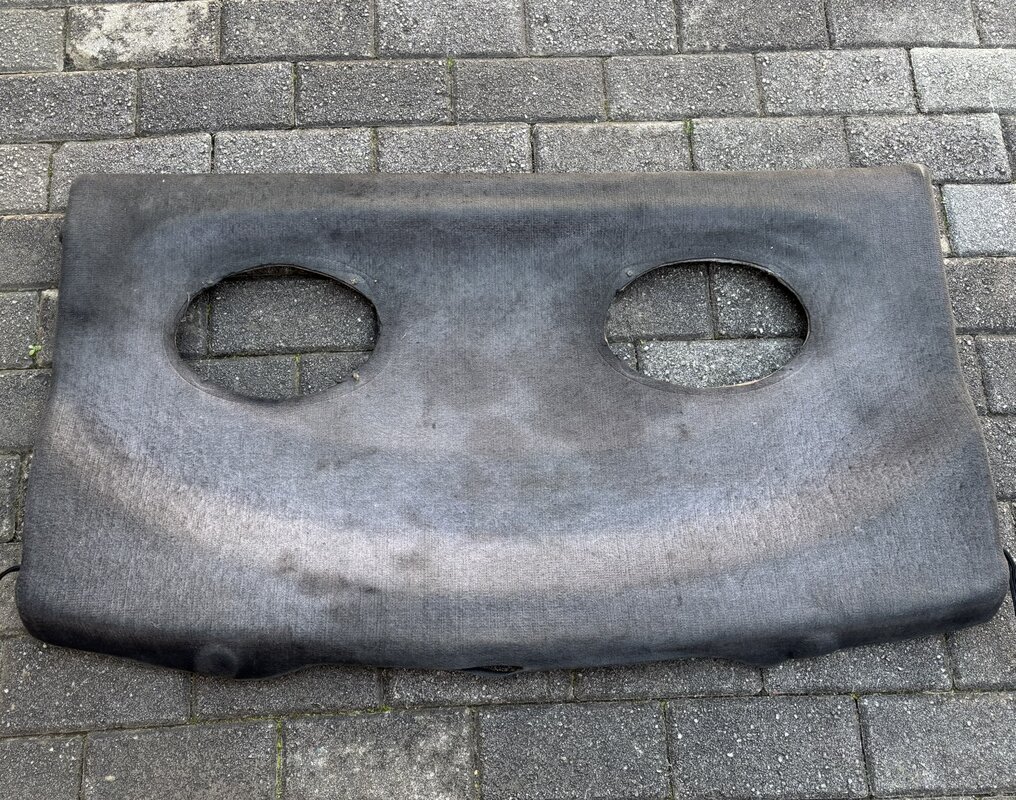
Then, moving on to a rather significant update, refurbishing the backboard. It was looking in an extremely sorry state, it was broken in 3 places, and the covering represented more of a workshop workbench than something that belongs in a car. It was a real let down for the interior, but I am a man with a plan.
Before the refurbishment:
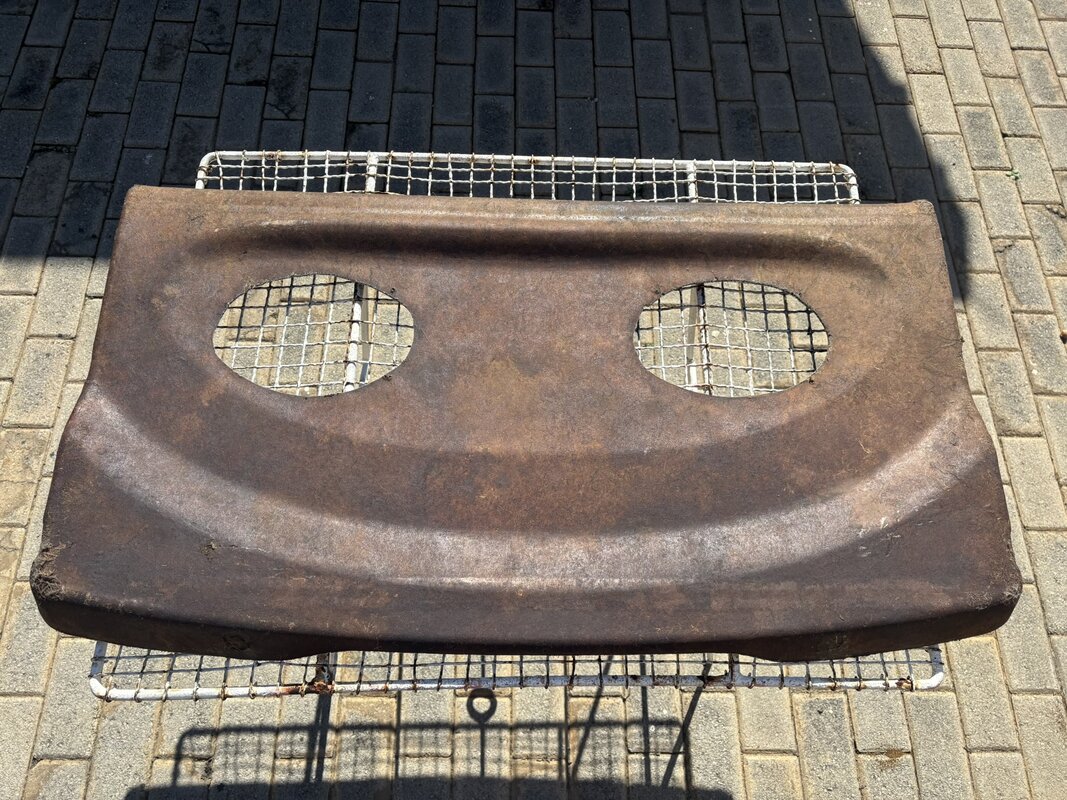
And the process started with removal of the old covering, leaving the raw pressed board:
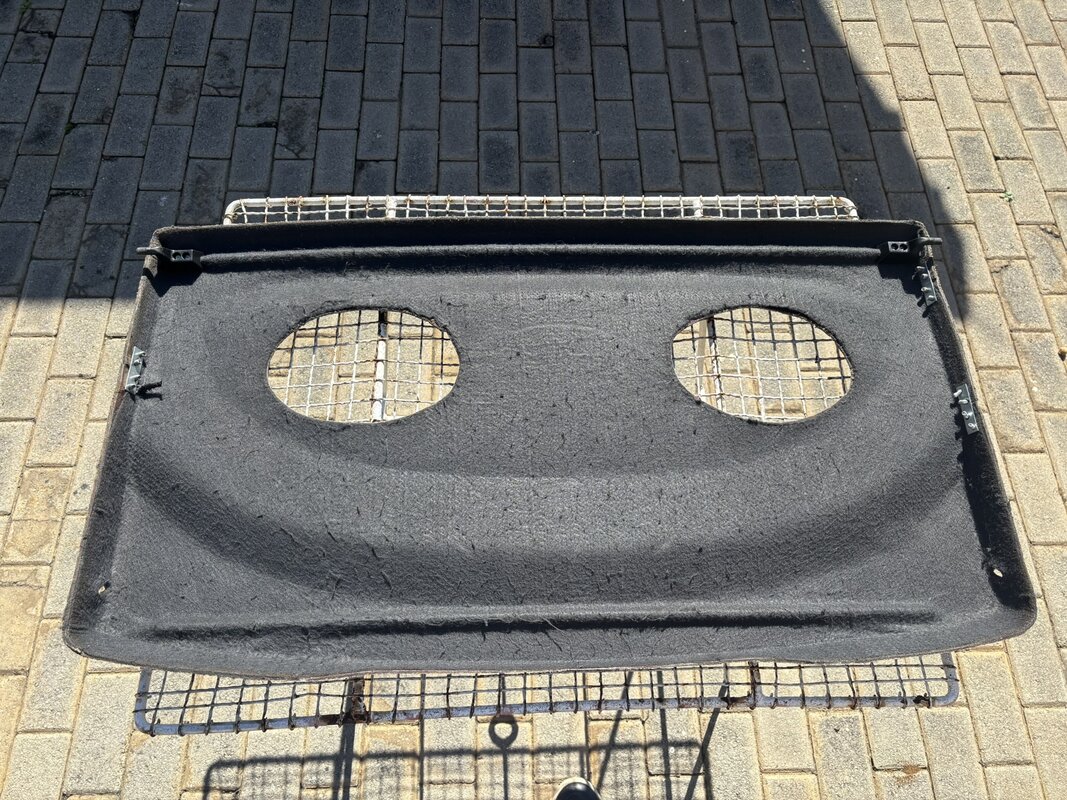
If you look closely, you will notice my repairs to the frame. I used some small steel brackets, and pop rivets, to reinforce where it was broken and very weak from years of neglect. After this, I painted the brackets black to blend in a little better. It's not the most glamorous repair, but it is mighty effective in bringing back rigidity to the board:
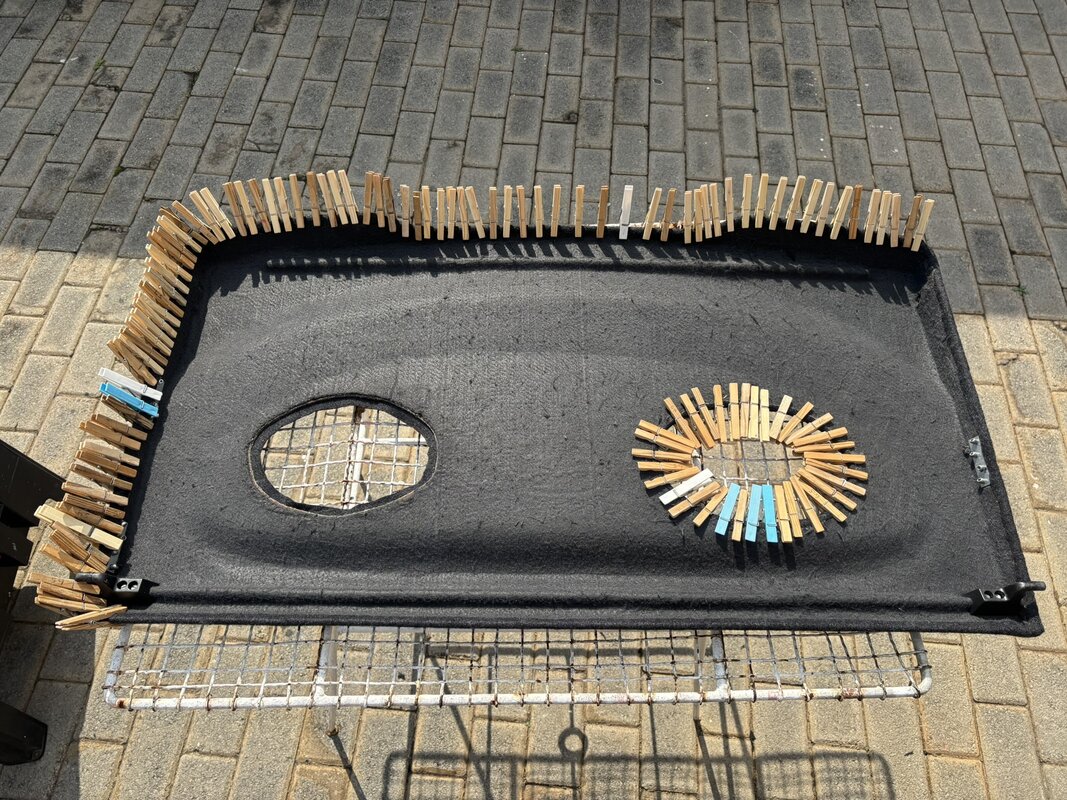
I had some good quality speaker cloth left over from a previous project a few years ago, so this came in handy for this repair. I used some contact adhesive spray (sparingly) and carefully commenced with recovering efforts. I stocked up on pegs too to ensure that things stayed put.
All done, underside view, I reckon it looks pretty good (the underside I cleaned with P&S Xpress Interior Cleaner and a microfiber towel:
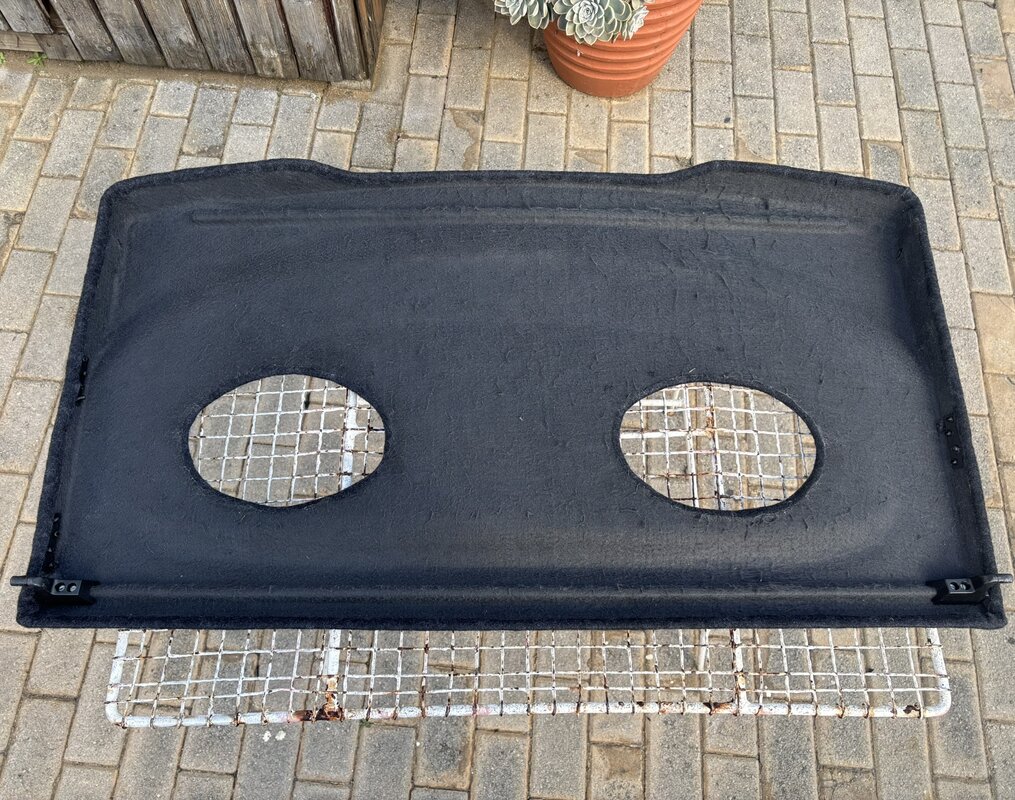
Top view:
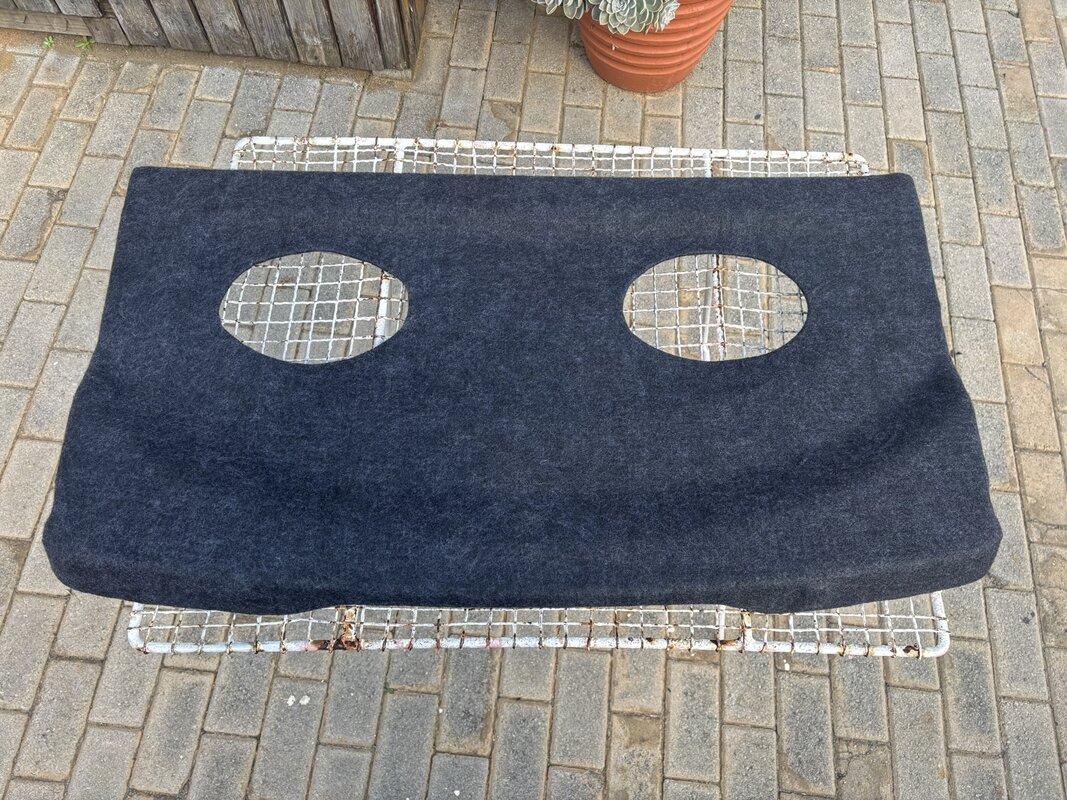
And reinstalled, much better:
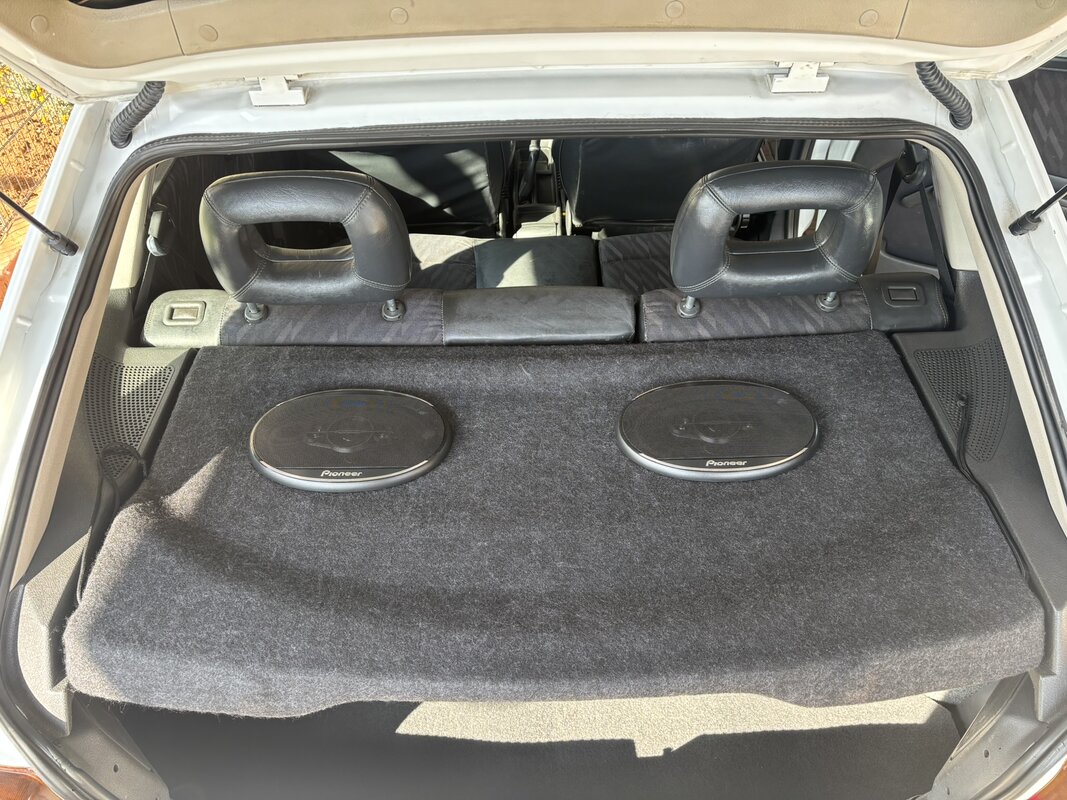
With the boot in a mostly reasonable state, it was time to move to the interior. I decided to remove all the seats, because commitment was in full supply, and it needed it.
Before cleaning:
After starting with cleaning, I had done the top 2 panels of the backrest here:
The carpet was okayish in the easy-to-reach areas for cleaning with the seats installed (i.e. under the floor mats), but everywhere else, there was years of accumulated dust and dirt. We spent a good deal of time scrubbing, extracting and repeating the process.
Passenger side mostly cleaned, notice how it looks grey again, compared to the beige (uncleaned) driver's side:
Both sides clean:
The seat frames and rails were also cleaned prior to reinstalling, and leather treated with P&S Leather Conditioner. To finish off the seats, I gave the headrests some attention which will hardly be noticed or seen: I polished the chrome, to remove years of oxidation and buildup.
Polished on the left, RHS was before polishing:
A week later, it was time to move back to the boot area and wrap things up. As mentioned previously, the OEM carpet is missing, but was replaced with 2pcs of hardboard, cut to the shape of the boot. It fits pretty well, and ensures a more flat floor, compared to standard where the 16in TS spare wheel causes a bit of a hump. I had also purchased a piece of replacement carpet to lie over the board, just to make it look a bit neater. Unfortunately I couldn't get the exact colour (yet), but I am working on that.
New replacement carpet:
Then, moving on to a rather significant update, refurbishing the backboard. It was looking in an extremely sorry state, it was broken in 3 places, and the covering represented more of a workshop workbench than something that belongs in a car. It was a real let down for the interior, but I am a man with a plan.
Before the refurbishment:
And the process started with removal of the old covering, leaving the raw pressed board:
If you look closely, you will notice my repairs to the frame. I used some small steel brackets, and pop rivets, to reinforce where it was broken and very weak from years of neglect. After this, I painted the brackets black to blend in a little better. It's not the most glamorous repair, but it is mighty effective in bringing back rigidity to the board:
I had some good quality speaker cloth left over from a previous project a few years ago, so this came in handy for this repair. I used some contact adhesive spray (sparingly) and carefully commenced with recovering efforts. I stocked up on pegs too to ensure that things stayed put.
All done, underside view, I reckon it looks pretty good (the underside I cleaned with P&S Xpress Interior Cleaner and a microfiber towel:
Top view:
And reinstalled, much better:

///M Individual
Well-known member
Amazing work thus far bud! Well done on saving this icon.


